How to change instrument lighting on a Priora
Replacing the instrument panel backlight of a Lada Priora
Task: replace the instrument panel backlight in a Lada Priora
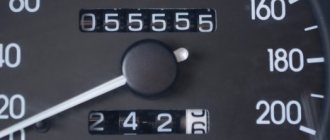
We remove the dashboard of the Lada Priora. Let's disassemble it, everything is simple (4 screws and everything else is secured with latches). Another important thing is to carefully remove the hands and not damage them. Peel off the lining (overlay with numbers) and on the back side of this lining we begin to erase the green coating. I washed with ear sticks and rubbing alcohol (solvent is not recommended).
Next, carefully remove the LCD screen. We take out the green filter, erase the green coating of the filter and put everything back
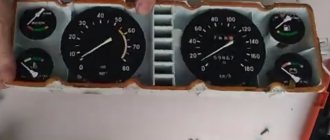
Next, we change 5 light bulbs to white LEDs (you can also install red or blue LEDs, whichever backlight you prefer). I bought white LEDs together with a base at a radio store.
Let's put everything back together in reverse order.
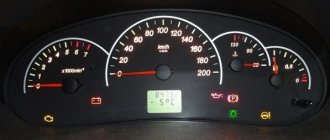
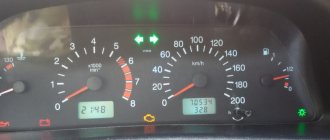
The photo shows that it shines brightly, but in real life it is much worse. After driving around, some diodes began to blink, apparently there was a bad contact, and I decided to change the backlight a little.
I bought 1 meter of LED strip and a soldering iron with a thin tip.
hide
1 Replacing Priora lamps in 5 minutes
2 Illumination of the instrument cluster Lada Priora 2.1 Soundproofing Priora
Replacing backlight
dashboard _
Lada
Priora
VAZ 2170.
Illumination of the instrument cluster Lada Priora
Backlight tuning
instrument clusters
Priora
frets from Pavel Medved.
Let's begin. We take the tape and cut strips, 3 diodes in each, and solder the wiring to them. I took solid copper wire.
Next, glue these strips in the same way as shown in the photo. In some places it is necessary to drill holes for the wires.
Let's check this whole thing. To test the LEDs, I bought a 9 volt Krona battery. All diodes light up
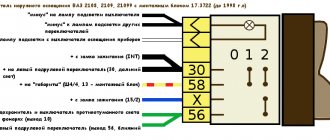
We take the board and connect it to the car, turn on the dimensions and use the control light to find the plus and minus of the backlight. And solder the wiring to them.
Then we assemble everything and twist and insulate all the wires.
I wanted blue arrows. I bought blue fluorescent paint at an art salon. I wiped off the red coating on the hands and painted it.
It shines very brightly. You set the backlight control to minimum and everything is fine, it doesn’t dazzle. But still I decided to tint it with 20Koy.
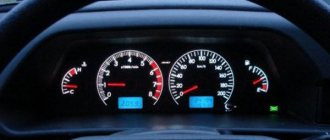
Here is the final version of the work done. I spent 2 evenings on this matter and was pleased with the result. Now it shines evenly and brightly.
Result: work on replacing the dashboard backlight of the Lada Priora has been completed
Noise insulation priors
To soundproof the Lada Priora with your own hands - for starters, I bought five or two rolls of Splen, STP sheets, corrugations for
Post Views: 102
Why does the instrument lighting not work on the Priora?
On a VAZ 2170 Priora car, lamps without base lamps . Each lamp is installed in a special socket, with which they can be removed from the socket and installed back in place. To prevent the lamp socket from jumping out of the socket while the car is moving, when installing it in the socket, it is fixed by turning it clockwise.
If only part of the instrument panel is not illuminated , then one of the backlight lamps has either burned out or lost contact with the path along which electric current is supplied to it. To eliminate this malfunction, the instrument panel will have to be removed.
In case of loss of lighting of the entire panel and simultaneous failure of the devices located on it, it is necessary to check the F10 (7.5A) fuse and the fastening of the ground wire.
If only the dashboard lighting on the Lada Priora does not light up completely, and the rest of the instruments and warning lamps are working, then you need to get to the plug connector and check whether contact No. 18, through which power is supplied to the lighting lamps, has oxidized. If everything is normal with the contact, it means that the track on the plateau from which the lamps are powered has burned out.
The driver who can disassemble the instrument panel can fix this malfunction himself by gluing a piece of foil to the burnt area with tape, having previously cleaned the ends of the track to ensure contact.
Lada Priora Hatchback Turbo › Logbook › Installing a daytime running lamp controller
Priora instrument panel: detailed description and disassembly technique
Dashboard pinout Connecting VDO on a Priora car
1 Pink-white To electric power steering 2 Blue-white To hazard warning light 3 Blue-gray To emergency oil pressure sensor 4 Brown-blue To parking brake switch 5 Yellow-blue To immobilizer control unit 6 Black To airbag control unit 7 Yellow To the exterior lighting switch 8 Blue To the right turn signal switch 9 Blue with black To the left turn signal switch 10 White and blue To the computer 11. To the brake pad wear sensor 12. To the seat belt sensor 13 Black To the traction control control unit 14 Red and blue “RESET” key on the steering column switch 15 Pink-blue To the brake fluid level sensor 16 Black To ABS 17 Green To the high beam switch 18 White To the instrument cluster light control 19 Brown Panel ground 20 White-red Terminal “30” 21 Orange Terminal “ 15" 22 Yellow-red To fuel consumption sensor 23 Orange-white MK “forward” key 24 White-black MK “back” key 25 Black-white Outside temperature sensor (-) 26 Yellow-green Outside temperature sensor (+) 27 Pink Fuel level sensor 28 Gray Speed sensor 29 Green-white Coolant temperature sensor 30 Brown-red Tachometer (low voltage) 31. Service. Panel diagnostics. 32 Brown-white Terminal “L” of the generator relay regulator
Here we connect: 1) Speed control, connect the white wire to the gray wire (pin 28 of the dashboard connector) 2) Ignition, connect the yellow wire to the orange (21 pin of the dashboard connector) 3) Dimensions connect the blue wire to the yellow (pin 7 of the dashboard connector)
Next we are interested in the mounting block, on the left under the panel, namely K7 - the relay for the high-beam headlights.
A mass is attached above the mounting block with a bolt.
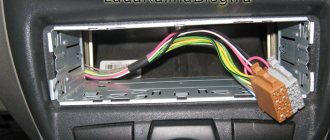
We unscrew the screw from the bottom and take out the mounting block from the panel; we need the relay on the bottom left.
1) Connect the red constant plus wire to the pink wire going to the high beam relay. 2) The green wire in our case to the white-green wire going directly through the fuses to the lamps
What we end up with: 1) When autostarting, the lamps do not light up. 2) The lamps light up smoothly when you start moving. 3) When parked for a long time, the headlights first dim by 50%, then turn off. 4) When the headlights are turned on, the lighting goes into normal mode and the DRL turns off.
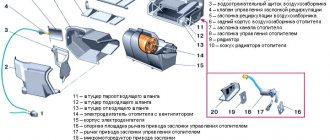
The dashboard contains the following parts, without which the car would not function:
- external lighting controller;
- switch for turning and lighting headlights;
- signal regulator;
- instrument cluster;
- wiper regulator.
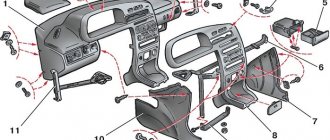
Removing and installing the dashboard of a Lada Priora car
Instrument panel Lada Priora: general information on symbols
You will need: 8" and 10" socket wrenches, flat and Phillips blade screwdrivers.
1. Disconnect the wire from the negative terminal of the battery.
2. Remove the steering wheel.
3. Remove the steering column trim.
4. Remove the steering column switches.
5. Remove the floor tunnel linings.
6. Remove the instrument cluster.
Remove the right and left screws securing the center console of the instrument panel.
Use a screwdriver to pry off the heated side window nozzles on the right and left.
Using a 10mm socket wrench, unscrew the two nuts on the upper fastening of the instrument panel on the left and right
Turn the three latches and remove the fuse and relay box cover
Remove the four screws securing the instrument panel amplifier
Turn bottom left...
...and on the bottom right there are two screws securing the instrument panel.
Remove the screw securing the instrument panel to the left of the steering column
Remove the fastening screw located on the right under the instrument panel
Using a size 8 wrench, unscrew the bolt securing the ground wires of the instrument panel to the body bracket
Slide the instrument panel wiring harness clamps to the right
Disconnect the three harness pads from the pads mounted on the bracket
Disconnect the ignition switch (lock) wiring harness connector.
Disconnect the wiring harness connectors from the electric power steering
Using a 10mm wrench, unscrew the nut securing the ground wire of the instrument panel harness from the bracket for the electronic units
Slide the pad lock
Disconnect the instrument panel harness from the ignition system harness.
Disconnect the instrument panel harness connector from the power accessories control unit.
Disconnect the instrument panel harness connector from the airbag control unit
Remove the instrument panel and remove it from the passenger compartment
Install the instrument panel in the reverse order of removal.
Possible reasons
Removing the instrument panel ford focus 2. instructions on how to remove the instrument panel ford focus 2
What to do in a situation where the instrument panel backlight on a VAZ-2110 car has disappeared? First of all, you should look for the reason why this malfunction occurred. Sometimes it can be identified immediately, but in some cases this process takes some time. In fact, there may be several reasons, so you will need to check everything methodically.
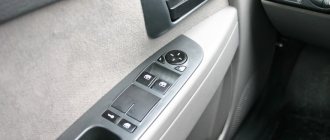
The most banal and simplest option is that someone turned the rheostat knob, which is responsible for the amount of light flux, all the way to the left.
This, by the way, is often the sin of children who are placed in the front seat. “Young drivers” love to turn all sorts of knobs, press buttons and switch levers. Perhaps the adults overlooked it, and the child “corrected” the dashboard lighting. The problem, as you understand, is solved by simply returning the rheostat knob to its previous position. Therefore, before you start looking for possible reasons for the sudden disappearance of the backlight, check this particular point.
I would like to remind you of one simple rule. In a situation where there may be several possible causes of failure, when searching you need to follow the path of least resistance. In other words, test the simplest assumptions first. You may be lucky and find the problem with minimal time and effort.
If the reason is not in the position of the rheostat handle, you need to proceed to further search for the causes of the breakdown. Possible sources of problems here could be:
- fuse;
- instrument panel circuit board;
- contacts;
- wiring;
- failure of light bulbs due to short circuit.
So, let's look at some of the above reasons in more detail. After the rheostat handle, you should check the integrity of the 5-amp fuse F1. You can also usually turn on the side lights and see if they work on the left side. Everything is explained here simply. The lamps that illuminate the instrument panel, the left side lights, as well as the trunk lighting operate through this fuse. The dimensions located on the right side of the car receive power through F11, that is, they are not of interest to us in this particular case.
You may see the following situation. The left side parking lights, or trunk light, work, but the instrument panel light does not. This means that the problem is not in fuse F1. Therefore, you need to continue searching for the possible cause of the malfunction. In particular, it is necessary to check the contacts of the rheostat that illuminates the dashboard lighting. It is not uncommon for plugs to fall off. Accordingly, the lighting of the shield disappears due to lack of contact.
However, the rheostat itself can also fail. It is quite easy to check this assumption. To do this, you must first remove the rheostat, and then directly connect its contacts. If after this manipulation the instrument panel lights come to life, it means that the problem has been found, and you just need to replace the failed part. If not, then you need to continue searching further.
The most serious problem due to which the instrument panel lighting disappears is damage to the printed circuit board of the dashboard itself. In particular, there are often situations when the track on it that supplies power to the lamps burns out. One point worth noting here. The instrument panel in such a situation cannot be repaired, which means there is only one way out - replacement with a new one.
There are cases when, due to a short circuit, all the lamps illuminating the instrument panel burn out. However, this happens quite rarely. Much more often, one lamp may fail. As you can see, there are several reasons why the instrument panel lighting may disappear. Accordingly, the search will take some time. However, in the vast majority of cases, eliminating the malfunction that has arisen will not be so difficult, and many people can easily do this with their own hands.
Relay in the interior mounting block
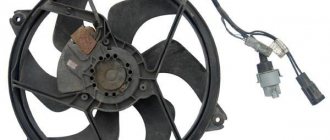
K1 – radiator cooling fan relay. See information about F1.
K2 – relay for turning on the heated rear window. See. information about F2.
K3 – starter activation relay. If the starter does not turn when you turn the key, first check the battery voltage and the contacts of its terminals, if necessary, clean them from oxidation and tighten them firmly. Charge the dead battery or replace it with a new one. The common ground contact in the engine compartment or the contact on the solenoid relay may also disappear; check whether the nuts are securely fastened and whether they hold the wire terminals well. You can check the starter by closing its contacts directly with a screwdriver when the gearbox is in neutral gear or by applying a plus from the battery to one of the retractor contacts. If it turns, it means the problem is in the wiring or the ignition switch. If not, most likely the starter itself or the retractor is faulty. Another reason may be the lack of contacts in the ignition switch. Also check the contact group, wires and connectors.
K4 – additional relay (ignition relay).
K7 – headlight high beam relay.See. information about F3, F4.
K8 – horn relay. See information about F5.
K9 – alarm relay. Check together with fuse F8.
K10, K11, K12 – backup relays.
Additional relays are mounted on a bar and located under the dashboard, near the front passenger's feet. To get to them, you need to remove the right tunnel lining. Next to the additional relays is the electronic engine control unit (ECU). If its connector interferes with access to the relay, disconnect it by first removing the negative terminal from the battery.
F1 (15 A) – main relay circuit, starter interlock.
F2 (7.5 A) – power circuit of the electronic control unit (ECU).
F3 (15 A) – electric fuel pump. If the fuel pump has stopped pumping (this can be determined by the absence of the sound of its operation when the ignition is turned on), check together with relay K2. There may also be problems with the immobilizer, it blocks the pump, see information about F20. If the wiring, this fuse and the relay are good, most likely the fuel pump itself has failed. To remove it, you need to disconnect the battery, remove the rear seat cushion, unscrew the cover, ring and fuel hoses, then carefully remove the entire fuel pump.
K2 – electric fuel pump relay. See. above about F3.
The power fuse box is located in the engine compartment under the hood, near the left strut support. To get to it, you need to open the lid by prying the latch.
1 (30 A) - engine control system circuit. If there are problems with the electronic control unit, short circuits or other malfunctions, this fuse may blow.
2 (30 A) - vehicle on-board circuit. 3 (40 A) - vehicle on-board circuit.
4 (60 A) - generator circuit.
5 (50 A) - electric power steering circuit.
6 (60 A) - generator circuit.
In case of any problems, it is important not to panic, to think soberly and logically. The most important thing is to diagnose and establish the cause of the breakdown.
If you don’t have enough experience or nerves, it’s easier to sign up at the nearest car service center. if it has a competent electrician.
I hope this article will help you deal with electrical problems and quickly fix any Priora malfunctions. If you have any experience or information, please leave a comment below, useful information will be added to the article.
Lada Priora Universal Ladushka › Logbook › Overexposure of the instrument panel with smooth ignition…
Finally, I had a couple of days of free time and I decided to spend it usefully by re-lighting the instrument panel. Boards with white (scale) and red (arrow) LEDs were purchased half a year ago (from our colleague on the site) Knife5341, who made them with his own hands and sent along with them detailed installation instructions, for which many thanks to him! To remove the instrument panel, you need to unscrew 4 screws:
Then we disconnect the “contact group” of wires from the instrument panel:
Next, you will need a screwdriver (star) to unscrew 4 screws to separate the back cover from the instrument panel:
After this, by snapping the clamps, the front part of the shield is separated from the block with the main board:
In order to get to the board itself, you need to carefully remove the arrows (preferably by scrolling them counterclockwise) and peel off the standard diffuser:
Now comes (as it turned out) the most “tedious” task - erasing the green filter from the diffuser. To speed up the process, all those places that I needed to erase, I first lightly scratched with a screwdriver, after which I used (borrowed from my wife