What is needed to bleed the clutch of a VAZ 2107-2101
The procedure for bleeding the clutch on a VAZ 2101 in accordance with manuals for car repair and maintenance requires the presence of an assistant who will be directly in the car during repair work. However, this work can be done alone, although it will take more time. Also, in addition to having certain repair skills, the owner will need a certain set of tools:
- A simple rubber tube for bleeding air and waste fluid.
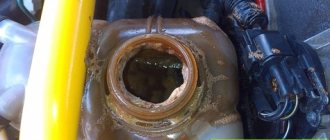
- New fluid to fill the clutch tank. As usual, ordinary brake fluid of the DOT-3 or DOT-4 standard is most often used as such a substance.
A set of keys for dismantling the master cylinder tank and other clutch parts in case of malfunctions.
In the case of self-repair and bleeding of the VAZ 2105 clutch, the owner will have to alternately carry out work both in the engine compartment and inside the car.
Removing and installing the clutch mechanism of a Lada Vesta car
Place the car on a lift and disconnect the negative terminal of the battery.
We remove the gearbox.
Depending on the modification, the engine and gearbox types may be installed on the vehicle. Removal and installation of gearboxes are discussed in the articles:
— removal and installation of gearbox 21807 with engine 21129;
— removal and installation of gearbox 21827 with engine 21129;
— removal and installation of the JH3 gearbox with engine 21129;
— removal and installation of the JH3 gearbox with the H4M engine.
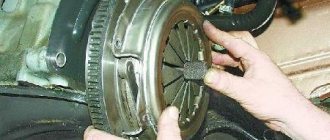
We install the flywheel retainer on the engine cylinder block, unscrew the six bolts 2, Figure 1, securing the clutch pressure plate to the flywheel 1 and remove the clutch assembly 3 (for engines 21129 and 11189 - replaceable head 8, knob, flywheel retainer 67.7820-9526; for engine H4M - replaceable head 12, knob, flywheel retainer 67.7820-9708).
Defective clutch discs
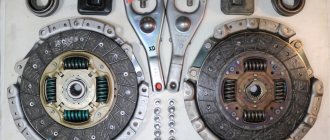
Inspect the clutch driven disc. If there are cracks, dents, broken damper springs and cracks or delamination of the friction linings, the disc must be replaced.
Using a caliper, measure the distance “A”, Figure 2, between the end of the rivet 1 and the working surface of the lining 2. If the value A = 0.2 mm or less, the driven disk must be replaced.
Inspect the clutch pressure plate (basket). There should be no scratches or signs of tarnish on the surface of the disc in contact with the clutch driven disc. If there are cracks or breaks in the pressure spring blades, the disk must be replaced.
Installing clutch discs
Check that the clutch being installed matches the vehicle's equipment.
Clean and wash the splines in the clutch driven disc hub and on the transmission input shaft.
Install clutch 3, Figure 1, assembled onto flywheel pins 1 and tighten fastening bolts 2 without tightening.
Install mandrel 1 into the hub of the driven disc, Figure 3, and center the driven clutch disc relative to the engine flywheel (for engines 21129 and 11189 - mandrel A.70081; for engine H4M - the mandrel is supplied in the spare parts kit with the clutch disc).
Install the flywheel clamp on the engine cylinder block and tighten the six bolts 2, Figure 1, alternately, crosswise, securing the clutch pressure plate. Bolt tightening torque 20 - 31 Nm (2.0 - 3.1 kgf.m) (for engines 21129 and 11189 - replaceable head 8, knob, torque wrench, flywheel lock 67.7820-9526; for engine H4M - replaceable head 12, knob , torque wrench, flywheel lock 67.7820-9708).
Install the gearbox as indicated in the above articles.
Connect and tighten the negative battery terminal.
I have already written about the nature of the clutch’s operation, which manifested itself with the arrival of heat in Moscow. It all started at about 14 thousand kilometers, by 17 thousand it became a reason for reflection, and by 20 thousand it forced me to contact the service center. It has become absolutely impossible to push your car in traffic jams and move away smoothly!
In our case, the procedure did not help: jerks and impacts persisted even when the box cooled down. The next step was also the same at all dealerships: the clutch needs to be repaired. The capital’s masters, who had seen more of the West than their colleagues in the regions, suggested moving straight to the “autopsy.” More than one sedan with a similar problem has passed through their hands, and there have been cases of its manifestation even after a run of 5,000 kilometers.
The problem is not only that the malfunction is widespread. Clutch kits are in short supply. For example, in Moscow we had to wait about a week for him. It’s good if the dealer, as in our case, ordered parts without disassembling the unit. What if your Vesta is already hanging on the lift and is unable to move? In addition, the replacement parts are exactly the same. This means that we have every chance of encountering the same disaster again before the end of summer. Let's hope that the plant is looking for ways to get rid of the defect.
Sources
- https://autoruk.ru/lada-vesta/transmissiia-lada-vesta/kak-sniat-i-ustanovit-diski-stcepleniia-lada-vesta
- https://www.zr.ru/content/articles/901443-lada-vesta-iz-parka-zr-sila-s/
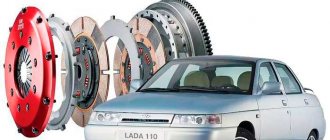
How to modify the AMT clutch with a 1.8 engine on Lada Vesta and Lada XRAY
Jerking, jerking, shaking and vibrations when starting to move and when changing gears are one of the problems faced by owners of Lada Vesta and Lada XRAY with AMT and a 1.8-liter engine. If the LADA dealership recognizes such a case as covered by warranty, then the defective Valeo clutch disc is replaced with a new one of the same company (there is no alternative). According to reviews from owners, this solution is not durable. Soon they found a better replacement - a Sachs clutch disc.
Question to AvtoVAZ
via Za Rulem magazine:
You have to modify the design yourself.
Attention! The SACHS clutch disc is designed for installation on Chevrolet Niva cars. You install it on Lada Vesta and Lada XRAY (1.8L, AMT) cars at your own peril and risk
- Driven clutch disc Sachs (article 1878 002 205)
- Washers 8x14x1.5 (6 pcs.)
The Sachs clutch disc is approximately 1.5 mm thicker than the stock Valeo:
Therefore, 6 washers should be placed under the bolts that secure the basket to the flywheel. Otherwise, there may be problems with gear engagement.
On a Lada XRAY, you can replace the clutch disc without removing the gearbox and subframe, on the left side, by moving the box to the side:
After replacing the clutch disc, we adapt the clutch (some owners did without this, and there were no problems in the operation of the AMT after installing the Sachs clutch disc).
Installation on Lada Vesta (author):
Installation on Lada Vesta (author):
Installation on Lada XRAY (author)
Feedback from social networks:
Have you encountered similar problems? How did you solve vibrations at start-up on a 1.8-liter engine with AMT?
Let us remind you that on 1.6-liter LADA engines with AMT, in such a situation, the clutch kit is replaced under warranty. It uses new friction linings of the driven disk. They make switching and starting movement smoother. The risk of jerking and vibrations is reduced (see information letter No. 5-17 dated January 23, 2017).
Hydraulic Clutch Actuator - Bleeding
If the following malfunctions occur, it is necessary to check the hydraulic clutch drive system for fluid leaks and remove air from the system:
— the appearance of free play of the clutch pedal;
— the clutch pedal is in the middle or depressed position;
- Difficulty shifting gears.
Possible consequences of contamination entering the hydraulic clutch system
The hydraulic clutch drive is very sensitive to contamination. The entry of contaminants into the system can lead to the following consequences:
— inability to change gears;
— damage or complete failure of the hydraulic clutch;
— leaks from the hydraulic clutch drive.
To remove air from the hydraulic clutch drive, use the following equipment:
— installation for removing air from the hydraulic drive system through a brake fluid reservoir type OMA 883 f. "OMA" (Italy);
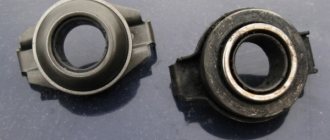
— a syringe for removing air through a fitting located on the clutch slave cylinder.
Hydraulic Clutch Bleeding Procedures
If parts of the hydraulic clutch are removed
Perform air removal operations using a device for removing air through the brake fluid reservoir or using a new syringe through the air removal fitting located on the clutch slave cylinder (brake fluid according to the current “Codifier of basic and auxiliary materials used in vehicle maintenance and repair” LADA" K 3100.25100.00018).
If the clutch hydraulic parts are not removed
Perform air bleeding operations with a syringe only by injecting brake fluid through the air bleeding fitting on the clutch slave cylinder.
Place the vehicle on a two-post lift, apply the parking brake and turn off the ignition.
Remove the engine crankcase protection (see here)
Bleeding procedure if there are no hydraulic drive parts removed
Bleeding using a hydraulic drive system bleeder
Secure the clutch pedal in the up position using a strap attached to the steering wheel to ensure hydraulic integrity during the bleeding operation.
Connect the installation for removing air from the hydraulic drive system to the brake fluid reservoir (installation for removing air from the hydraulic drive system type OMA 883 f. "OMA", Italy).
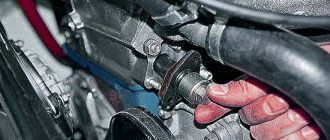
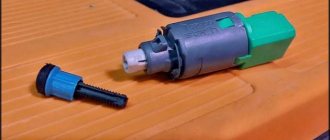
Remove plug 1, Figure 8-1, from the air bleeder fitting on clutch slave cylinder 4.
Connect the transparent tube to the air removal fitting, lowering the other end into an empty vessel located above the air removal fitting (transparent process tube, process vessel).
Press the lock 2 and pull out the pipeline 3 one click to open the air bleed hole.
1 — plug of the fitting for removing air; 2 — clamp; 3 - pipeline connecting the main and slave cylinders of the clutch drive; 4 — clutch slave cylinder; 5 - gearbox