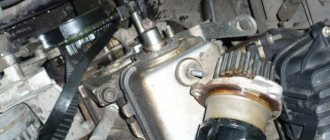
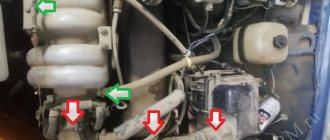
An additional pump for the stove is one of the options for solving the problem of low cooling system performance on domestic cars.
Functioning normally under average operating conditions, it malfunctions at high or low ambient temperatures. In the first case, the engine overheats, in the second, the heater works poorly and is unable to provide an acceptable air temperature in the cabin.
Diagram and design of the heating system in the VAZ-2107
The design of the heating unit on “sevens” with a carburetor engine or injector is identical:
- Blower The line is aimed at blowing the windshield.
- Airflow cover.
- Radiator unit.
- Radiator protective cover.
- Heating unit faucet pull.
- Radiator outlet line.
- Underwater pipe of the radiator assembly.
- Radiator tap. Used to drain refrigerant.
- Blower Designed for blowing air flow through the glass of the right window.
- Nozzle for supplying air flow to the side glass.
- Air duct damper intended for blowing right glass.
- Additional resistor device.
- A cover located on the air flow distribution device.
- Blower damper for heating the windshield.
- Electric fan motor for heating system.
- Impeller of the ventilation device.
- Blower in the internal ventilation system.
- Cover air flow control knob.
- External blower flap control handle to direct air flow to the windshield.
- Bracket for fixing air flow control handles.
- Lever for controlling the blower flaps of the heated glass system.
- Airflow cover control handle.
- Radiator faucet control lever.
- Air flow cover pull.
- The damper rod designed to control the heated windshield.
- Left blower for heating the side window.
- Ventilation nozzles located in the center of the console.
- Nozzle blade.
- Directly the nozzle of the heating system.
- Nozzle handle.
- Toothed pulley of the damper drive device.
- Air inlet seal located at the rear.
- Air supply pipe.
- Front sealing element of the air supply pipe.
- Air supply valve.
- The latch of this hose.
- Damper equipped with a gear sector.
Diagram of the VAZ 2107 heating unit
To control the heating system, three levers are used:
- The top one is designed to supply refrigerant to the radiator unit. This slider is connected to the faucet via a cable. It is mounted on the inlet line. In the extreme left position, the device does not work and the heating unit does not heat. If you move it to the right state, it will open and the coolant will enter the radiator device.
- In the middle position, it is possible to control the air flow flaps. If the slider moves to the left state, the air supply from the street is cut off. It will only circulate inside the car. When moving to the far right position, air flows from the street into the car.
- In the lower state, the damper is controlled, which is designed to distribute the air flow among the blowers. In the extreme left position, the flow flows to the side deflectors and to the center, and in the right position - to the windshield.
Each of the listed levers can be set to any state, this will allow for optimal functioning of the heating unit.
Disadvantages of the heater in the VAZ-2107
The need to improve or improve the operation of the heating system may arise as a result of the following shortcomings:
- Ineffective rear airflow. Due to design features, warm air is difficult to reach passengers sitting in the back. It will take time to effectively warm up the entire interior of the car.
- There is a weak air flow from the left deflector device on the “sevens”.
- The electric motor of the heating unit is too loud.
- The faucet of the radiator device is also considered a weak point. With prolonged use, it leaks, which leads to a decrease in the volume of antifreeze in the system.
Signs of a malfunctioning gasoline pump
After this, install the gasket and pump in place, attach the nuts, but do not tighten them. You need to wait until the sealant begins to harden - this will take 15-25 minutes. Only after it has hardened can you tighten all threaded connections crosswise for uniformity. The repair of the VAZ-2106 is not complete - all the pipes will need to be replaced. It is advisable to use new clamps; also replace the gasket under the tube going to the heater tap.
Interruptions in the fuel supply to the engine or engine failure to start are not always associated with malfunctions of the fuel pump itself. Of course, these signs are a clear fact that there is a failure in the fuel system, but in order to find out their cause, it is necessary to carry out diagnostics. However, according to statistics, most often problems arise precisely because of the fuel pump.
Read more: Disassembly and assembly of the cylinder head of VAZ 2110, VAZ 2111, VAZ 2112
The following signs can be identified that indicate a possible pump malfunction:
- the engine does not start or does not start the first time;
- the engine “troubles” at high speeds and runs jerkily;
- humming sound when driving;
- noticeable loss of vehicle dynamics.
How to modify and modernize the stove with your own hands?
You can improve the operation of the heating system on the “seven” in the following ways:
- redo side window ventilation;
- modernize the damper;
- modify the foot airflow system to increase its efficiency;
- improve the operation of the rear cabin heating system;
- modify the thermostat;
- improve the functioning of the steam exhaust line;
- install an additional water pump.
User Egor Panther spoke about options for upgrading the heating system in VAZ 2107 cars.
Improved side ventilation
The side ventilation system needs to be modified after purchasing an additional fan. The device is mounted in the left line, which will allow forced air flow to the deflector.
The tuning procedure looks like this:
- At the first stage, the deflector device is dismantled from the main line. To perform this task you need to use a screwdriver. The deflector in the cabin is pryed up and removed; it must be pulled forward. Similar actions are performed on the other side of the stove.
- Dismantling the device is carried out carefully so as not to leave any traces of damage on the center console.
- If the deflector is removed, it is necessary to remove the holding device from the dashboard. This element is mounted in the center console using special antennae. The essence of this modernization is that a classic computer fan is installed to force air flow into the heating system.
- To install the ventilation device, the element must first be fitted to the deflector body. After applying it to the plastic with a marker or pencil, you need to apply markings. Using a utility knife, a cut is made in the plastic on the deflector.
- If the dimensions are marked accurately, the ventilation device will be tightly installed in the housing. This is important, since such installation will prevent the part from loosening while driving.
- After completing the installation of the fan, you need to make sure that its blades rotate normally and nothing interferes with them. If problems arise, the device is adjusted. If necessary, the blades can be trimmed a little.
- To ensure efficient air flow and no backdraft, the entire structure must be sealed. Therefore, using sealant or the remains of plastic that appeared after cutting the deflector, the cracks are clogged.
- If all steps are completed, the ventilation device is installed in the main line area, and then mounted on the body of the deflector element.
- After completing all the installation steps, you need to work with the electrical component. It is recommended to connect the fan electrical circuit to the conductor where the current appears when the ignition is activated. This option is more convenient. It is possible to connect the device to the heating unit control cable.
Damper modernization
Modification of the VAZ 2107 stove, which consists of upgrading the lower damper of the system, is the easiest option to implement. If all actions are performed correctly, the device will not open or close randomly when the car drives over bumps. This will ensure efficient and equal airflow on both glasses.
Video
The Avto Fix Info channel spoke in detail about the procedure for replacing the radiator device on the stove of the domestic “Seven”.
It's winter, it's time to install a 220 volt heater on the engine. In principle, there is nothing complicated in this procedure, the only problem is the availability of a warm room for the work. In this article we will talk about how to install engine heating on a VAZ 2107.
How to choose engine heating
Of course, before installing heating, you need to buy it. We will consider two options, one with and without an electric pump. Let's look at the advantages and disadvantages of each of them.
Installation of engine heating on a VAZ 2107 with an electric pump
This preheating differs from the other type by the presence of a pump that circulates the coolant while it is warming up. Naturally, this significantly speeds up the warming up process, however, the circulation of the coolant does not allow it to warm up to the required level.
- as mentioned above, such preheating of the engine warms up the coolant much faster.
- the engine warms up most evenly, which allows you to minimize wear during the first start.
Flaws:
Perhaps the shortcomings are not as few as we would like. First of all, constant circulation of water requires high power of the heating element. If it is less than 1.5 kilowatts, this may result in the engine simply not warming up to the required temperature. It will just need to be reheated during operation.
any mechanic will tell you that the fewer parts in a unit, the more reliable it is. An electric pump is installed here, which actually adds a few extra parts. Accordingly, the reliability of such an installation decreases. In addition, installation becomes more complicated.
Installing engine heating on a VAZ 2107 without an electric pump
There is a second type, it is the most common because it is easy to install, does not require any maintenance, and is also highly reliable.
- As mentioned above, first of all it is reliability.
No need for additional power. If you only have a 220 volt outlet, then this is quite enough.
Easy to install. It is enough to install only a couple of tees and the heated housing itself.
Flaws:
- Water circulates only under pressure from the temperature difference. That is, when the water has warmed up in the heating housing, it will continue to flow through a small cooling circle.
Signs of a faulty water pump on a classic
The pump on a VAZ is a very important detail. It largely depends on it whether the car will heat up or not. Needless to say, element failure is an unpleasant thing, but it also has its advantage. Thus, a failing part always gives a sign to an experienced driver, who must be able to recognize the main signs of an impending breakdown.
First of all, let's look at the signs of deteriorating pump bearings. Albeit insignificant, but excessive play of the drive pulley is already a reason to think about it. Also, rustling, howling, roaring and other characteristic sounds of worn-out bearings should alert the driver.
Experienced motorists make an interesting comment on the sounds. The engine, they say, does not creak, but knocks or makes noise. On the contrary, everything that squeaks or creaks are characteristic signs of a generator, rollers or pump. A howl indicates that the timing belt or alternator belt is overtightened.
If you don’t pay attention to these signs, then after several tens of kilometers the car’s run, coolant may begin to leak, although this is not an axiom, because there are so many examples when there was no leakage when the pump completely collapsed. It is better to focus on noise: the grinding noise of bearings will only intensify over time, and it will be impossible not to notice it
As for leakage, it depends more on the quality of the seal. It is located in the pump and is designed to ensure tightness. Liquid can come out of the drain hole if it is provided on the pump (depending on the pump model - there are ones with or without holes). Over time, the leak will only get worse if replacement measures are not taken.
You can check the bearing visually:
- stick your hand in and grab the pump pulley;
- move it back and forth;
- if even a slight play is observed, this means that some wear of the bearings is present.
However, if there is no whistle and the play is very insignificant, then the pump will continue to run for some time. You can remove the alternator belt and check the pulley like this. This will allow you to better feel the free play.
Thus, as long as there is no specific grinding noise, and there is no critical release of antifreeze to the outside, you can drive. From the first sign of rustling or faint whistling to complete failure, it is possible to travel another 1000–6000 kilometers. Here, depending on your luck, there are no magic tips.
On the other hand, and this must be taken into account, the pump can fail much earlier, before reaching the grinding stage. Everything can happen quickly and unnoticed by the car owner, and you should not wait until the noise level increases to replace the pump.
It is important to understand that there is such a breakdown of the water pump that there will be no loss of antifreeze or noise at all. And the engine will boil
For example, this happens when a plastic impeller moves away from the shaft. In fact, the shaft is spinning as before, but the impeller is inactive and just dangles. At the same time, the stove will stop heating.
There is another option for the motor to overheat. The pump is in good condition, new. However, in hot weather or in difficult off-road driving conditions, in traffic jams at traffic lights, the fan often turns on and the engine begins to heat up. This happens due to a mismatch in the design features of the pump: for example, if an impeller of a smaller size than necessary is installed inside (on older models of the pump, the impeller is equipped with small blades that may not be able to cope with the cooling of a more powerful engine).
If the owner has a choice when purchasing a new pump, then it is better to give preference to models with a larger impeller.
Pump impellers: small (left) and large
A large gap between the impeller and the pump body can also cause insufficient antifreeze flow through the cooling system. The gap should be no more than 1.5 mm. This deficiency is especially pronounced at idle speed, in traffic jams.
The gap between the impeller and the pump housing should not exceed 1.5 mm
Original methods for diagnosing the operation of a pump were found in one automobile magazine.
- You need to take several clean sheets of white paper and lay them out under the car in the evening. In the morning, check the paper; if it is wet, with traces of greenish liquid, it means the pump is leaking.
- Turn on the interior heater at full power. If the arrows of the water temperature indicator shoot up sharply, stop the machine. Check by touch the condition of the cooling radiator after stopping the engine and the condition of the pump drive belt. If the elements are too hot, there is something wrong with the pump.
- Open the hood of the car. If there is a clear smell of coolant, this indicates a pump malfunction.
- The engine switches to idle mode. Then you need to pinch the upper pipe of the pump with your finger. If the pump is working, a slight push of liquid is felt.
How to install engine heating on a VAZ 2107
First of all, it is worth clarifying that the engine heater is installed at the lowest point of the cylinder block. In the classic version, this is a spar to which the beam is screwed. Most manufacturers complete their products with all kinds of brackets, for example, the Alliance heater has a plate that allows you to attach the housing next to the engine to the spar.
Any heater has an indicator arrow, which indicates the point of entry of the coolant into its body. This pipe must be connected to the cylinder block jacket. From here, water will flow into it, after which it will go into the very top pipe, which goes from the radiator to the pump.
Types of additional heaters
There are three types of additional heaters for the VAZ-2107, and each of them has its own characteristics. The interior of this car can be equipped with:
- electric heater;
- autonomous heater;
- additional stove radiator.
Which one to give preference is up to the car owner to decide, and here consider the positive and negative sides of each option. Electric heaters are a heater with a fan, adjusted to operate from a 12 V network. The main advantage is ease of installation, since they just need to be connected to the on-board network through the cigarette lighter or run the wiring directly to the battery.
The negative qualities of electric heaters include low power and heavy load on the on-board network. You should not expect a significant increase in the temperature in the cabin; it is suitable for intensive heating of glass, since it is not recommended to use it for a long time.
Self-contained stoves include an internal combustion engine and a fan installed in a housing. The essence of its work is that the internal combustion engine (ICE) heats up during operation, and the generated heat is supplied to the passenger compartment by a fan. And since the heating of the internal combustion engine is strong, such an additional stove is effective. The positive qualities of such a heater include autonomy; it works even when the car’s engine is turned off. The negative side of an autonomous stove is increased noise and additional fuel consumption.
One of the best options is to use an additional radiator installed inside the car, which is connected to the engine cooling system. Such an additional stove does not require fuel and creates a slight load on the on-board network, while installing another heat exchanger allows you to increase the temperature in the cabin. The disadvantage is the complexity of installation.
About the procedure for such a replacement
The work can be done approximately in the following sequence:
- In the removed plastic casing of the stove, you need to cut off the shell at the bottom of the casing. This is due to the fact that the “eight” fan is slightly longer than the standard device;
- It is necessary to cut the ridge that supplies air to the floor of the machine;
- The next step is to install a new unit instead of the standard fan and securely fasten it;
- Connect the device to the car's on-board network. In this case, they use a button and additional resistors from the VAZ 2108
.
After this modification, the interior will be noticeably warmer.
Installation locations, connection diagrams
You can purchase an additional stove for the VAZ-2107 or make it yourself. The design of such a heater includes a radiator, which is connected to the cooling system through pipes, and a fan that creates air flow.
If you decide to install an additional heater radiator, first of all decide on the installation location. There are three optimal locations for installing equipment:
- Under the front passenger seat
- Below the front panel under the glove compartment.
- On the center tunnel between the front seats
The location should be selected based on the overall dimensions of the stove.
The next important condition is the connection diagram. You install the additional radiator in series with the standard one (the drain pipe of the standard one acts as an inlet for the additional one). The disadvantage of this connection is the weak heat transfer from the other heat exchanger, since it will receive antifreeze, which has already given off some of the heat.
An additional stove can be connected in parallel to the standard heater (the supply and drain of the second radiator cut into the corresponding pipes on the main stove). The negative side here is the likelihood that the main flow of liquid will flow only to one radiator; in this case, the second one will heat poorly.
Video: Installing an additional stove
What is needed to install a new pump on a car?
Alas, many cars, regardless of the manufacturer, do not withstand any criticism in the harsh Russian conditions in matters of interior heat supply. Simply put, the performance of the stove does not live up to the expectations placed on it, and in the car, even with a big minus outside, it is simply cold. But it turns out that everything can be fixed, and with our own hands. The main thing is to have a head on your shoulders and instructions for use.
Modernizing a car's heating system involves installing an additional electric pump. Let's look at the example of the tenth VAZ model, since most often the owners of these cars complain about the lack of sufficient heat in their cars, especially when the engine is idling. To carry out the operation you need:
How to install an additional stove
To install an additional heater in a VAZ-2107 you will need:
- stove (homemade, purchased);
- pipelines;
- tees for insertion into the cooling system;
- shut-off valve (to completely shut off the second radiator).
The installation algorithm is relatively simple and includes the following steps:
- Drain the coolant from the engine.
- Place and secure the stove in the chosen location
- We cut tees into the cooling system pipes
- Install the shutoff valve on the supply pipe
- We connect the radiator to the cooling system using pipelines through a tap according to the selected circuit (series, parallel). We place the tubes laid throughout the cabin secretly (in places where they are not visible and the likelihood of damage is low).
- We lay the power wires for the stove fan and install the control button.
- We fill the cooling system with antifreeze and check the connections for leaks.
- We remove air pockets from the cooling system.
- We check the functionality of the second stove.
If everything is done correctly, then the second heater, after heating the engine, supplies a heated air flow into the cabin. Finally, we note that if the additional stove heats poorly, it means that the performance of the standard water pump of the cooling system is not enough to ensure proper circulation of the liquid. In this case, installing another pump - an electric one from GAZelle - can solve the problem.
Another pump cuts into the pipes through which antifreeze is supplied to the interior heating system. This unit ensured proper fluid flow through the system.
Improvement of the heating system
The design of the VAZ 2107 stove is far from perfect. Therefore, car owners modify it in a variety of ways. First of all, attempts are being made to improve the tightness of air ducts, especially at joints. This allows you to slightly increase the efficiency of heating the interior.
VAZ 2107 owners modify the heating system in a variety of ways
Fan replacement
Often, to improve the operation of the stove, car enthusiasts replace their original fan with a more powerful one, used in other VAZ models (for example, VAZ 2108). The factory fan motor is mounted on plastic bushings, which wear out quickly. As a result, shaft play appears, and a whistling noise becomes audible in the cabin when the fan is operating.
Usually, along with the fan electric motor, a number of other elements of the stove control unit are also changed. The rotation speed of the VAZ 2107 factory fan at a current of 4.5A is 3000 rpm. The VAZ 2108 electric motor consumes 14A at a frequency of 4100 rpm. Therefore, when replacing, you should install the appropriate fuse, resistor (usually from a Niva) and speed switch (for example, from a Kalina).


