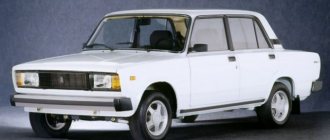
On all cars produced by the Russian automaker AvtoVAZ, including the most popular model in our country, the Lada Priora, the clutch is activated thanks to a mechanism called a clutch cable. This special mechanism is very important in the car control system and is sometimes called a clutch. Those car owners who prefer to carry out replacements and repairs in the car in a timely manner and with their own hands will be interested in studying this material, in which we will tell you about this device and how the clutch cable is replaced and other nuances.
About working on the clutch cable on LADA Priora
Initially, on domestic passenger VAZs with a rear-wheel drive system, the clutch was engaged thanks to an ordinary hydraulic system. The principle is exactly the same as that of the brake drive: all the pressure from the main cylinder is supplied to the so-called working cylinder. Only modern cars, such as, for example, the Lada Priora we are considering, received a front-wheel drive system; the specialists of the automobile manufacturer abandoned this principle of operation of the device in question, which greatly facilitated maintenance. The company has developed a reliable and very simple system for engaging a car clutch using a cable, now it is the main one in the entire system. The principle of the rocker arm, so to speak, is applied here, that is, when pressing the lower part of the corresponding pedal while sitting in the car, its working part, located at the top, passing through the rod (the so-called base), certainly begins to go in a completely different direction, plus everything else at this time she pulls the cable straight and, of course, behind her.
The second end of the cable is located on the drive fork of the clutch system. When the pedal is pressed, the clutch is released, thus directly enabling shift/on. transfer.
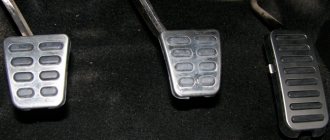
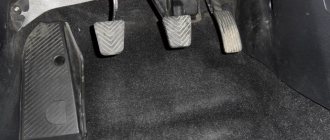
The clutch pedal has failed. Signs of a faulty car clutch cable
The purpose of the clutch system is to change gears safely for the engine. There are several components of the clutch, such as the clutch cable, that ensure its proper operation. The cable disengages the clutch discs when the clutch pedal is depressed, allowing for smooth gear changes. If the clutch cable is stretched or torn, it will not perform its function and in such a situation the clutch pedal will fail. Clutch cable malfunctions can be identified by various signs.
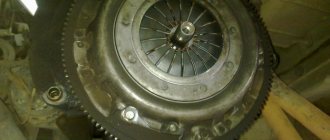
Clutch cable device in Priora
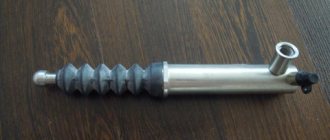
In order for the drive to work properly and stably, the core (cable) is located inside a special casing, completely fixedly fixed. As mentioned above, one end of the cable is attached to the clutch fork, as you understand, on the gearbox, and the other end is located in the cabin near the pedal. Each end is equipped with a fastening device. The ends are very different from each other, and it is simply impossible to confuse them in any way. There is also a rubber coupling; it is installed in the body in the hole where the cable goes into the compartment where the engine is located from the car interior.
So, the device consists of the following elements:
- In duplicate, fasteners for the casing.
- Clutch cable.
- Fastening element for fork.
- There is a special loop for the pedal.
- Rubber casing to protect the interior opening.
As you already understand, the core is located inside a hard shell, where it moves under the influence of return springs and the pedal itself. Thanks to this, its stable operation is ensured.
Priora diagnostic connector
Priora doesn't start well when hot
How to replace the clutch cable on a VAZ 2170-VAZ 2172?
Note! The cable is changed very easily, about 30 minutes will be enough for you, we do not recommend that you go to a service station and have it replaced there, because it is a waste of money (In fact, you need to go to a service station when something serious has happened to the car, which you cannot do is within your power, but because of trifles, going there all the time is at your personal discretion) and if they are not there, then it is better not to save on spare parts, but on work!
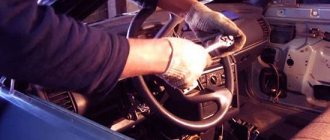
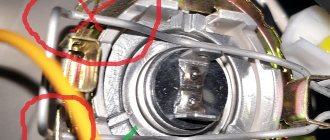
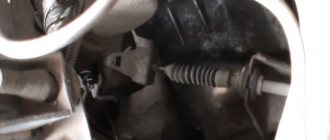
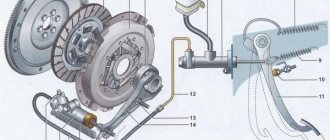
Removal: 1) First, remove the rubber boot, which covers the holes into which the clutch cable exits, so that dirt and moisture do not get into it (This boot is indicated by a red arrow), as soon as it is removed, use an “8” wrench to unscrew the nut (Look in the place indicated by the blue arrow; the nut is really hard to see in the photo), thanks to which the cable sheath stop is attached to the bracket, and as soon as the nut is unscrewed, remove the stop from the bracket.
2) Now look at the place where the tip of the clutch cable is connected (And it is connected to the end of the pedal, see the photo below for more details), this tip is installed on the clutch pedal finger (The finger is indicated by a blue arrow) and secured to it with a lock, which is indicated by a red arrow, as you can see, in the photo this lock has already been removed, you will have it on your finger, so that you can remove it, use pliers or a screwdriver and remember something, it is better to buy this lock in advance at a car store, since Basically, it always gets lost and it becomes almost impossible to find it inside the car.
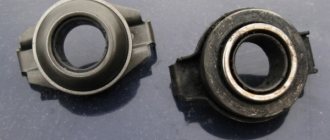
Note! After one of the ends of the clutch cable is disconnected, look for a plastic bushing on the finger, be sure to check whether it is worn out or has any defects (Because of it, extraneous noise can simply occur in the cabin when squeezing the clutch), if with it everything is in order, you don’t even have to touch it, but if it has defects, then remove this bushing and replace it with a new one, and lubricate the new bushing with Litol-24 or LSC-15 grease before installation, and even if you don’t If you change it, we still recommend that you lubricate the surface of the old bushing with one of these lubricants!
3). to the bracket and disconnect it from it, to do this, hold the tip from turning with one wrench, with the other at this time loosen the nut that is located next to the bracket (see photo 2) and after that, pulling the cable, remove it from the bracket and pulling the cable forward (As the car moves), first pull it into the engine compartment, and then completely remove it from the car.
Installation: Installation of the cable is carried out in the reverse order and it is inserted through the engine compartment and then brought out into the car interior. The cable is attached to the clutch fork in this way: first, a rein is screwed onto the tip so that the tip of the cable protrudes straight out a little (Approximately 1 mm) from the driver, in addition, we recommend that you coat the surface of the driver with which it comes into contact with the fork with Litol-24 or LSC-15 grease, then install the tip in its previous position (On the clutch fork), but only pull it out when it it will fit into the slot until it stops (see photo 1) and measure this distance, which is indicated by the letter L with a caliper or a ruler, it should be 27 mm, if it does not match, adjust it using the leash that was screwed onto the tip of the cable and finally release the tip, under the action of the spring, it should rest against the fork (see photo 2), check that there are no gaps and after checking, press the clutch pedal 3 times, then check the distance L again and, if necessary, adjust it using the leash located on the tip of the cable.
What are the main faults in the Priora clutch cable?
When the clutch cable on a Lada Priora is already in a state close to failure, or even possibly has failed, the driver will immediately feel it. When an attempt is made to engage the clutch in order to shift or engage a gear. Main types of breakdowns:
- The drive fastener to the pedal or probably the fork is broken. Always at such a moment the pedal will fall to the floor.
- The cable is disheveled. In this case, it is almost impossible to press the clutch pedal.
- The cable has broken. In this case, the pedal also falls freely.
All this indicates that it is time to conduct a thorough check of the drive on the Lada Priora. Each of the above malfunctions indicates that the clutch cable needs to be replaced and everything can be done even with your own hands. There is no point in replacing individual parts.
If you need to service your all-wheel drive, then you need to contact specialists and they will carry out preventive work for you; a car with all-wheel drive requires constant monitoring of the units.
Why do you need a clutch cable and when to change it?
Thanks to the clutch, torque is transmitted from the transmission to the power unit. The gearbox is connected to the engine by a vehicle, which is a metal cable. It is with the help of the vehicle that the car starts, gears are changed and braking is carried out. Thanks to this lever mechanism, the car moves.
Lada Kalina is equipped with a ratcheting mechanism, thanks to which the length of the cable is adjusted. During clutch operation, the friction linings of the disc are constantly worn out, and the tension of the vehicle changes. The tension is adjusted using a ratchet mechanism.
In theory, the ratchet mechanism works as follows:
- due to the tension of the cable, the clutch release fork (VVS) rotates, causing the spring to compress;
- when compressed, the spring causes compression of the clamps located on the tip of the vehicle;
- Thus, the tip is released, the vehicle is tensioned.
In reality, drivers often have to make frequent manual adjustments.
Clutch cable and adjustment mechanism
Signs that your vehicle needs adjustment or replacement:
- the appearance of extraneous sounds when the clutch is disengaged;
- gears shift poorly;
- insufficient traction;
- the clutch does not disengage completely;
- The clutch pedal (PS) has failed.
Before you start adjusting the vehicle on the Lada Kalina, you should check its condition. The vehicle requires replacement if it is rusty, torn or has any damage. To check the condition of the vehicle, it is necessary to remove the air filter.
Changing the clutch cable on a Priora
As we said, replacing the clutch cable in your LADA Priora is possible with your own hands, the most important thing is to know how to change it correctly. Read more about this.
To replace you will need the following tools:
- The keys are ordinary 8“/17“.
- Pliers/screwdriver/pry bar.
The replacement begins with dismantling the old drive, and you need to start from the interior of the LADA Priora. You will have to do everything with an assistant. Algorithm of actions:
- Slowly release the clutch fork. In this case, an assistant removes the cable fastening bracket from the pedal.
- Unscrew the fastening of the casing near the pedal. Use key 8 for this.
- Let's move on to the engine compartment, and using a screwdriver you should carefully pull out the seal there and pull the cable out there.
- We disconnect the negative terminal of the battery, since the work will be carried out next to the starter drive.
- Remove the air filter. Access to the cable fastening is now open.
- Using a 17 key, we easily release the shell latch. Thus, the core will be weakened and the tip in the fork at the point where the clutch is engaged can be freely removed.
- Remove the casing from the groove. This is all that is required for the drive to become free.
- Let's go to the salon. Let's start installing the new device. At this stage, the assistant must pull the cable from the engine compartment into the passenger compartment. Before starting installation, lubricate all open areas of fastening the tips and the core itself.
- We place it properly in the cabin, secure the tip mechanism, of course, to the pedal.
- Attach the casing.
- We press out the fork and attach the clamp directly to the fork.
- We put it in the place where the casing is supposed to be fastened, directly on the gearbox. Using a 17 key, we adjust the tension of the device in question.
- We fix the seal that was previously removed from there in a special hole in the passenger compartment.
- We put a device such as a car air filter in its rightful place.
Instructions for replacing the clutch cable
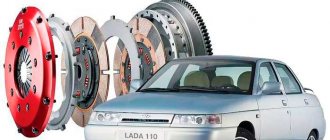
Which clutch is better to install on a Lada Kalina, Grant or Priora depends on financial capabilities.
But first, let's figure out how best to replace the cable on these cars:
- First you need to unscrew the nut of the bracket cable installed under the dashboard of the car. The nut is unscrewed using a size 8 wrench, after which the stop is removed from the bracket.
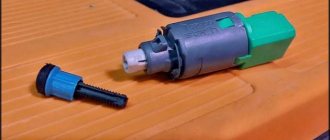
- Next, you should disconnect the locking bracket installed on the so-called finger, then the body of the compensation device itself is disconnected, use a screwdriver to do this. You also need to remove the plastic bushing from the pedal pin. Visually inspect the device for mechanical damage or wear. If they are present, then the bushing needs to be changed, having previously treated it with grease.
- Now it is necessary to dismantle the cable seal installed in the hole in the shield (as can be seen from the photo, it is located in the engine compartment of the Lada Granta or Kalina). The tip of the cable should be pulled as it moves, after which it is removed from the groove on the fork.
- Using a 17mm wrench, you need to unscrew the nut that secures the cable tip to the bracket on the gearbox. Use another wrench to prevent the element tip from turning.
- Now you need to dismantle the cable tip, then the element itself needs to be removed from the hole. The cable can be completely dismantled.
- After these steps, you can begin installing the new device. To install correctly, the element must first be inserted into the hole in the shield. The wear compensation device on the Lada Grant or Kalina must be fixed on the pin, having previously treated the device bushing itself with lubricant.
- You need to secure the cable to the pedal and install the previously removed seal. Also mount the tip of the element into the transmission bracket and completely secure the fixing nut. Don't forget to screw on the leash. Installation of the new element must be done by moving the lower tip forward to the end. The tip itself must be held in this position, at this time you need to correctly measure the distance, which we talked about at the beginning of the article, between the leash and the fork. By rotating the leash, you should select the optimal value.
- Immediately before installing the leash, it will also need to be lubricated. In particular, we are talking specifically about the plane in contact with the plug.
- The final step will be to press the pedal all the way down several times. Having done this, you will again need to measure the distance between the fork and the leash. If it is more or less than 2.7 cm, then it should be adjusted.
Priora clutch cable broke causes
clutch _
it will be higher or lower,
I don’t remember
, many, for example, like
it if
when
I
of
the pedal it starts to
grab
or from the floor, it’s different for everyone, I’m somewhere in the middle and so it was outside
and
I lifted it
and it’s so comfortable for
my wife
Yes, DuKCH
, agree.
Some members of the forum have knowledge of the Russian language at the level of the 1st grade of high school... I’m generally silent about punctuation marks.
There won't be anything there. The pedal will then go up. I make sure that it is a little higher than the brake pedal (it’s time, the cable has stretched), it turns out that the clutch is pressed a little more. Who cares, in short.
don’t tell me, if the clutch is worn out, there will be slipping!
DyukCh wrote: v804nu wrote: the clutch will be higher or lower, I don’t remember, many people like it, for example, that when you release the pedals it starts to grab or from the floor, it’s different for everyone; his wife is so comfortable for her
Features of the Lada Priora clutch
Any motorist interested in how to adjust the clutch on a Priora should know about the presence of the drive cable auto-adjustment function. That is, VAZ designers took care of the owner and saved him from the need to constantly adjust the clutch drive mechanism during operation. The same ratchet-type system is installed on Kalina, but both there and on Priora it is impossible to do without periodic adjustments. This factor has been proven by practice and forum discussion pages.
How does an automatic cable tensioner work?
In the release drive on the VAZ 2170, there are no gaps as a concept, hence the name - backlash-free clutch. The ratchet mechanism serves to compensate for the working length of the cable as the driven disk linings wear out
To understand the process, it is important to accept the following data:
- During operation, the driven disk wears out and its linings become thinner - as a result, the release bearing and basket springs shift towards the gearbox.
- Accordingly, the fork at the place where the cable is attached moves towards the radiator.
- The spring located on the bushing of the adjusting mechanism is compressed at this time and tightens the clamps of the cable tip.
- As a result, the tip is pulled out of the driver, due to which the wear of the disc linings is compensated.
For those who don’t yet know how to adjust the clutch on a Priora themselves, it is important to take into account the moment when the linings are new. In this case, when releasing the pedal, the ratchet bushing will only lightly touch the bracket without releasing the clamps
Therefore, the toothed tip of the cable will not move relative to the housing. Only as the linings wear out does the spacer sleeve release the spring-loaded clamps and the cable tip extends to the amount necessary to balance the worn parts.
Adjustment
First you need to determine where the clutch cable is located. Everything is clear in the cabin; it is located near the corresponding pedal. And under the hood you should look for it near the clutch basket. All this splendor is located on the left side of the car. To make the adjustment, you will need the same ruler and a pair of open-end wrenches (17 and 19). All this is done in the following order:
- First, we prepare the car, put it on the handbrake, and install wheel chocks. If there is an alarm, you must leave the window open in case the central locking is activated. For greater convenience, it is advisable to remove the battery, but this item is optional;
- It is advisable to treat the adjusting nut with WD-40 and let it stand for half an hour;
- Next, use a 19mm wrench to loosen the locknut. Use another key to adjust the position of the pedal. In this case, tightening the nut towards the passenger compartment allows you to lower the pedal, the reverse movement raises it;
- After adjustment, you need to check the position of the pedal. It should be at a distance of 12-13 centimeters from the floor. To check, press the pedal several times and repeat the measurements.
If you cannot bring the clutch into the required range, then most likely the cable has stretched. It needs to be replaced.
Changing the clutch cable, basic algorithm
Replacing the VAZ 2110 clutch cable is extremely simple. Even a novice amateur motorist will be able to do the job, and it’s quite difficult to make a mistake. What we do:
- 1. To start, use two 19 mm open-end wrenches. loosen the nuts of the clutch cable end, tilting it away from the bracket;
- 2. Disconnect the cable from the fork that controls the clutch release;
- 3. Now you need to disconnect the cable end from the clutch pedal lever. This can be done through the interior, but if you worry about dismantling in advance, then the task is greatly simplified. First, remove the protective cover of the mechanism.
- 4. The end of the cable is unscrewed with a nut, additionally secured with a locking bracket. Unscrew the pedal lever nut, thereby releasing the cable;
- 5. To release the upper end of the cable sheath, unscrew the corresponding bolt of the thrust plate in the passenger compartment. Then the thrust plate is removed along with the cable;
- 6. The old cable is removed through the interior. When replacing, the lead of the new cable is lubricated with silicone.
Reasons for replacement
Practice shows that there are several main situations that force you to change the clutch cable.
Situation
Peculiarities
The clutch does not work properly
It becomes difficult for the driver to depress the clutch pedal, which causes problems when trying to move away or start the car, the clutch slips
Gearbox is acting up
It begins to switch with certain problems, and during operation it also makes strange, incomprehensible sounds
If, after pressing the clutch pedal, it does not want to return to its original position when you remove your foot, this may indicate a problem with the cable
Such symptoms can only suggest that the problem lies in the cable. To make sure of this, you should conduct a full check of the node's condition.
All the symptoms mentioned may indicate a broken cable or a broken fork. In the case of a cable, you will have to replace it. If the fork falls off, it will need to be returned to its place and clamped in order to prevent possible repeated falls.
Between a broken cable and a broken fork, it is better to face the first situation. Buying a new cable will cost 200 rubles, and a fork costs about 2000 rubles.
There are two ways to change the clutch cable:
Each option has the right to exist. We will introduce you to the two operations, after which you can choose which method to prefer.
Replacement procedure
Taking off the frill
- Raise the car using a jack.
- Unscrew the cable fixing nut. It is located under the clutch pedal.
- On the pedal rod there is a ring and a locking ring.
- To remove the cable, you will need to understand the cotter pin that holds it. To dismantle it, take a size 8 wrench and unscrew the cotter pin.
- It is now partially free as it is still held in place.
- Remove the frill and windshield wiper, then lift the hood.
- In the engine compartment, find the cable fixation point. Dismantling is carried out with a 19 mm wrench, which needs to be used to unscrew the nut.
- An old rubber band is often used if it is not worn out. Yes, and it’s difficult to change it yourself. But if necessary, change it. If you see strange wiring there, feel free to remove them. They do not perform any functions.
- Insert the rubber band into the hole through which the cable went.
- Place all fasteners, bolts, and nuts in a separate box so as not to lose them.
- Install a new cable and tighten the retaining bracket under the hood.
Removing the frill
Without removing the frill
Here the operation is somewhat more complicated, since you will have to bypass the frill. But usually the work takes less time, which is why most VAZ 2109 owners choose this option.
- Unscrew the clutch cable fastenings using a 19 mm wrench.
- Remove the cable end from the fork.
- It is not always necessary to remove the tip from the clutch fork. This largely depends on the location of the cable break.
- Go into the interior and find the cable fastener under the clutch pedal. It's small, so a key for 8 will come in handy.
- Unscrew the bracket that holds the tip to the pedal. Try to raise the pedal as high as possible, and then use a flathead screwdriver to hook onto the clip.
- That's it, the cable can be removed. Just don't pull too hard. And what you should be afraid of here is not that it will completely break. You can damage the cable socket with sudden actions.
- It is best to remove the cable through the interior.
- There may be wires in the cable channel that interfere with removal. Pull them out with confidence, as they do not perform any tasks.
- Also, washers located under the hood may interfere with your work. Just carefully unscrew them and you're done.
- Remove the bracket from the pedal lever. This way there will be no problems with removing the cable.
- Carefully insert the new cable into the hole through the interior into the engine compartment.
- Follow the reverse procedure for assembling the assembly.
- The most difficult thing is to put the tip fixation bracket in place. It is because of this that many advise removing the frill. But you can work around this difficulty.
- Make a clip from a regular paper clip. Secure the bracket with it. If necessary, use pliers.
- When assembling, do not forget to lubricate the cable with grease or oil, which does not freeze at sub-zero temperatures. This will make the element more elastic.