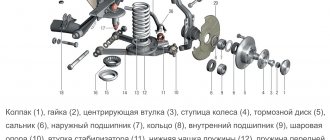
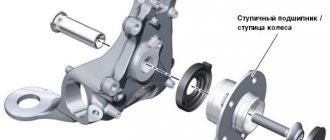
The front wheel bearing on the Priora VAZ 2170, as on other VAZ cars, often fails, especially when the mileage exceeds 80,000 km. First there is noise from the wheel, which can increase during acceleration. Vibration also often occurs, wheel play increases, and in some cases the noise turns into a grinding sound - all these signs mean that the front wheel bearing of the Lada Priora requires immediate replacement. If you delay repairs, the consequences can lead to wheel jamming, which leads to unsafe situations on the road.
This article will tell in detail about the principles of replacing wheel ball bearings (hereinafter referred to as SP) on cars of the VAZ family, in particular on the Lada Priora. The instructions are accompanied by many photos and videos. The material also provides information on how to choose a front wheel bearing for a Priora by number, size, price, and manufacturer.
After reading the article, you will understand that replacing the front wheel bearing is done with your own hands without special skills, experience, or special tools, and the price for repair work of this type in a car repair shop is very high.
How to diagnose the front wheel bearing on a Priora and the causes of failure
At the beginning of the article, signs of a malfunction were already mentioned, if they occur in the VAZ 2170, it is necessary to check the hub assembly. To diagnose a breakdown, it is enough to do several operations:
- Raise the car with a jack;
- Check the play of the suspended wheel with your hands;
- Rotate the wheel and listen for noise;
- Watch several videos on the principle of diagnosing the front wheel bearing of a Priora.
Why does the front wheel bearing of a VAZ 2170 (Priora) fail:
- Expiration of service life;
- Incorrect operation of the suspension, aggressive driving style, road quality;
- Poor quality ball bearing (defect, counterfeit, manufacturing defect);
- Depressurization (dust, moisture, dirt);
- Malfunction of adjacent components (brake disc imbalance, etc.);
- Road accidents, collisions with deep potholes in the asphalt or holes.
Replacing the front wheel bearing on a Priora
To replace the front wheel bearing with your own hands and in garage conditions, motorists are more often inclined to use a method that does not require further wheel alignment, as well as specialized pullers.
To replace the front wheel bearing you will need:
- set of keys, sockets;
- round nose pliers;
- hammer, vice;
- screwdriver;
- jack;
- torque wrench;
- cup and three-jaw puller (if possible).
How to remove the front wheel bearing from a Priora
Removing the front wheel bearing of a VAZ 2170 and further replacement begins with placing the car on a flat surface, as well as ensuring sufficient illumination of the repair work site.
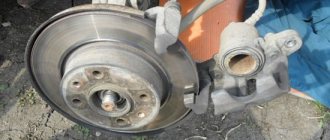
- Next we remove the brake caliper. First, unscrew the nuts on both sides to remove the housing itself.
- Now we remove the pads. Then unscrew the rear bolts with a 17mm wrench to remove the caliper from the disc.
- Unscrew the hub nut, then remove the brake disc.
- Now you need to press the hub off the drive shaft. Below is a method using a three-claw removable device.
- Next, unscrew the fastening nut to dismantle the casing.
- We unscrew the two nuts on the ball joint and use a 17mm wrench.
- Then we unscrew the two bolted connections that secure the pivot pin to the rack.
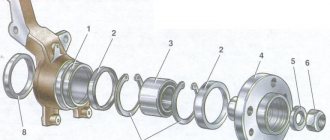
- Having disconnected the steering knuckle, we proceed to removing the ball bearing.
- We clamp the assembly in a vice so that the hub is at the bottom. Now we take the mandrel (in this case the head is 32 mm). By hitting the small bearing ring with a hammer, we knock out the hub through the frame, on which the inner race will remain.
- Remove the retaining ring using round pliers. Now you should press the outer race out of the steering knuckle. The photo shows a method using mandrels with a vice. The force from compressing the vice must be transferred to the outer race.
- Other methods: use a cup puller or tap with a chisel and hammer through a mandrel.
- Let's go back to the hub. At the hub, on the pressed-in old ring, we make a notch with a grinder.
- Then we knock down or split the clip with a chisel.
How to change the bearing on the front hub of a Priora
Before replacing the front wheel bearing, you should remove dirt and corrosion from the inner surface of the knuckle, as well as from the hub. The parts are wiped with a rag, and the seating surfaces are lubricated with machine oil. Replacement is carried out according to step-by-step instructions.
- We insert the new rolling element into the mounting hole, then hammer it through a wooden spacer evenly, without distortions, to a depth of 3-5 mm.
- Don't forget to put a retaining ring on the arc side.
- We press the ball bearing through a vice with a mandrel (or a piece of pipe), as shown below. Here you can also use a removable cup-type device.
- Insert the second locking element.
- Now you need to press the hub into the ball bearing hole. It is recommended to use the same mandrels.
- The assembled unit is mounted back onto the rack and ball joint. Then the locknut is tightened with a torque wrench (for tightening torque, see the table below).
- Further assembly is carried out in reverse order. We recommend watching the video of replacing the front wheel bearing on a Priora at the end of this article.
How to remove the front wheel bearing on a Priora
Removing the front wheel bearing of a VAZ 2170 and further replacement begins with placing the car on a flat surface, as well as ensuring sufficient illumination of the repair work site.
It should be noted that in order to tighten the hub nut, as well as the wheel bolts, you will first need to loosen them without jacking up the car.
- Next we remove the brake caliper. First, unscrew the nuts on both sides to remove the housing itself.
- Now we remove the pads. Then unscrew the rear bolts with a 17mm wrench to remove the caliper from the disc.
- Unscrew the hub nut, then remove the brake disc.
- Now you need to press the hub off the drive shaft. Below is a method using a three-claw removable device.
- Next, unscrew the fastening nut to dismantle the casing.
Another method is to screw the bolts into the technological holes of the hub. As a result of tightening, the bolts rest against the casing, thereby compressing the part.
- We unscrew the two nuts on the ball joint and use a 17mm wrench.
- Then we unscrew the two bolted connections that secure the pivot pin to the rack.
- Having disconnected the steering knuckle, we proceed to removing the ball bearing.
- We clamp the assembly in a vice so that the hub is at the bottom. Now we take the mandrel (in this case the head is 32 mm). By hitting the small bearing ring with a hammer, we knock out the hub through the frame, on which the inner race will remain.
- Remove the retaining ring using round pliers. Now you should press the outer race out of the steering knuckle. The photo shows a method using mandrels with a vice. The force from compressing the vice must be transferred to the outer race.
- Other methods: use a cup puller or tap with a chisel and hammer through a mandrel.
- Let's go back to the hub. At the hub, on the pressed-in old ring, we make a notch with a grinder.
- Then we knock down or split the clip with a chisel.
What front wheel bearing is in Priora: dimensions, number, prices, characteristics
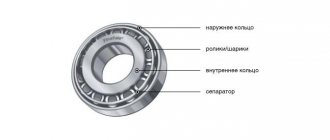
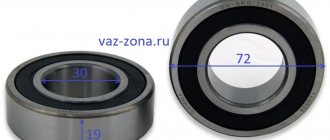
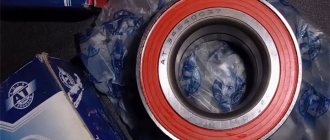
Before you begin the repair, you need to know which front wheel bearing is on the Priora, as well as which one is better in terms of price, reviews, quality, and manufacturer. The designer at the manufacturing plant included in the design an angular contact double-row sealed ball bearing with lubricant inside (LITOL-24). According to reviews and statements from VAZ owners, the best option would be original products from VBF or foreign manufacturers: SKF, SNR, SWAG, FAG.
The dimensions of the front wheel bearing, as well as the catalog numbers of recommended manufacturers, are presented in the tables in a similar article on replacing the wheel bearing in a Lada Granta car; look for detailed information there.
GOST: 6-256707А1КЭ12 ISO: 256707А1КЭ12.P6Q6/L2 Factory code: 11180-3103020-00SKF: VKBA1414 FAG: 713 6140 30
BEARING SIZE CHART 6-256707
What are the best bearings to install on Priora?
You have already figured out how the replacement takes place without dismantling the rack. But some owners of Lada Priora have a question: what is better to choose - a standard part or an alternative one. The most important thing is that it is a ball component; roller ones are not as durable. If there is no option for Lada Priora in the store, then it is better to take a part for Kalina. Some motorists recommend buying cheaper bearings for the “ten”, but it is better to look for more modern options.
Video on replacing the wheel bearing on a Priora is below.
The wheel bearing is a small but quite important part of the car - one of those that directly affects the safety of the driver and passengers. Therefore, you need to carefully monitor the bearings and periodically check their condition. If, when rocking a wheel that has been hung, play is felt, or noise appears during movement, it is better to replace the wheel bearing.
However, if the play is increased, you can try to loosen the nut and check the tightening torque. If it is less than permissible, then you can tighten and lock the nut again. So the wheel bearing on the Priora will probably last for some time.
To press the bearing in, you just need to use the appropriately sized mandrels that are included in the kit. If you don’t have mandrels, you can use the rings of the old bearing.
The rear wheel bearing of the Priora is not a scarce part at all. Priora rear hubs are available for sale from a variety of manufacturers - both domestic and foreign. In any case, the price is relatively small. If you are in doubt whether the wheel bearing is suitable for Lada Priora cars, the dimensions are indicated on the product itself.
Replacing the rear wheel bearing on a Priora can be done at a car service center, or independently. Let's carefully consider the second option.
First, let's prepare everything you need. We will need a 30mm socket wrench, a thin chisel, pliers for removing the retaining rings and two pullers - a universal one and one for pressing out the bearing.
Remove the decorative cap and hub. This is done like this: first we unlock the hub nut. Then loosen the tightening of this nut and the wheel bolts. We engage first gear and install reliable stops under the wheels of the front axle. We lift the back part and install it on the stops. Remove the wheel, brake drum and brake pads. Finally unscrew the hub nut and remove the thrust washer.
Next, using the prepared puller, we press the hub from its axis, clamp it in a vice and remove the retaining ring.
We also use a puller to press the old bearing out of the hub. We clean it and press in a new bearing for the Priora front hub. Reinstall the previously removed retaining ring.
Using a suitable mandrel, press the hub onto the axle and install the brake drum and wheel in place. We lower the jack and finally tighten the hub nut (it’s better to buy a new one). Then we lock it and install the removed cap on the hub. Congratulations, you have replaced the wheel bearing on a Priora yourself.
Good day everyone, I was concerned about replacing the front wheel bearings on the Lada Priora, having carefully studied the information on the Internet, it was established: 1. dimensions of the front wheel bearing are 35x68x37 (Kalina/Priora); 2. Thus we have the following options: FAG: 713 6140 30 (set + nut); FAG: 713 6900 50 (set + nut); FAG: 713 8045 10 (2 bearings included); SKF VKBA 3441 (set + nut); SKF VKBA 1414 (set + nut); SKF VKBA 1315 (set + nut); SKF BAH-0031 D (bare bearing). Anyone who has real operating experience, please share your impressions, thank you!
Comments 15
It’s so interesting to watch... Somewhere on the Tayotov forum or BMW, if a person bought a bearing from FAG, SKF, SNR, NSK, KOYO and it quickly turned out well, then he does not “complain about the quality” but usually writes, “I got it wrong” or “they sold a fake.” But here, first they want a good bearing from a famous brand for 700 rubles, and then they complain about its quality.
PS For an ATV, for example, I take an original Japanese wheel bearing KOYO, at best it costs 2000 rubles, but usually it’s closer to 3000 rubles. Everything that is sold under this brand in this size from 600 to 1500 rubles is fake. And the bearing there is smaller than the eight rear...
Tips, tricks and repair videos from specialists
1. The parts of the front wheels wear out evenly, so when replacing one side, be sure to check or change the other.2. If you do not have a puller, as well as a vice (press), it is recommended to take the assembly to a car workshop for pressing / pressing.3. It is recommended to press-fit using non-impact methods.4. Life hack: heat the steering knuckle before inserting p/w.5. Be sure to lock the hub nut after tightening.6. When assembling, treat threaded connections with graphite lubricant.7. Before installation, check the amount of lubricant inside the unit by carefully opening the rubber seal.8. Buy spare parts from certified stores, ask for documents for original products.9. This video collection presents a detailed replacement process.
The Prior release bearing is an integral element of the clutch system, which is involved in the gear shifting process. The part is involved in the process of pressing the clutch pedal and changing gear, and is responsible for disconnecting the clutch discs.
If we talk about the service life of the bearing, in most cases it is quite long and amounts to at least 100 thousand kilometers of the vehicle. However, during operation in difficult conditions (off-road, constant switching in traffic jams, lack of lubrication), faults are diagnosed even after 15 thousand mileage.
Tips, tricks and repair videos from experts
- The parts on the front wheels wear out evenly, so when replacing one side, be sure to check or change the other.
- If you do not have a puller, as well as a vice (press), it is recommended to take the assembly to a car workshop for pressing / pressing.
- Pressing is recommended to be done using non-impact methods.
- Life hack: heat the steering knuckle before inserting the socket.
- Be sure to lock the hub nut after tightening.
- When assembling, treat threaded connections with graphite lubricant.
- Before installation, check the amount of lubricant inside the unit by carefully opening the rubber seal.
- Buy spare parts from certified stores, ask for documents for original products.
- This video collection presents a detailed replacement process.
New Lada: Communities›Lada Priora Club›Blog›candles on the Priora! I want to buy 4 electrode spark plugs for a Priora, what do you say? Are there more electrodes? who installed them at all and what was the effect?
Video of the process of replacing a wheel bearing on a Priora
How to tighten a nut with a torque wrench
How to choose a wheel bearing
How to press in a bearing without a press
Articles on your car from an expert:
Diagnostics of the release bearing on a Priora
There are no special devices or tools for troubleshooting. The main signs of possible defects or malfunctions:
- extraneous noise when changing gears (knocking, crunching, specific howling, creaking);
- Difficulty when switching.
If any of the listed symptoms appears when switching, pressing the clutch pedal and changing speed, it is recommended to dismantle the box and inspect, and in case of malfunction, replace the Priora release bearing
It is important to note that it is not always necessary to replace the product with a new, similar one. Sometimes the cause of extraneous noise from the gearbox and incorrect operation of the release unit is contamination, insufficient lubrication of the product and (or) the guide bushing along which constant, working rotation of the bearing occurs. Therefore, sometimes it is enough to clean or thoroughly lubricate the bushing and the part itself. Obvious signs indicating a malfunction are:
- significant play of the part;
- physical deformations (cracks, abrasions, chips);
- uneven or difficult rotation.
When diagnosing breakdowns or damage, dismantling and installation of a new part will be required.
Replacing the release bearing of Priora
In order to change the part, you will have to remove the gearbox. You can find detailed instructions for removing the gearbox here (link to page).
After removing the box, you need the following:
- The first step to removing the bearing is to find the antennae of a special spring retainer. Next, remove the two ends of the antennae from the bearing holder. To do this, you need to apply a little force and pull the antennae out of the two holes.
Now you know how to change the release bearing on a Priora!
Important points
Please note that there are counterfeit auto parts on sale today. Please note that most new, original release valves contain light-colored factory-applied lubricant. In addition to the above, we recommend that you purchase release levers that are made only of metal. In addition to the presence of a metal body, make sure that in the places of fastenings, the so-called lugs (clamps), the metal coating is of a uniform color without signs of hardening at high temperatures. Pay special attention to checking the part for the so-called backlash (should be absent or minimal). Rotate the product, listen to see if there is any noise when it rotates.
In order to choose a Priora clutch release bearing, you need to know what clutch system you have installed (which manufacturer). For example, Valeo also has its own, original bearings that are not interchangeable. And on the contrary, it guarantees full compatibility and correct operation with various clutch systems on Kalina and Priora cars. Plus, there are good reviews about the quality and long service life.
Replacing the rear wheel bearing on a Priora
Before we begin the repair, the following preparations must be completed:
- Raise the rear of the car with a jack
- Remove the rear wheel
- Remove the brake drum
- Now you can proceed further with the repair. Using a socket and a wrench, unscrew the hub mounting nut, as shown in the photo below.
2. When this is done, you can begin to remove the hub and bearing assembly. To do this, it is most convenient to use a special device - a puller with rotary grips.
3. Now, using a wrench, we turn the puller rod clockwise, thereby pulling the hub off the axle, as it were:
The result of the work done is shown in the photo below.
4. Next comes the most difficult thing - removing the bearing from the hub itself. To do this, turn it over with the inside facing up and clamp it in a vice. Then, using pliers, tighten the locking ring and remove it.
5. And then we turn the hub over to the other side so that the bearing can be “squeezed” out of the hub downwards, or carefully knocked out using a spacer or other available tool. Of course, for good measure, you will need a press, but you must admit that not every car owner has such equipment in the garage.
Personally, in this example, a 30 mm socket was used, and a knob was paired with it to hold it. With small blows of a hammer, the bearing is easily knocked out of the hub.
The result of this procedure is shown clearly below.
6. The inside of the hub must be thoroughly cleaned and a Litol-type lubricant applied to the inside.
7. After which you can replace the bearing - the new one is installed in the reverse order. To press it in, it is convenient to use an old bearing, and carefully use a hammer to install everything in place.
Let's see what it looks like in practice.
Also, instead of a hammer, you can do everything more accurately and correctly by using a vice instead of a press. I think that the meaning of this manipulation is quite clear to everyone. We press the bearing until a groove appears for installing the retaining ring.
8. Again, using pliers, install the ring in its place and you can put the hub on the axle, having previously lubricated it.
Causes of wheel bearing failure
Wheel bearing inside the hub
In principle, if we are talking about really high-quality wheel bearings, then they are made from materials that can withstand just crazy loads. Thanks to this, the hub ones run for 120 thousand kilometers or more. But sometimes, this period is reduced and, moreover, significantly. We list the main reasons for reducing the service life of a wheel bearing:
- frequent wheels falling into potholes at high speed;
- loss of lubricant;
- improper tightening when replacing;
- crooked pressing when replacing;
And so, if a car falls into a hole with a wheel, and even at high speed, the wheel bearings, like the entire suspension itself, experience enormous loads, not to say overload. And if this happens often, the hub ones may die ahead of schedule. Careful driving significantly extends the life of many and very different parts of the car, including the wheel bearing.
If the protective boots are damaged, grease leaks from the inside of the bearing and the bearing dies. Therefore, when replacing hubs, you need to ensure that the protective elements are installed correctly and are not damaged during the installation process.
As for improper tightening, this is a reason that falls within the competence of specialists who replace wheel bearings. If the bearing is tightened too much, it may overheat, which negatively affects its service life.
Well, distortions when pressing the wheel bearing lead to the fact that the loads that the bearing perceives are distributed unevenly. And this leads to uneven wear.
It should be noted that the last two factors that reduce the life of a wheel bearing relate to the work of the mechanics who perform the replacement. Therefore, trust such work, as well as your favorite car in general, only to reliable and proven professionals. Moreover, if you drive your car carefully and do not test its strength strictly and regularly, you will not have to replace wheel bearings often.
The best wheel bearings
When a wheel (wheel) bearing breaks, it must be replaced. This detail, small in size, is very important; it ensures freedom of rotation of the hub mechanisms. Continuing to use a broken one is dangerous: it will jam, and then a major accident cannot be avoided. The range offered at car markets is quite wide. To decide which wheel bearing is better, it is useful to study its characteristics and the features of bearings offered by different companies. Of course, your choice will be influenced by what exactly you want: to qualitatively repair your favorite car, sparing no expense, or simply to make inexpensive repairs and put the car up for sale.
Symptoms of a bad wheel bearing
The first sign indicating a wheel bearing failure is a characteristic sound. This is a distinct crunching, knocking or grinding sound in the wheel area. You will hear it both in the car and outside when the car passes by.
Another sign of a bad wheel bearing is vibration, which is transmitted to the steering wheel and the entire car. Therefore, it is also unlikely to miss this symptom.
If the car pulls to the first or left side, this could also be the result of wheel bearing problems. The point is that when one wheel jams, straight-line movement, alas, is impossible. In such cases, the bearing must be replaced immediately.
How to determine whether a wheel bearing is faulty
In principle, the symptoms of wheel bearing wear themselves are quite eloquent and allow us to predict the source of the problem with high accuracy. However, it is possible to check the condition of the bearing, almost one hundred percent. To do this, you need to jack up the car, put supports under it, and then swing the wheel in a vertical plane. If you feel play, the wheel bearing needs to be replaced. You can also rotate the wheel and if there is a problem with the bearing, you will hear specific noises or feel uneven rotation.
Should I change the wheel bearing myself? At first glance, replacing a wheel bearing is not such a complicated procedure. But this is only at first glance. It is enough that two of the four reasons for premature wear of a wheel bearing relate to errors during its installation. Therefore, if you are not a professional mechanic, it is not recommended to change the hubs yourself. The same special pullers may need much more than one. Based on this, we advise you to pay for the work of a specialist, because if the wheel bearing is installed correctly, it will not be necessary to change it soon.
