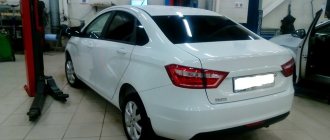
How to remove the front seat of a Lada Vesta Sedan
The process description is suitable for many car brands.
- We place the car on a level surface and open the front doors.
- Move the driver's seat all the way back. Remove two screws (head 10).
- Move the chair forward as far as possible and unscrew the two screws at the back. The size is similar.
- We remove the chair from the car interior and place it on the surface of the workbench for work.
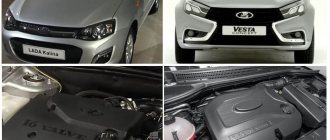
Using the same principle, we remove the front seat of the Lada Vesta.
Unlike “Classic”, “Lux” and “Comfort” chairs have:
- greater rigidity;
- lateral support;
- quality of fabric upholstery;
- the presence of an armrest;
- heating system.
How to remove a toilet seat
Before you begin dismantling the cover, you should prepare the necessary tools. So, you will need:
- hacksaw;
- socket wrench;
- pliers.
The dismantling steps are as follows:
- Unscrew the bolts. Whatever model of toilet seat is used, it is fixed to the base of the plumbing fixtures using two bolts. First you need to try to unscrew them by hand. If this does not work, use a socket wrench.
- If the bolts turn, fix them with pliers.
- If you can't remove the bolts with pliers, cut them off with a hacksaw. But this is a drastic method, so try first treating the bolts with lubricant and try unscrewing them with a wrench again.
Once the cover is removed, you can begin cleaning. As soon as the event is over, the toilet seat can be sent to its rightful place.
Reinstallation steps:
- Installation of bolts. First, they should be secured in the structure of the toilet seat. After which they are installed in the corresponding holes on the base of the toilet and secured with nuts.
- Adjustment. The seat position should be adjusted and the bolts should be tightened tightly. If you are installing a micro-lift system, you must first make sure that the system fits tightly to the base of the plumbing.
Now you know how to remove the cover to clean it. This is quite easy to do. The main thing is that all actions must be performed carefully so as not to damage the seat and the plumbing itself.
The problem of removing the front seat on their car usually arises among car enthusiasts in the following situations:
- Covers must be worn. Many drivers know that it is impossible to put covers on the seat so that they fit completely and follow the curves without removing the seat, since the cover is secured with a special hook under the seat.
Covers are usually changed when selling or buying a used vehicle to restore the interior. Also, new covers are purchased by those car enthusiasts who want to add new, fresh notes to their car. Additionally, a lot of people wash their covers to keep them clean.
- The seat needs to be repaired or reupholstered, and sometimes even replaced.
Owners of used, old cars, whose seats have virtually no lateral support, are usually concerned about replacing seats, which makes the trip not entirely comfortable. Often people do not attach importance to such trifles, but after driving a car with lateral support, everyone wants to install a similar seat for themselves.
The driver’s lifestyle also affects it. The average driver spends about three hours a day behind the wheel, which puts stress on the spine and negatively affects posture. The result is back problems.
So, let's consider a step-by-step mechanism of actions that will help you correctly remove the front seat:
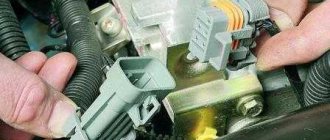
- The very first step is to remove the ground from the battery (negative wire). This is necessary in order not to disrupt the car’s electrical system, because most cars have wires in the seat - electrical wiring, heating and other useful functions.
- Now you need to move the seat as far forward as possible.
- A traditional seat is attached to a “sled”, which, in turn, is most often closed with plugs both in front and behind. These plugs must be removed and pulled out, or lifted up if they are latched.
- The front seat is attached to the “sled” with bolts - this is necessary for transporting the seat back and forth. First you need to remove the caps from the rear mount, and then repeat this action with the front mount. Please remember to also disable the seat belt sensor.
- The last step is to turn off the electrical equipment.
After the above manipulations, the chair is completely disconnected. Now you need to carefully remove it, so as not to damage the plastic interior, and remove it from the car.
Have you decided to remove the VAZ 2110 seat yourself? In this case, this is a step-by-step guide to removing the VAZ 2110 seat:
Move the seat all the way. Use a screwdriver to pull out the ends of the cables.
After we have moved the seat all the way, unscrew the 4 nuts that are shown in the picture.
We remove the brackets, after unscrewing the nuts they come off very easily.
Raise the front edge of the seats; this must be done after the brackets have been removed.
You also need to unscrew the 2 front bolts to secure the slide.
You need to unscrew the 3 rear bolts, but this must be done after you have removed the seat and removed it from the interior.
Remove the locking ring; it is located on the axis of the left slide.
The seat belt buckle bolt must be unscrewed.
We remove the tension spring from the slide.
We also unscrew the fastening bolt on the right slide.
You need to remove the inner sleeve.
And away with the outer sleeve!
How to remove the back seat on a Lada Vesta
The rear seats structurally consist of an upper backrest and a lower sofa. We dismantle them separately from each other.
To remove the rear seat sofa, you must:
- Open the rear doors, and together with your partner, lift the sofa up, thereby removing its front part from the latch.
- Move the sofa towards the luggage compartment, remove the lower hinge from the lock.
- Remove the sofa from the car interior.
Removing the back of the rear seat on a Lada Vesta
- Unscrew the seat belt fastenings on the left and right side of the backrest (bolts at “14”).
- Unscrew the screws at the base of the back (2 in total).
- We unfasten the fastening one by one and remove the backrest from the car interior.
If necessary, we carry out preventive maintenance and install in the reverse order. On the Lada Vesta SV station wagon, the rear seat is removed by pressing the side plastic latches and folding the backrest to a horizontal position.
How to put covers on a Lada Vesta without removing the front seats
Standard set of covers:
- front and rear headrests (2 pieces each, plus one small one);
- front backrests (2 pcs.);
- base (2 pcs.);
- backrest is composite (2 pcs.);
- rear sofa (1 piece).
Before you start putting on the covers, remove the seat pad and the plastic handle for the lumbar support.
- To do this, we press the casing at the location of the handle, and use pliers to squeeze the metal bracket out of the core.
- Pull the cover carefully without damaging the fabric.
- We put the braid under the bottom of the chair, pull it through, and tie it in a knot. We first move the chair forward (backward) all the way for convenience.
- We put the covers on the backrests, tuck the material under the plastic clamps of the headrests. You can remove them with a flat screwdriver or by hand.
- We insert the braid into the gap between the back and the base, pull it tight, and tie the thread.
By analogy, we put covers on the passenger seat.
Folding backrest of the rear sofa Logan 1
This is a small instruction for those who want to slightly improve their 1st generation Logan, make its rear sofa foldable.
You will need the following list of spare parts:
- seat back lock 2108/09;
- buttons for locking doors of classic VAZ (any model);
- fasteners (bolts, nuts, washers). Tie clamps and a half-ring screw will not be superfluous;
- a pair of hood hinges from the classic VAZ 2107;
- pair of hood lock pins 2108/09.
The tool you need is this:
- Bulgarian;
- drill;
- keys;
- screwdrivers;
- step drill.
The sequence of actions is as follows:
- Remove the backrest of the second row of the 1st generation Logan. Unclench the rings that hold the trim in place to expose the bottom of the seat along with the frame.
- Estimate the hinges; if necessary, you can modify them with a grinder. Drill holes for fasteners.
- Cut off the so-called “tails” of the seat bottom fasteners, which are no longer needed. Secure the hinges and align the sheathing with their protruding parts. When returning the fabric to its place, it will be convenient to use plastic ties if you don’t want to mess with the factory rings.
- Remove the plastic covers from the upper tongues of the back fasteners and drill holes for the lock pin. This part itself will also have to be slightly modified. The pin spring will have to be divided in half and the lower cup removed. The pin must be fixed in the hole on the back of the seat.
- Return the backrest to Logan's interior.
- Make marks in the metal for the holes where the lock pins will go, drill holes of approximately 2 cm, and also make holes for the fasteners of the locks, approximately 5-6 mm.
- Next, drill through the metal of the rear shelf for the lock rods.
- Then you need to make the lock rods. For this you will need VAZ “soldiers”, half-ring screws, and plastic clamps. It is important to correctly bend the half-ring screw, since the lock is located at an angle, and it is much more convenient to pull the toy soldiers up vertically.
- By bending the plates with pins, you need to check that the opening and closing of the locks occurs without problems.
- Next, remove the metal cross member and place the door seal from the VAZ 2108/09 onto the exposed metal so as not to scratch the transported goods.
In total, such parts for improving Renault Logan will cost approximately 2 thousand rubles.
Purchase and replacement of rear seat latches Lada Vesta
The luggage compartment of the car is spacious, but sometimes it is not enough to transport oversized cargo. The owners remove the back and dismantle the sofa.
During frequent installation and dismantling, the mountings for fixing the pillow wear out. The material is plastic and will crack if not handled carefully.
| Name / catalog article | Price in rubles |
| Latch 8450006696 (old model) | From 150 |
| 8450030620 (new sample) | From 190 |
| Analogs from General Motors A2656521 | From 170 |
*prices are as of March 1, 2019.
Conclusion
The process of dismantling the front seats and rear sofa is simple. If you follow the described recommendations, installing the covers will take no more than half an hour.
How effective the covers are is up to you to decide individually. Don’t forget that every time you get into the car you rub down the seats, subsequently holes and scuffs form. The service life of the seat is reduced by a third. When selling a car, worn out (damaged) seats serve as the basis for a discount on the price of the car.
Reviews
| № | Positive | |
| 1. | Ivan , 38 years old (drive2.ru), Sverdlovsk: I have a basic modification of the Lada Vesta, the seats are good and practical. In order not to get them dirty and wipe them every time I plant them, I bought covers. | |
| 2. | Vladlen , 43 years old (prom.ua), Samara: after a collision with oncoming traffic in winter, he dismantled the seats. The first time, I was a little doubtful of my abilities, but it turned out to be much easier. | |
| 3. | Peter , 46 years old (autotoday.com), Krasnodar: I’ve been using the car for three years, there are no covers, scuffs are visible on the seats. | |
| 4. | Gennady , 37 years old (rozetka.ua), Rostov-on-Don: I rented the car at a dealership and immediately bought covers so as not to get the seats dirty. It's been two years now and the interior looks like new. | |
| 5. | Dmitry , 44 years old, Kursk (avtoflit.com): you need to buy covers, because the bag is in the cabin, the ash falls, and burns the fabric. Due to the loss of appearance, the value of the car decreases when selling it. | |
| 6. | Vyacheslav , 41 years old, Saratov (autotoday.com): I treat the car with care, but in three years the upholstery has worn out, abrasions are visible in places. Considering that I am going to sell the car in the spring, this will negatively affect the price. They often ask for a discount. We urgently need to buy covers. | |
| Negative | ||
| 7. | Victor , 37 years old (prom.ua), Uralsk: the quality of the material is poor, the car is two years old, and the upholstery looks like it’s 100 years old. | |
| 8. | Fedor , 43 years old, Moscow (avtoflit.com): I heard that you can install front seats on a Lada Vesta from Renault Logan. They are more practical, better quality, more comfortable. | |
| 9. | Kirill , 33 years old, St. Petersburg (drive2.ru): I don’t know how it is in other configurations, but in the basic version the workmanship of the seats is poor, the upholstery is cheap and wears out quickly. | |
| 10. | Vasily , 44 years old, Pskov (autotoday.com): after purchasing a Lada Vesta, do not delay with covers, as the upholstery wears out to holes in a year and a half. | |
Should I put covers on the seats or not?
This is the personal choice of the car owner. But generally, cases have more pros than cons. Of course, if you put cheap covers from the market on beautiful seats, the interior of the car will lose a lot in terms of appearance. But more often it’s the other way around - the standard seat upholstery looks so-so, but good covers give it a more expensive, beautiful look. Often already worn out seats are covered with covers.
Another undeniable advantage of covers is in terms of practicality. They can be removed and washed, wiped, vacuumed. And the standard upholstery underneath is like new. Before selling the car, you can remove the covers if they are frayed and sell the car with apparently new seats. The covers can be changed just like that if you get tired of them. Buy and supply a different color, a different material...