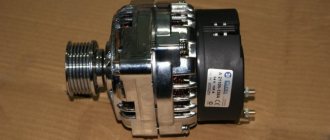
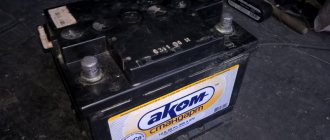
Standard battery
A battery is installed on the Priora from the assembly line; this battery production company has proven itself well in the market. The products of this company, when used correctly, easily overcome the milestone of 5 years of active work.
Characteristics of a standard battery
| Name | Parameter |
| Manufacturer | AKOM (Russia) |
| Voltage (V) | 12 V |
| Starting current (A) | 510 A |
| Capacity (Ah) | 60 Ah |
| Cost, rub) | 3000 rub |
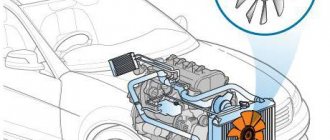
A few words about how the battery-generator tandem works
Everyone, even a novice driver, knows that the battery interacts with the generator. After starting the engine, the battery goes into constant charging mode. After the engine speed increases, the voltage at the generator output also increases, which is not a “hum”...
In order to prevent the above described, a small relay-regulator is installed in the rotor excitation circuit, the task of which is to reduce the current to the optimal level, regardless of the engine speed. As a result, the voltage is maintained at the required level. The battery light comes on when there is no charging from the generator.
So, let's simulate the situation. You started the engine, but the battery light did not go out. What's the matter?
- Faulty relay-regulator, diode bridge;
- Poor tension of the generator belt, critical wear or belt slippage. Wear (play) of the generator bearing;
- Blown fuse or poor contact;
- Poor contact at the battery terminals, at the generator terminal or at the ground wire;
- Open circuit of the generator excitation circuit, serious wear of the generator brushes or brush holders;
- Wearing out the ignition switch is an option, but in this case several lights will light up at once.
Reasons for battery failure
There can be many reasons for battery failure. Below is a list of reasons:
- Overcharge. Occurs due to a faulty car generator.
- Overheat. Most often it occurs in hot summer months; the temperature of the electrolyte exceeds the permissible values, which leads to damage to the battery plates.
- Low voltage in the car network. Occurs due to a malfunction in the generator.
- The battery is completely discharged. Occurs due to a broken alternator belt or when the side lights are on and the engine is off.
- Freezing. Occurs in winter if the battery is left in the cold for a long time.
Diagnostics and repair
When the battery charging indicator light is on, it is necessary to carry out diagnostics and determine the reason for its lighting. Initially, you need to make sure that the battery is charging or the light is signaling due to some other problem, i.e. determine whether the generator is working or not.
There are a couple of simple ways to check. If trouble occurs on the road, you need to pay attention to lighting devices (headlights, panel lights, interior lights); when there is no charging, the battery runs out and the brightness of the glow decreases. Can be used at night when the headlights are on (more noticeable).
During the day, you can use the “old” effective method, which does not require any instruments and equipment, which will certainly answer whether the generator is working or not. The diagnostic sequence is as follows:
- open the hood;
- start the internal combustion engine;
- turn on consumers, providing load on the network (headlights, heated rear window, etc.);
- remove the negative terminal from the ABK;
- if the engine continues to run and the headlights are on, then the generator is successfully generating electricity that can power all systems and charge the battery;
- If the engine stalls after removing the negative terminal, then the electromechanical power source is broken.
After making sure that the generator does not produce electricity, it must be carefully examined, installed and repaired. It is better to carry out the procedure in a garage and have the minimum necessary tools.
Generator belt
You need to start with the simplest action, i.e. Check the integrity of the drive belt and its tension.
The tension is checked by pressing the belt with a finger, at an equal distance from the pulleys, with a force of about 8 kg. The deflection rate of an old belt is up to 5 mm, a new one is up to 2 mm. If it falls within these parameters, then it’s fine; if not, then it needs to be tightened up. A too-tight belt won't do any good either. It will act on the bending of the shafts of the generator, water pump and other attachments, if any.
The integrity of the belt, if there is no obvious damage, is checked after its removal. Having loosened the tensioning device (it can be on the generator or installed separately in the form of rollers), remove the belt, turn it inside out and bend it. We carefully examine the inside; if there are cracks, the belt must be replaced.
Current collection brushes
Having finished with the belt, we move on to the brushes. On most vehicles, the location of the generator on the engine allows the brush block to be removed without removing it. The brush holder and the relay regulator are manufactured as a single unit.
To remove the brushes, you need to de-energize the power system by disconnecting the terminal with the minus sign. Next, remove the wire of the voltage regulator relay from the generator connector and unscrew the two screws securing the “chocolate”. After this, remove the relay and inspect the brushes. Both the contact planes and the brushes as a whole must be smooth, of a regular rectangular shape without chips. The length of the protruding part of the brushes must be at least 40 mm. If one of the requirements does not meet, they must be replaced. The installation process is in reverse order.
Voltage regulator
After diagnosing the brushes, you can immediately check the voltage regulator, you just need to put it in place. The check is not difficult, you can do it yourself. To do this, you need to have a multimeter with you.
The point of the test is to measure the voltage at the output from the generator at different engine speeds. Procedure:
- start the engine;
- in idle mode, measure the voltage, the limit should not go beyond 13.2 to 14 V;
- increase the crankshaft speed to 2000 - 2500 rpm, the voltage values should be in the range from 13.6 to 14.2 V;
- from 3500 rpm of the crankshaft and above, the voltage on the generator should not exceed 14.5 V.
If, during measurement, the parameters coincide with the above limits, then the regulator is normal and works perfectly in tandem with the electrical machine; if there are discrepancies, then you should think about changing the regulator.
It should be remembered that the voltage supplied from the generator under load (high beam headlights, heater or air conditioner, heated windows, etc.) should not be lower than 13.2 V, and without load at maximum speed no higher than 14.8 V.
There is an option to check the voltage regulator relay for operability in a dismantled state. To do this, you need to have a power supply with adjustable voltage and a 12-volt light bulb. The circuit is simple, shown in the figure.
If the relay is working properly, the light will glow in the range from 12 to 14.5 Volts. Before and beyond these values, it should not light up, otherwise the relay-regulator does not work.
Diode bridge
The diode bridge is designed to rectify the current supplied from the generator to the vehicle's power supply system, and its breakdown significantly affects the quality and quantity of electricity generated.
Before you start checking the rectifier in detail, you need to make sure that the bridge circuit is not short-circuited.
To do this, attach the ohmmeter probe to the generator terminal marked 30, and install the second probe on the housing. With a normal working diode rectifier, the reading on the device should tend to zero.
After making sure that there is no short circuit, check the diodes for breakdown. It is better to remove the diode bridge from the generator when carrying out this procedure, otherwise the readings may not correspond to reality, and it is more convenient to manipulate. The semiconductors in the rectifier are conventionally divided into “positive” with a red housing and “negative” with a black housing. Each diode needs to be checked.
Procedure:
- Set the multimeter to measure resistance in the range from 1 to 2 kOhm.
- Separately, each diode is checked with probes, touching the outputs of the semiconductors.
- First, the diode is checked in one direction, then the probes are swapped and checked in the other direction.
- Serviceable diodes in one direction should show a resistance from 400 Ohms to 800 Ohms, in the other “infinity”.
- If the measuring device shows resistance in both directions or “infinity,” then the diode is damaged.
The damaged bridge is replaced with a new one.
Bearing
A bearing malfunction is a purely mechanical failure, leading to unpleasant consequences, including mechanical damage to the rotor and stator of an electrical machine. Bearing failure occurs due to a highly tensioned belt, poor lubrication, and lack of protection against dirt. This malfunction cannot be ignored; it will make itself known as soon as it appears. In the initial stage, the generator pulley will wear out the belt intensively, then the generator may simply jam. To prevent this, you need to do an inspection more often - check the play in the generator bearing.
It’s easy to check, first inspect the belt to see if there is obvious wear, then with the belt removed, move the generator pulley up, down and from side to side, checking the play. If so, the bearing needs to be replaced. To do this, the front cover of the generator is removed, the bearing is pressed out, a new one is pressed in and the cover is put in place.
There is no contact at the generator terminals
To be even more convincing, once we are ready to fully examine the generator, it is necessary to check the positive contact of the generator output. This may also cause the battery charging indicator light to light up. This happens because under the influence of an aggressive environment and vibration, this contact oxidizes and corrosion appears on it, preventing the normal flow of current from the electromechanical power source to the network. Therefore, in any case, it is better to do prevention after examination. Clean, if possible tin the ends of the wires and secure firmly.
In parallel with the preventive maintenance on the generator, it would not hurt to completely inspect all the wires coming from it. Inspect the terminals, insulation and, if necessary, repair or replace.
Do the same with the wires to ground.
Open circuit of the generator
There are cases of generator phase failure, most often this happens at the points where the end of the winding with the diode bridge is attached. Therefore, after fixing the problem, it is worth checking the remaining bolted and soldered connections. If there are any violations, then it is necessary to clean the bolted connections from corrosion and tighten them well; the soldering should be well tinned and soldered.
It wouldn’t hurt to check the stator winding for insulation resistance and interturn short circuit. All measurements are made with an ohmmeter or multimeter.
If during measurement the parameters do not correspond to the norm, then the generator must be rewinded, or it can also be replaced with a working unit. The insulation resistance should tend to infinity, and the resistance of the turns is indicated in the passport of the electrical machine and should not deviate.
Alternator belt tension
The belt is tensioned by special tension rollers or a belt tensioner on the generator, depending on the engine design.
The photographs show a pair of belt tension adjustment devices, and the degree of tension and testing are described above.
Battery light is on
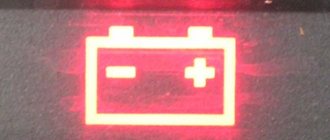
On the dashboard of the Lada Priora there are a large number of different indicators indicating any malfunctions or the state of the engine. Quite often it happens that a red lamp with a picture of a battery may light up on the dashboard.
This warning light indicates that there is no charging current to the battery, that is, the battery does not receive a charge, and the car continues to operate from the battery, which will soon lead to its complete discharge and the engine stopping.
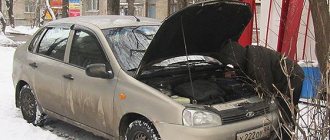
What to do when the battery light is on
- Check the integrity of the alternator belt. If the belt breaks, you need to go to the nearest service station and have the belt replaced.
- If the belt is intact. Check the generator connectors for reliable contact connections.
If the cause of the breakdown cannot be determined independently, you must contact an auto electrician for further diagnosis of the vehicle.
If this breakdown occurs on the highway, then the distance that can be driven on the battery can be increased in several ways. To do this, you need to remove as much load from the battery as possible.
Identification of faults and their causes
The illuminated battery light informs the car owner that a malfunction has occurred. As a rule, failures that result in a lack of charging occur either in the generator or in the car battery itself.
Battery fault. It is quite simple to identify deviations in the operation of the battery itself; you should remove the unit that aroused suspicion and put another one (new or working) in its place. And compare the dashboard indicators: if the light goes out, we can safely conclude that the problem is in the battery itself. And this problem can arise when the plates become sulfitated, which in some cases can be eliminated by repair. If the plates are shorted, the device must be replaced.
How to understand what exactly caused the light bulb to burn? How to fix the problem?
If the battery light is on while the engine is running, do not turn it off, open the hood and check the voltage at the battery terminals. If charging is supplied to the multimeter, the voltage should be 13.5-14.3V. If there is no charging, the voltage will be much lower - approximately 12V.
To solve the problem you will need:
- Two screwdrivers (flat and Phillips);
- “Control” (12V light bulb);
- Multimeter;
- Pliers, a knife and sandpaper to clean the contacts.
Useful tips
To prevent your car from having problems charging the battery, use the following tips:
- Don't ignore your car's dashboard signals. In this case, you will be able to solve the problem at the initial stage of its development.
- Inspect the alternator belt regularly. The correct operation of all electrical equipment on board directly depends on it. If there are any defects, replace it as soon as possible.
- Check the voltage from the generator to the battery. If you notice a discrepancy, diagnose the on-board network.
- Periodically pay attention to the condition of the battery terminals. If you notice oxidation, eliminate this defect. They can be treated with WD-40.
- Isolate the generator and battery from water to prevent short circuits. Leave engine washing to professionals.
- When repairing the battery charging circuit, do not use cheap spare parts.
To summarize, we note that the battery is the most important element in the car’s electrical network. Therefore, you should carry out timely maintenance of the charging circuit and, if necessary, change the necessary parts. In this case, you will ensure a proper system of work. In the article, we told you about the main malfunctions that can cause the battery charging lamp to light up and what to do about it. We hope our recommendations will help you in solving the problem at hand.
Why did the battery light on the instrument panel come on?
The main part of the battery energy is spent on turning on the ignition system and starting the engine. Starting the engine is accompanied by a significant consumption of the battery's electrical charge, and to ensure repeated starting of the engine, the vehicle's electrical network is equipped with a recharging system. After starting the engine, the generator generates electricity, part of which is supplied to the battery to restore charge.
Recharging the battery requires constant monitoring by the driver. If the system is operational, then when the ignition is turned on, the battery charging warning lamp lights up for a few seconds at idle, which signals that the generator-battery circuit is in good condition. After the engine starts, the battery indicator light should go out, indicating that the battery is charging.
If the battery warning light continues to light or lights up again on the instrument panel, then action must be taken. Otherwise, the car may stall on the way, or after stopping the engine again, it will not be possible to start it again.
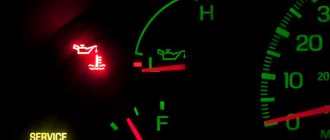
The battery light may light differently. In one case, it does not go out after starting the engine or lights up brightly while driving. In the other, it burns only under certain engine operating conditions. For example, it glows dimly at medium speeds, but as the speed decreases, the intensity of the glow increases.
Self-diagnosis of battery charging systems
A set of necessary tools from the following list:
- multimeter;
- indicator light 12 V;
- pliers;
- Phillips and flat slot screwdrivers;
- knife;
- sandpaper.
DIY tool for diagnosing battery charging systems
Procedure for a blinking charge light that does not turn off or goes out
Modern cars have a complex electronic engine control system that does not tolerate an amateurish approach. It is strictly forbidden to check the proper operation of the generator by removing one of the battery terminals. Due to a sharp surge in voltage in the on-board circuit, many elements of the battery charging and engine operation control system can fail. The most reliable, safe, and effective way to check the battery charge is to use a special measuring device - a multimeter.
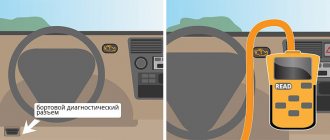
Control measurement with a multimeter
Although this device can measure many parameters of electric current, in this case we are only interested in one characteristic - voltage. Knowing its value, we can make a conclusion about the technical condition and performance of the generator.
To measure voltage using a multimeter, you need to turn it on in DC voltage measurement mode
- First you need to check the voltage using a multimeter at the battery terminals with the engine off. By comparing the readings of the device with the data, you can judge the degree of discharge of the battery.
- Then the low beam of the headlights and the heating stove are turned on at minimum speed. The voltage at the terminals is measured again. It will decrease, but should not be less than 13.5 V. If the voltage value is less than this value, you need to find out the reason for the abnormal operation of the generator.
If everything is normal with the electrical equipment of the machine, then after 5–10 minutes the electronics will drop the voltage to normal: 13.5–14.0 V
- Check the condition and tension of the generator belt.
- Remove the relay regulator from the AC source and check the condition of the brushes. If their length is less than 5 mm, they must be replaced.
- Carefully inspect all contacts and, if necessary, clean them with sandpaper.
- Using a signal light, ring all the circuits that fit into the terminals of the battery charging indicator light.
- Then you should start the engine and check the availability of charge provided by the generator. Measurements are also taken at the battery terminals while the engine is idling. Voltage values should be 13.7–14.3 V.
Table: dependence of the degree of discharge on the voltage at the battery terminals
| Battery terminal voltage volts | 11,95 | 12,05 | 12,21 | 12,37 | 12,57 | 12,7 |
| Battery discharge level in percentage | 90 | 70 | 50 | 30 | 10 | 0 |
Trouble-shooting
If, during diagnostics, we were able to establish the reason why the battery lack of charge light comes on, you can often fix the problem yourself. Let's look at the most common ways to solve the problem:
- To begin with, the discharged battery must be charged using an external charger. If there is a ROM, try starting the engine using it. If the light went out, the reason was precisely the dead battery.
- Oxidized contacts are cleaned with sandpaper. After wiping them with a rag, the contacts are securely tightened, having previously been treated with an anti-corrosion agent.
- When the belt is loose, tighten it using the adjusting screws. If belt defects (delaminations, breaks) are detected, it must be replaced.
- If an open circuit is detected at the diagnostic stage, the damaged wire is replaced with a intact one, taking into account its load.
- The blown fuse is replaced with a new one. Sometimes the reason for the lack of charging of the battery lies in the weakening of the fuse contact, which is solved by installing it in the seat.
If the cause of the battery indicator light has been eliminated, you should start the engine and let it idle for about 10 minutes, then measure the voltage at the generator output terminals.
Source
Trouble-shooting
If, during diagnostics, we were able to establish the reason why the battery lack of charge light comes on, you can often fix the problem yourself. Let's look at the most common ways to solve the problem:
- To begin with, the discharged battery must be charged using an external charger. If there is a ROM, try starting the engine using it. If the light went out, the reason was precisely the dead battery.
- Oxidized contacts are cleaned with sandpaper. After wiping them with a rag, the contacts are securely tightened, having previously been treated with an anti-corrosion agent.
- When the belt is loose, tighten it using the adjusting screws. If belt defects (delaminations, breaks) are detected, it must be replaced.
- If an open circuit is detected at the diagnostic stage, the damaged wire is replaced with a intact one, taking into account its load.
- The blown fuse is replaced with a new one. Sometimes the reason for the lack of charging of the battery lies in the weakening of the fuse contact, which is solved by installing it in the seat.
If the cause of the battery indicator light has been eliminated, you should start the engine and let it idle for about 10 minutes, then measure the voltage at the generator output terminals.
Content
Monitoring the battery charging process
To correctly understand the reasons for the unstable operation of the lamp that controls the charging progress of the battery, you need to understand the interaction of the generator and the direct current source. When the engine is running, the battery is constantly charged with a voltage of 13.6 to 14.2 volts. The charging current is generated by the generator. The voltage of the output electricity depends on the speed of the generating device. The higher the speed, the greater the voltage. To limit the voltage within specified limits, a regulator is connected to the rotor winding circuit. It is this that stabilizes the output voltage, which is then supplied to the battery terminals for charging.
If the charging current is constantly supplied within the specified limits to maintain the battery in working condition, the battery charging indicator lamp should not light up. A constant glow of the light indicates that the generator is not working or that the supply wires are broken. The most common cause of generator failure is a weakened or torn drive belt.
Video: car battery charging system
Generator circuit
The operation of the generating device is based on the principle of electric magnetism. Structurally, there are two main parts with the help of which alternating current is produced.
The rotor and stator generate current into the vehicle's on-board network
These are the stator and the rotor. The rotor is driven by a drive belt from the engine crankshaft. The stator is stationary and consists of windings that are attached to the generator housing. Together they form a structure in which the rotor is centrally located inside the stator. There is a gap between them, which allows the rotor to rotate at enormous speed.
Scheme of operation of the generator and connection of the charging control lamp
The stator includes 3 windings that form a three-phase current system. The terminals from the windings are connected to the diode bridge separately, as in the diagram above.
The rotor consists of many electromagnets, which together create a powerful magnetic field. It crosses the stator windings, and a three-phase alternating current is generated in them. The output voltage depends on the speed and is controlled by a regulator, which is built into the system for supplying current to the rotor. To convert alternating current into direct current, a diode bridge consisting of diode rectifiers is used. They only allow current to pass in one direction.
Current is supplied to the electromagnets of the rotating rotor using two copper-graphite brushes in contact with copper slip rings located on the rotor shaft. As the speed increases, the relay-regulator reduces the current in the rotor, thereby reducing the magnetic field.
The battery charging control lamp is connected to a set of diodes that are connected in parallel to each of the three stator windings. This is a separate circuit and the amount of current here is small, but sufficient to light the LED indicator. So, to the light bulb, on one side there is a positive wire from the general network of the charging system, and on the other contact there is a positive wire from the ignition switch. If equal voltage is applied to both sides, the light bulb does not light. If there is no voltage on one contact, the light comes on. If the charging current begins to pulsate or decrease, the light begins to flash or light up with less brightness.
Signal lamp
On many domestic cars, for example, VAZ 2109, VAZ 2110, VAZ 2114, VAZ 2115, an old type lamp with a filament is installed as a battery warning lamp. On these models, it is possible to change this lamp when dismantling the instrument panel if it fails.
However, some car enthusiasts, due to inexperience or ignorance, install an LED lamp instead of an incandescent lamp. This leads to the fact that after starting the engine and idling, the lamp (at a voltage of just over 12 Volts) continues to burn. However, if you force the engine speed up to about 2000 rpm, the battery light goes out.
New Lada: Technical characteristics of Lada Priora
Common reasons why the battery light is constantly on
These include the following cases:
- The alternator drive belt is loose, worn or torn;
- the fuse has blown in the section of the circuit from the ignition switch to the control light (in this case there is charging);
- contact is broken in the connector blocks of the mounting block;
- malfunction of the relay regulator;
- diode bridge malfunction;
- malfunction in the circuit of additional diodes;
- break in the current supply circuit to the rotor electromagnets;
- poor contact at the battery terminals;
- lack of supply current at the output of the generator;
- the generator brushes are worn out;
- there is no ground on the negative wire.
If the generator is not working on a strong battery, the car will be able to drive for about 2.5–3 hours during the daytime, if you do not turn on the headlights, air conditioning, wipers, or audio system.
The source of many faults in the battery charging system is the generator voltage regulator relay
The light may sometimes come on when the turn signal is turned on.
The most common reason is a malfunction of the diode bridge, poor contact in the rotation fuses, or poor contact in the ground wire of the instrument panel. It is necessary to check the contacts of all terminals on the wires coming from the generator. The problem must be fixed. Indeed, if the generator malfunctions (a break in one of the three diodes), the battery will no longer receive a full charge and after some time will be completely discharged every time the turn signals are turned on and/or off.
The light bulb goes out and burns at full intensity
A battery light that barely burns at half intensity while the engine is running indicates a generator malfunction: the diode bridge or insulation in one of the stator windings is broken. Less commonly, there is a problem with the ignition switch. The key cannot turn all the way due to accumulated dirt. A few drops of WD-40 “liquid key” into the ignition key hole will alleviate the situation. Sometimes it may be necessary to repair the car's electrical wiring and timely diagnose a decrease in the signal to the indicators.
The light comes on when the speed increases
This is a signal that charging has stopped when you press the gas pedal. The most common cause of this malfunction is wear of the slip rings on the generator shaft. There are problems with the belt, brushes or bearings of the generator. The malfunction must be found and eliminated. Otherwise, due to loss of charging, the battery may fail at the most inopportune moment.
The light comes on at idle
The light comes on as soon as the car starts. Sometimes the reason is simple. When the engine is idling, powerful current consumers are turned on: air conditioning, headlights, windshield wipers. The load on the generator increases sharply and the battery simply does not have enough charge. The light starts flashing periodically. If the alternator belt is loosely tensioned, then when you turn on the headlights or air conditioning, you can hear the squeal of a slipping belt. But a battery light burning at low speeds can also indicate a malfunction of the relay regulator or rectifier bridge. In any case, the fault must be found and eliminated.
The light flashes periodically when the engine is cold
A flashing battery light requires you to pay special attention to the generator. Perhaps the brushes or copper slip rings on the armature shaft are worn out. Perhaps there is a bad contact in one of the phases of the diode bridge. Often the cause of this malfunction is loosening of the nuts securing the diode bridge contacts or oxidation of the closing surfaces of the contacts.
The battery charge control lamp lights up when the headlights are turned on.
The light comes on when the headlights are turned on
This is the reason why the generator cannot produce rated voltage when the load increases. It is necessary to check the AC source for a break in one of the phases of the diode bridge, wear of the commutator rings or brushes.
The light remains on when the ignition is off
In this case, the current to the light bulb can only come from the ignition system. It is most likely that there is a problem with the ignition switch, the switched on contact of the ignition unloading relay or the car alarm.
And the light is on and charging is in progress
In this case, it can be assumed that there is a loss of current in the battery lamp circuit or at the contact from the generator, or at the contact from the ignition switch. The reasons may be different: the wire is broken or has fallen off the connector, the contacts in the connecting blocks have oxidized or rusted. Very rarely, the cause may be a relay regulator.
Let's look at different situations in which the battery light comes on.
- Situation one - the on-board voltmeter shows the charge, the battery light does not light up, the multimeter shows 12V at the battery terminals, while the battery itself is completely discharged.
Treatment: We strip the high voltage terminals and wires, after which we measure the voltage again. If this does not lead to anything, check the voltage at the “30” terminal of the generator. Connect one electrode of the multimeter to the generator terminal, the second to ground. If in this case the voltage is slightly higher than on the battery, “stripping” the “30” terminal. If necessary, change the wire that goes from the generator to the battery.
- Situation two - the light and the light indicate charging, but the battery is discharged. The voltage on the battery is normal (
14V), but when there is a load (signal, headlights, etc.), the charging arrow jerks to the extreme left position. The reason is poor tension of the generator belt, or a problem with the pulley or bearing itself.
- In addition, the cause of the above situation may be a breakdown of one of the diodes or a break in the stator winding. Do the following - turn off the ignition, then check the diodes with a multimeter; if a breakdown is detected, replace them.
- It would be a good idea to check the generator brushes. To do this, simply remove the brushes and check their length, if the length is less than five mm. I recommend replacing the generator brushes.
- Situation three - after turning the key in the ignition, the battery lamp does not light up, while the charge sensor does not work, and the battery does not charge. The most likely cause is a blown fuse. It is designated “F10”, its rating is 10 Amp. If after replacing a new fuse you do not see any result, the reason may lie in the lock itself or the ignition relay.
- Situation four - after turning the key there is no charging, but all devices are functioning, the battery light does not light up.