Using the Scanner
Using a scan tool is the easiest way to reset your check engine light. Here are 5 simple steps:
- Connect the scan tool to the OBD connector under the steering column. A laptop or tablet with the appropriate software is installed in the holder;
- Then turn on the car’s ignition and turn on all the gadgets accordingly;
- On your mobile device, in the appropriate section, press the “READ” button to view engine error codes. We write down the codes with a pen in the order in which they were received. This will be necessary for subsequent repairs.
- We delete the error code. Press the “ERASE” button on the scanner. The Check Engine light will turn off when all error codes are cleared. Some scanning tools have many options, such as freeze frame, which captures the sensor readings. When deleting codes, these readings will also be deleted. Note: in some scanners, the option to clear codes may be automatic and the “CLEAR” or “YES” button instead of the “ERASE” button.
- Be sure to turn the ignition on before clearing codes.
What to do if the Lada Priora check engine light is on
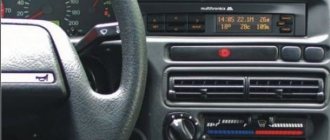
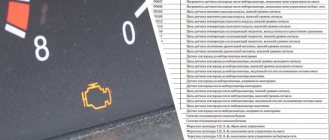
There is an interesting icon on the Priora instrument panel. Upon closer examination, it is clear that this is the silhouette of a car engine. Every experienced driver, looking at him, will casually say, “Ahhh, Check.” But at the same time he will not be able to clearly explain what kind of “Chek” this is, and what it serves and why it caught fire.
You can hear many interesting versions. The most common one is that if it lights up, this is a signal of a breakdown of the mass air flow sensor (mass air flow sensor). Well, and a dozen more equally exotic versions. So what is this alarm? And in what cases does it light up? And most importantly, what to do in this case?
PRINCIPLE OF OPERATION OF CARS WITH ECM (ELECTRONIC ENGINE CONTROL SYSTEM)
Cars with conventional carburetor engines have been replaced by cars in which fuel enters the cylinders through a system of nozzles (injectors). And sparking occurs not in the distributor (distributor), but in a special ignition module. This rather complex system is controlled by a special intelligent unit. You could say it's a computer. It is he who sends signals to trigger all actuators. Therefore, the entire ECM system can be divided into three parts.
- Computer (ECU).
- Actuators (injectors, spark generators, etc.).
- Sensors (Air, oxygen, throttle opening, crankshaft position, etc.)
PURPOSE OF THE CHECK ENGER WARNING LAMP ON PRIOR
What does the “Check” indicator light have to do with this system? The most direct. The fact is that this lamp is directly connected to the ECU (electronic control unit). This warning light comes on when the ignition is turned on. This gives a signal that the main unit is ready for operation. After starting the engine, after 2-3 seconds, the lamp goes out. This means that the motor and all devices are operating normally. And you can safely continue moving.
IF THE LIGHT IS ON
But when the warning light does not go out while the engine is running, or lights up while driving, this means that one of the computer-controlled components is not working correctly, or has generally failed. Literally, “Check Anger” means check the engine.
It is a mistaken opinion that the “Check” lights up when one sensor breaks down. You need to know that this signal can appear for a very large number of reasons! In general, if you read it correctly, from English, this signal, “Check Angier,” means “Check Engine.”
HOW TO DIAGNOSIS THE ECM
Of course, the most correct action if the “Check” signal lights up on the instrument panel is to go to a service center for diagnostics. There, through a special adapter, a desktop computer or laptop equipped with a licensed program will be connected to the Priora ECU. And they will be able to “talk” to the Priora ECU.
However, at the moment, small mobile devices have appeared in the car accessories market. Of course, they are not able to conduct a full-scale diagnosis of the Priora. But they are quite capable of reading error codes from the ECU memory. Then you just need to decipher the codes correctly. This is the case if the diagnostics provides them in digital format. In this case, you can turn to the Internet.
THE MOST COMMON REASONS WHEN THE CHECK ENGER LIGHT COMES ON ON A PRIOR
But the Priora has the most common breakdowns. To begin with, it is worth listing the main sensors included in the Priora ECM.
- Mass air flow sensor (MAF).
- Throttle position.
- Camshaft positions.
- Crankshaft.
- Knock sensor.
- Oxygen sensor (2 pcs.).
- Speed.
- Rough road sensor.
And also the actuators can make the “Check” light up.
- Idle air control (IAC).
- Fuel injectors (4 pcs.).
- Ignition modules (4 pcs.).
- Canister valve.
- Electric fuel pump.
All these components are activated through the computer, and therefore, if their operation fails, the “Check” light immediately lights up.
MOST COMMON ECU ERRORS THAT CALL THE “CHECK LIGHT”
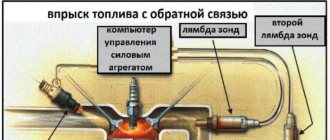
In the first place, of course, there will be malfunctions of the oxygen sensor. These devices are installed in the exhaust manifold (sensor No. 1) and after the fuel afterburner (catalyst), No. 2. They read the percentage of CO content in the exhaust gases. Due to soot from burnt fuel, they most often deteriorate. The car begins to lose power, the “Check” light comes on. After all, the computer receives a signal that there is too much fuel.
Alas, it is only possible to accurately determine the reason why the signal may have come on using software diagnostics.
On the second place, the mass air flow sensor deservedly stands. A thin thread made of a special alloy changes resistance depending on the amount of air passing through the nozzle. The malfunction is characterized by severe engine malfunction. The revolutions “float”, the power drops, and, of course, the “Check” light comes on. And also checking only with diagnostics through the program.
And the camshaft sensor closes the top three. Its malfunction is characterized by an increase in startup time. Sometimes there may be slight jerks when accelerating. Again, there is no way to determine a breakdown without a program.
PRIORA ACTUATORS
Here in the first place is the IAC, a device that regulates the supply of additional air bypassing the throttle valve. It works by means of a micromotor that extends and retracts the shutter mechanism. If there is a malfunction, the engine will not start at idle. Or, conversely, it increases the speed to 1500-2000. "Check" lights up
Then the ignition modules. When it fails, the motor “troubles” and the speed “floats”. Power is lost. And as a result, the “Check Anger” icon lights up.
Faulty injectors give similar symptoms. It is interesting that all breakdowns of actuators, with certain skills, can be diagnosed without a computer. At least they will make the “Check” signal light up. This is done by either replacing it with a known-good unit, as with IAC, or by replacing it in places, as with ignition modules or injectors. And only the adsorber valve requires connecting equipment.
So what can we say. There is only one conclusion. If the “Check” indicator light on the instrument panel lights up, you need to do computer diagnostics in any case. This is the surest way out.
Battery disconnect method
Disconnecting the battery is an old way to reset the check engine light. Here are three steps to clear the check using this method: Step 1: Disconnect the cables from the battery. At this point, you should use a wrench to unscrew the positive and negative cables.
Step 2: Discharge the remaining electricity. The next thing you should do is press and hold the car horn for about 30 seconds. This action will help drain the car battery.
Step 3: Wait and reconnect the battery. After disconnecting the battery cables and draining the remaining electricity, all you have to do is wait about 15 minutes and then plug the battery back in. Error codes will be cleared. (Note: This method may not work on some vehicles.) If after this procedure the “check” lights up again, this may mean that the problem is still much more serious.
Allow the check engine light to go off on its own.
Wait until the “check” goes out on its own. The simplest method because you don't have to do anything. The computer system in most vehicles will automatically recheck for problems that may activate the error light. If it is a minor problem, it will automatically correct itself and the check will go off. However, if the check light is still on after three days, you need to apply the methods mentioned above to reset it.
If this continues to happen despite the following reset procedures, you should take your vehicle to your nearest auto repair shop and have it diagnosed by a professional mechanic. Professional diagnostics use more sophisticated tools and can identify precise problems.
REMEMBER: You can always contact our car service center, where your car will be happy to receive professional technical assistance. You can also make an appointment with us for a scheduled technical inspection! Please familiarize yourself with our car repair and diagnostic services.
How to reset a check on a Priora yourself
Probably every VAZ owner has encountered such a problem when, out of the blue, the “chek” error comes on. Here many people immediately panic. Don't worry, there's nothing wrong with it. Firstly, this error appears when any sensor fails (here you will have to suffer and determine which one), but all this is determined by changes in the behavior of the car: dynamics, consumption, etc. Secondly, this error appears when the wrong mixture enters the combustion chamber. This can happen in two cases: some sensor is not working correctly, or low-quality gasoline. Try using higher quality fuel the next time you fill up.
However, even if you correct the problem, the “check” will continue to light up. Many people go to computer diagnostics to clear an error, where they pay about 150-200 rubles per minute. Although it’s not a lot of money, why? If you can reset the error yourself, spending the same minute on it, and you don’t have to go anywhere. Don’t know how to reset the check error yourself? Very simple, read below.
We reset the error.
- To do this, turn on the ignition without starting the car.
- Open the hood and remove the positive terminal of the battery.
- We wait from 10 seconds to a minute and seat the terminal back.
- Close the hood.
- Turn off the ignition.
- Turn on the ignition and start.
And then a miracle, the error light stopped lighting.
Even if you cannot decide why your check light came on, do not immediately run to diagnostics. Try to reset this error using the method described above. There are simply cases of accidental operation (there was an impurity in gasoline and the like). And then after the reset the error simply will not appear again. And if, nevertheless, there is some kind of problem, then the “check” will pop up again, after 50 kilometers.
Check Engine Light comes on when your vehicle's computer detects a problem with the powertrain. This may indicate a serious or minor complication, but ignoring it will definitely make the problem worse, leading to significant damage and costly repairs. You can avoid all troubles if you know the reasons for the signal. However, it sometimes does not turn off despite solving the problem. In this case, it won’t hurt you to find out how to reset the “check”.
Most drivers get annoyed if the check light still does not go off, even if the car problem has been corrected. In this case, your car's computer is faulty and a little intervention is required to resolve the issue.
What's the result?
Ease of use and accessibility allow adapters for the diagnostic connector to significantly simplify the procedure for checking a car, reading and decoding ECU errors. It is also worth noting that the error can be quickly reset without having to disconnect the battery terminals, erase a critical error, etc.
Finally, we would like to add that among the commercially available adapters, there are devices that may not read errors recorded in the ABS unit and Airbag airbag modules. In other words, information on these items may not be available. For this reason, before purchasing an adapter, it is necessary to separately clarify the possibility of reading errors from the memory of the above and other ECM modules by one or another device.
Why does the check light light up on the dashboard? Is it possible to continue driving a car if the check engine light is on? What should you check first?
The main signs by which you can determine problems with the DPKV crankshaft position sensor. Causes of failures, breakdowns, self-check.
For what reasons may misfire of the fuel-air mixture occur in one or more cylinders? Fault diagnosis, recommendations.
Computer diagnostics of a car engine and other units: why it is necessary and what malfunctions it identifies. How to check the car yourself.
The main reasons that lead to a lean mixture. A lean mixture on carburetor and injection internal combustion engines, as well as on engines with gas equipment. Diagnostics, repair.
Operating principle of the ECU, board design and connectors. ECU data processing, CAN bus. Causes of malfunctions of the engine control unit, repair or replacement of the unit.
Using the Scanner
Using a scan tool is the easiest way to reset your check engine light. Here are 5 simple steps:
6.2.2 Self-diagnosis system and fault codes
6.2.2. Self-diagnosis system and fault codes
Hand-held scanners are the most convenient and versatile devices for checking engine control systems on later models.
OBD-I systems (pre-1995 models)
The electronic control unit has a built-in self-diagnosis system (On Board Diagnosis (OBD) system), which serves to troubleshoot the system and turns on the engine warning light on the instrument panel if a malfunction is detected. The fault code is stored in the memory of the electronic control unit and is available for reading.
Reading fault codes for OBD-I systems
To read the fault codes stored in the memory of the electronic control unit, connect the STI and GND terminals of the diagnostic connection connector.
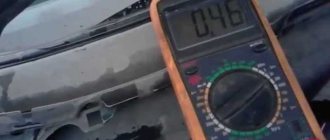
Connect a voltmeter to the STO terminal and vehicle ground. Turn on the ignition and count the number of times the gauge needle deflects or the check engine light blinks. For example, code 34 will be displayed as 3 long flashes of the light, pause, 4 short flashes.
Clearing OBD-I DTCs
To clear fault codes, disconnect the negative battery cable and depress the brake pedal for more than 5 seconds.
OBD-I DTCs (1993-1995 models, except 1994 and 1995 models with 4-cylinder engine and automatic transmission)
OBD-I Trouble Codes (1994 and 1995 Models with 4-Cylinder Engine and Automatic Transmission)
OBD-II systems (models since 1996)
Diagnostic connector for connecting the OBD-II system
The connector is located under the instrument panel on the driver's side.
Models since 1996 have a second-generation OBD-II self-diagnosis system. Access to the electronic control unit of this system can only be obtained using a special scanner, which must be connected to the 16-pin diagnostic connection connector located under the instrument panel. If a malfunction is detected, the electronic control unit turns on the warning light on the instrument panel and stores the malfunction code in memory.
Reading OBD-II System Trouble Codes
To read OBD-II system fault codes, use a special scanner, which must be connected to the diagnostic connector. If you don’t have a scanner, you need to contact a specialist.
Clearing OBD-II DTCs
To clear OBD-II system fault codes, you must use a special scanner.
Battery disconnect method
Disconnecting the battery is an old way to reset the check engine light. Here are three steps to clear the check using this method: Step 1: Disconnect the cables from the battery. At this point, you should use a wrench to unscrew the positive and negative cables.
Step 2: Discharge the remaining electricity. The next thing you should do is press and hold the car horn for about 30 seconds. This action will help drain the car battery.
Step 3: Wait and reconnect the battery. After disconnecting the battery cables and draining the remaining electricity, all you have to do is wait about 15 minutes and then plug the battery back in. Error codes will be cleared. (Note: This method may not work on some vehicles.) If after this procedure the “check” lights up again, this may mean that the problem is still much more serious.