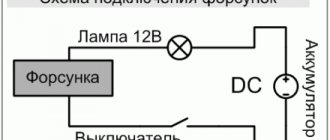
Injector system design
This system includes:
- Computer. Used to select the optimal operating mode and quality of the supplied mixture based on the indicators of all machine sensors. In addition, the computer detects any malfunctions in the injector elements themselves.
- Sensors Provide the computer with all the information about the current state of the engine. We are talking about a fuel flow sensor, an air flow sensor, a lambda probe, a knock sensor, and so on.
- Injection system. Modern engines distinguish between two types of injection. Firstly, mono injection is when one injector works on all cylinders and the prepared fuel mixture has the same characteristics. This type of injection is becoming less and less popular today because it is ineffective. In a distributed fuel injection system, unlike the first, a separate injector is installed on each cylinder, which is responsible for regulating the amount of fuel supplied.
- Injectors. They can be defined as the "workhorses" of the injection system because they have the main task of mixing air and fuel and delivering it to the combustion chamber.
The injectors also chop up the fuel mixture, such as when you're driving downhill in gear.
This part of the injector system is particularly susceptible to increased wear, mainly due to micro-dirt particles that can wear out the injector channels and locking mechanism.
Due to wear, the injector will begin to supply more fuel into the chamber than necessary. This affects the stability of the engine and power is lost.
Check Engine Error
When these signs appear, the “Check Engine” indicator on the instrument panel lights up.”
Your first action in this case is to contact a service center, where they will carry out diagnostics.
If it is determined that one of the injectors is not working properly, the question of replacing it will arise.
In order not to bring the injectors to a state of wear when they need to be replaced, it is necessary to prevent them at a certain time. Preventive measures include that the injectors need to be washed somehow.
Why do injector nozzles become clogged?
The main element of the injector is the injectors that supply fuel to the engine cylinders.
Thanks to these devices, fuel is delivered and atomized. If the injectors are clogged, the injector efficiency will be reduced. What is the reason?
Today, it is increasingly believed that the injector becomes dirty due to the use of low-quality gasoline, in which foreign elements or even sand are found. In practice this is not entirely true.
The fuel system of the car is thought out to the smallest detail. It provides varying degrees of fuel purity, which prevents dirt from entering the injectors, so the risk of injector contamination for this reason is minimal.
The system filters out foreign elements from large fragments to small contaminants.
What is the cause of pollution? The main culprits are heavy fuel fractions that remain on the nozzle walls).
Most often this happens after the ignition is turned off, when the body of the product warms up from the engine and the cooling system ceases to perform its functions.
At high temperatures, light fractions evaporate, while heavy fractions remain in the nozzle channels, gradually contaminating them.
Over time, deposits accumulate, causing the spray tip cross-section to become smaller and reduce spray efficiency. As a result, engine performance decreases.
The presence of heavy fractions in the fuel composition is a typical situation for low-quality fuel.
This gasoline is obtained through direct distillation and improved performance using high octane additives.
In addition, errors during fuel storage lead to an increase in the volume of heavy fractions. The result is contamination of the injectors, and the car owner inevitably faces the question of how to clean them.
How often should you clean the injector, and is it necessary to do it?
Against the background of the above, the conclusion itself suggests that it is necessary to periodically check the condition and performance of the injector. The question is in what time frame this work is required.
We highlight the following trends:
- 30-50000 km. In the absence of action on the part of the owner, the efficiency of the sprayers decreases by 5-7% and the “gluttony” of the car increases (on average by 2-3 liters). To get rid of existing contaminants, you cannot fail to clean the injector.
- 80,000 km or more. In this case, the efficiency of the nozzles decreases and the sprayers operate unevenly (deviations reach 30-50%). The issue of cleaning the injector becomes irrelevant, and the optimal solution is to install new parts, regardless of the condition of the latter.
- 50-80000 km. Then the situation gets worse. After this period, the productivity of the sprayers decreases by 12-15%, and the power unit itself begins to work unevenly. Over time, the plug will damage the seat, causing the nozzle to increase in diameter. This causes the system to become clogged. How to clean the injector in this case? The only solution is considered to be a full flush, but due to the increase in the diameter of the nozzles, this should not be done. In general, replacing parts should be preferred to cleaning.
- 30,000 km. If during the initial period of operation the car owner fed the car with low-quality fuel, the injectors gradually become clogged with tarry deposits, which leads to deterioration in engine performance. In such a situation, it is worth figuring out how to clean the injector and when it needs to be done for preventive purposes.
It should be noted that the nozzle is a consumable item, so do not be afraid to replace it. Each product has its own resource, after which you need to install a new element.
Manufacturers of many cars recommend replacement at intervals of 100-120 thousand kilometers. This is true even when the products appear to be functioning normally.
Is it worth cleaning the injectors? Given the use of low-quality fuel, the sulfur content of which is tens of times higher than EU standards, this must be done.
The main thing is not to delay this process and do the work from the point of view of prevention, not “treatment”.
Experts recommend carrying out this work every 25-30 thousand kilometers, but to achieve results it is important to understand how to clean the injector, what methods exist and what their characteristics are.
Replacing injectors
Of course, a car service center can replace the injectors for you. The price for this service starts from 1500 rubles. However, to save time and money, it makes sense to change the injectors yourself.
Removing injectors yourself
Here is a simple algorithm for removing injectors that all car owners can perform.
1.Disconnect the negative terminal from the battery
2.Take two 17mm wrenches and relieve the fuel pressure by unscrewing the fuel pipe fittings.
3. Separate the electrical connector from the fuel rail.
4.Take a Phillips screwdriver, unscrew the screw on the bracket on which the fuel pipes are attached, and remove it.
5.Use a 5mm hexagon to unscrew the two screws on the fuel rail mounting
6. Move the ramp in the direction of the injector axis, remove all 4 injectors from the engine and remove the ramp towards the left side of the vase.
7.Press the spring clip (1) located on the injectors, move it aside, and disconnect the electrical connector (2)
8.Using a screwdriver, move the injector clamp along the ramp and remove it (on new ramps, the bracket is simply removed).
9.Remove the nozzle from the hole on the ramp, slightly rocking it from side to side.
10.Remove the O-rings that are located on the nozzle body and sprayer using a thin screwdriver
That's all, now the injectors are ready for cleaning.
Do-it-yourself injector cleaning
For cleaning you will need electrical tape (wire) to secure the joints, a carburetor cleaner in a can, a syringe and a thin tube. The cleaning algorithm is as follows.
1.Insert the tube into the cap (nozzle) of the can 2.Insert the end of the tube into the hole of the syringe (without a needle) 3.Attach the end of the syringe to the nozzle 4.Start injecting the product through the tube, simulating fuel injection.
You need to inject until the coming out stream becomes smooth and clean. Then this will mean that the injector is clean.
Another way, if you have a battery nearby, you can try applying voltage to the injector with ordinary wires (polarity does not matter) simulating their operation and at the same time spraying liquid to clean the carburetor.
After this, you need to put on new O-rings and you can begin assembly, having first checked the resistance, which should be in the range of 11-15 Ohms. Reassemble the injectors in the reverse order of disassembly.
Main signs of malfunction: when to clean injectors?
Many car owners skip the period during which it is necessary to flush the injector. In fact, there are several signs by which it is easy to recognize the problem:
- Increasing the "gluttony" of the car. If previously in mixed mode the car consumed 8-9 liters, but now this figure has increased to 11-12 liters, this is a signal to action - you need to clean the injector.
- Engine power is reduced, as well as speed jumps when operating at idle. Depending on the neglect of the situation, fluctuations in the range of 700-1400 rpm are possible.
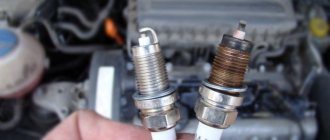
Other signs of a malfunction include failure of the accelerator pedal, deterioration in dynamics and the appearance of jerks during acceleration, premature failure of the lambda probe and catalyst.
In addition, injector problems are often indicated by difficulty starting the engine and increased exhaust emissions (excessive exhaust smoke).
It is worth noting that the problems listed above may occur against the background of other malfunctions. You can find out the exact answer after a complete diagnosis of the system and restoration (replacement) of the injectors.
Causes and symptoms of malfunctions of VAZ 2107 injector injectors
During operation, injectors come into contact with aggressive media more often than other components of the fuel system. Therefore, the issue of durability and functionality of fuel injectors is relevant for owners of injection “classics”.
Signs of malfunctioning fuel injectors on the “2107” are as follows:
- Unstable operation of the internal combustion engine at idle;
- The car stalls when starting off;
- Noticeable drop in power;
- Extraneous noise and vibrations in the operation of the motor;
- Jerks and dips during movement;
- Excessive amount of exhaust gases emitted;
- Change in fuel consumption.
The reason for the deterioration in the functional state of the VAZ 2107 injector nozzles is their clogging. Due to low-quality fuel, hard deposits form on the walls of the injectors, which reduce the throughput of the injection holes. A clogged injector is usually caused by an abundance of dirt in the fuel lines, gas tank, or fuel filter.
Basic methods for cleaning an injector
Today, there are several options for cleaning injectors with and without removing the injectors, which differ in principle of operation and efficiency:
- Using the capabilities of ultrasound. This option is more advanced and high-tech, therefore it gives the best results. The difficulty is that the work is carried out using expensive equipment that is only available in specialized workshops. The operating principle is based on the use of ultrasound. Compared to other injector cleaning methods, this method is the safest and most effective.
- Chemical method (washing). This cleaning option is good because it covers the injectors and the fuel system as a whole. It uses a special washing stand, which is connected to the machine's feed system. The fuel tank is switched off before work is performed. As a result, the flushing fluid cleans the pressure regulator, intake valves, injectors and even the fuel rail. PHOTO 6 But there are many ways to chemically clean the injector (nozzles) at home.
- Application of automotive chemicals (special products). This method is convenient because car shops are filled with many types of fluids for restoring injectors. How to clean the injector this way? It is enough to select the appropriate option, pour the product into the fuel tank (taking into account the manufacturer’s instructions), refuel and continue operating the machine. What features, pros and cons of the method we will consider below.
Some injection car wash options offered by drivers.
Additional recommendations
Having understood the washing technology, you can make sure that it is not so complicated if we are talking only about the technical component. Selecting the necessary materials, preparing tools and creating a special device for the job is quite simple. To do this, you only need to have desire, free time and the skills to use conventional tools that are present in the driver's kit.
Cleaning injectors without removal
But with the choice of a high-quality cleaning agent, things are much more difficult, because this is a responsible task. An incorrectly selected product can damage the injectors and make them unsuitable for further use. Such an error will entail not only temporary, but also additional financial costs. Therefore, it is important not to make mistakes when choosing.
Video - Cleaning injectors through the fuel tank
Most modern cars are equipped with a fuel injection system using nozzles. The operating principle of such a fuel system is very simple, but is vulnerable to various fuel contaminants. Therefore, periodically there is a need to flush the injectors and the entire fuel line.
This system works by constantly maintaining pressure through the fuel pump, which is about three atmospheres. And the nozzles are quick-acting electric valves with a fine-mesh spray mesh. When voltage is applied to the injector, the solenoid valve is activated and fuel enters the engine cylinder, and the metal mesh creates a special torch of fuel for maximum atomization and improved mixing with oxygen. Therefore, a dirty mesh causes deterioration in vehicle performance.
Causes of injector contamination
It is worth noting that the reason for plaque on the injector mesh and on the needle valve itself is not only contaminants in the fuel, but also substances contained in gasoline or diesel fuel. These are all possible tars, olefins, wax and other components. Over time, these substances settle not only on the inner surface of the injectors, but throughout the entire fuel system.
Subsequently, the injector loses its reference values, which leads to improper mixing of the fuel mixture, and subsequently to malfunctions of the power unit. The fact is that the nozzle, due to plaque, may not close the valve hermetically, thereby constantly letting fuel through, which increases consumption and deteriorates the fuel mixture due to incorrect proportions and inadequate mixing.
Also, the shape of the sprayed fuel may change, which can lead to a decrease in the supplied volume, and in some cases, due to poor atomization, the fuel does not burn completely. This significantly reduces the engine power, causing interruptions and failures in its operation.
Please note that any computer diagnostics of the car should be carried out only after cleaning the injector. This will eliminate the influence of the fuel system on engine operation and eliminate false errors in the computer.
How to clean injectors
There are two methods for cleaning injectors: cleaning with ultrasound and cleaning with special cleaning liquids.
Each method has its positive and negative sides. For example, ultrasonic cleaning is carried out only on removed injectors and only if there are no ceramic elements in the design of the solenoid valve. The removed nozzles are immersed in an ultrasonic bath filled with a special liquid, and under the influence of sound, all particles of deposits fly off from the body of the part. But the fact is that under the same influence, all ceramic elements are destroyed to the state of dust, and such a nozzle can no longer be restored.
But there are much more methods for cleaning injectors using liquid cleaners, and can be used both on a running engine and on a removed one. But the liquid used must be able to dissolve all elements of deposits, so it is worth using proven means.
It is worth noting that at home, it is impossible to carry out ultrasonic cleaning without the presence of special baths. In that case. If you have one, then most likely you know how to use it, and instructions for removing injectors from a car can be found on the Internet.
Therefore, let’s move on to a detailed consideration of cleaning injectors using liquids.
Cleaning the injector with the engine running
Another method, the simplest and least time-consuming. For this method, special fuel additives are used, and the car is used as usual. At the same time, the additive, diluted in the required proportion with the fuel, effectively cleans all deposits in the fuel system, including in the injectors. Here, too, it is necessary to use exclusively proven brands and specific products to achieve maximum benefit from this action.
The main disadvantage of the method of cleaning the injector using additives is that this additive will not only dissolve dirt in the hoses and injectors, but will also raise all the dirt in the gas tank, of which there is a lot. In principle, there is nothing wrong with this, but you will have to replace the fuel filter after cleaning.
Disadvantages and advantages of cleaning while the engine is running
But there is also a positive aspect to this method. It lies in the fact that in the process of cleaning the injectors, intensive cleaning of the valves and cylinders occurs. Since the additives contain all the necessary elements that effectively dissolve any contaminants from petroleum products.
Washing injectors with removal from the car
This method has several differences that significantly increase the effectiveness of the entire procedure. But the main advantage is full control over the process and a clear result of cleaning.
The fact is that by gaining visual access to the injectors, we can fully assess the condition of the mechanism and the amount of deposits. And also decide on the advisability of cleaning or replacing with a new one. Because there are so many strong contaminants that cannot be cleaned and must be replaced with new ones.
Another positive point is the possibility of visual observation of the correct shape of the sprayed fuel torch. This parameter is also important for the normal functioning of the motor. And this provides a good opportunity to test all injectors for uniform fuel consumption.
Washing the injector on the bench
This type of cleaning is very often used at service stations. For this purpose, a special but structurally simple stand is used. Allowing you to simultaneously clean all injectors, observe the shape of the torch and check the uniformity of fuel dosing by all injectors.
Injector cleaning options and basic tools
Now let's take a closer look at how to clean the injector and what tools can be used to solve this problem.
Automotive chemistry
As noted above, the simplest option is to use a special additive that is added to the fuel tank, mixed with the fuel, passed through the system and cleans the injectors. This product is recommended to be used as a preventive measure every 5,000 km. It should also be used in “young” cars with low mileage.
What prompted this request? If a vehicle's fuel system has not been cleaned for a long time, large amounts of deposits will accumulate.
If the car owner decides to clean the injector using additives, the latter causes the dirt to lag behind the walls, after which the main elements of the system become clogged. The first thing that gets dirty is the fuel pump.
The main representatives of automotive chemistry are:
Highly effective Liqui Moly Injection Reiniger series.
According to the manufacturer, this product can help even with severe contamination.
Its use eliminates the consequences of using low-quality fuel. After cleaning, engine power increases, fuel consumption decreases and the volume of harmful emissions into the atmosphere decreases.
How to clean an injector using Reiniger High Efficiency Injection? The package contains instructions according to which it is recommended to add 300 ml of liquid to a full tank of fuel from time to time.
Regular use of the product helps avoid contamination, keep the system clean and improve the efficiency of intake valves and injectors.
The use of the composition is recommended for problems with starting, decreased engine power, deterioration of exhaust gases and other malfunctions associated with injector contamination.
Liqui Moly Langzeit Injection Reiniger series.
It also fights existing dirt and prevents new deposits from forming. Used to clean injectors, intake valves and other elements of the fuel system.
Regular use of the product allows you to maintain engine power, reduce the risk of engine failures and extend the service life of the catalyst.
To clean the injector, simply add 10 ml of fluid for every 10 liters of fuel. The additive is mixed with gasoline and performs a cleaning function.
Liqui Moly Injection-Reiniger Series.
Another modern tool that provides quick cleaning of injectors and other elements of the fuel system.
The use of the additive eliminates carbon deposits and deposits on fuel lines, intake valves, metering devices and other components.
Periodic use of the fluid ensures uninterrupted operation, engine response to the throttle, better combustion of the combustible mixture, reduced emissions and reliable protection against rust.
Features of the product include compatibility with catalysts, as well as the possibility of use on all types of gasoline engines with an injection system.
According to the manufacturer, the anti-corrosion properties of the additive remain at the level of 2000 km.
To clean the injector with this product, it is enough to mix it in a ratio of 1 to 230.
Thus, 200 ml of additive is enough to prepare 70 liters of fuel. The tank should be 75% full when adding.
Liqui Moly Injection Reiniger Light Series.
This is a mild cleaner suitable for gasoline engines with various injection systems. Used as a preventive measure and periodic cleaning of the fuel system.
The manufacturer claims that the cleaner does not collect dirt from the fuel tank or clog fuel lines. Existing contaminants are dissolved and removed from the system.
When cleaning the injector in a timely manner using Injection Reiniger Light, engine starting is improved, the volume of harmful emissions is reduced and reliable protection against corrosion is provided.
The peculiarity of the additive is that it has no negative effect on the catalyst.
To clean the injector, add 0.25 liters of additive to a full tank of fuel. The volume of gasoline should not be more than 70 liters.
Liqui Moly Injection Reiniger Effectiv Series.
This composition is suitable for cleaning fuel injection systems in the presence of obvious signs of contamination: engine problems, breakdowns at idle and others.
The best option is to apply the product every 2000 km. The additive is especially useful when the car is filled with low-quality fuel.
To clean the injector, 300 ml of additive per full tank of fuel is sufficient. The product mixes with gasoline, cleans the fuel system, and protects it from future corrosion and deposits.
JET 100 ULTRA XADO.
Universal cleaner for injectors and carburetors.
Its advantages include high efficiency and the ability to remove all types of contaminants (dust, deposits, gasoline films, paints and others).
Using an additive helps restore the injector to factory specifications, remove existing dirt from the fuel system, as well as the line through which the air flow is supplied.
The advantages include safety for catalysts, reduced fuel consumption, and restoration of the previous engine power.
Before cleaning the injector, it is recommended to start the engine and spray the mixture onto the throttle valve.
After this, the engine should run at high speed for 4-5 minutes.
You can also clean the injector in another way - spray the composition directly into the fuel tank. In this case, you need to spray 20 liters of fuel in 12-15 seconds.
The advantage of the method is the possibility of comprehensive cleaning of the system: intake valves, fuel tank, gas pipelines, injectors and other elements.
XADO MaxiFlush.
Concentrated supplement containing highly effective elements. Purpose: to clean the fuel system of gasoline engines.
The result of using the additive is to normalize engine operation, eliminate idle problems and reduce the volume of harmful emissions in the vehicle exhaust. Used in injector cleaning systems.
Benefits include quick removal of contaminants, cleaning of the combustion chamber, fuel injectors and other elements.
By cleaning the injector with XADO MaxiFlush, you can reduce fuel consumption, restore the atomization pattern and optimize the fuel combustion process.
Regular use of the additive increases the reliability of the system and increases the efficiency of injectors by 3-4 times.
To completely clean the system you will need 300-350 ml of product. If the composition is used in professional installations, then mixing is carried out in a ratio of 300 ml of additive per 700 ml of gasoline.
If you need to clean the injector without additional equipment, you need to add the product to the tank at the rate of 300 ml of additive per 40-80 liters of gasoline.
Features of the composition include a slight effect on catalysts and lambda probes. Cleaning frequency is every 15-20,000 km for preventive purposes.
EGR Verylube XADO.
Modern cleaner for recirculation valve and injector door. Can be used for carburetor engines.
Using the additive helps restore factory settings. To clean the injector door, it is recommended to warm up the engine and spray the mixture onto the throttle valve, after which the engine should run at high speed for 4-5 minutes.
XADO VERYLUBE.
A universal composition designed for cleaning carburetors and injection engines. Its advantages include high speed of action and greater efficiency.
As a result of application, you can clean the injector, remove carbon deposits, films and deposits from the elements of the fuel system.
Using the composition for preventive purposes helps maintain engine performance and injector performance throughout the life of the vehicle.
As a result of use, the volume of harmful emissions into the atmosphere is reduced. The product has a loyal effect on oxygen sensors and catalysts.
To clean the injector with this additive, you need to warm up the engine and spray the mixture onto the car’s throttle body. The engine should run for another 4-5 minutes at high speed.
An option with complex cleaning is possible, when XADO VERYLUBE is added directly to the car tank. This involves cleaning the intake valves, pipes, spark plugs and other elements.
To achieve the result, simply spray the additive into a tank with 20 liters of fuel for 12-15 seconds.
Ultrasonic cleaning, its features and disadvantages
An excellent option is to clean the injector with ultrasound. In this case, the injectors are disassembled from the engine, after which they are diagnosed on a special stand, and then, if necessary, placed in a bath with a special liquid.
The part is then driven by ultrasonic waves. The ultrasound source is located at the bottom of the container where the nebulizers are lowered.
The following happens: under the influence of ultrasonic waves, the water in which the nozzles are located begins to vibrate. But since the liquid cannot vibrate at a frequency equal to the frequency of the ultrasound acting on it, microbubbles are formed and explode.
During microexplosions, high-pressure water acts on the nozzles, clearing them of impurities.
As a result of such manipulations, the injectors and the outer part of the injectors are cleaned of contaminants.
It should be noted that removing contamination from inside the nozzles is only possible by opening and closing the nozzles directly in the bathroom. Otherwise, you can only clean the outside of the part.
In general, the use of ultrasound is more effective, since even the most stubborn contamination is eliminated. The downside of this method is that it brings the car owner “a good penny.
The principle of ultrasonic cleaning is simple. First, the attachments are removed from the machine, inspected and installed in a special holder.
At the initial stage, the quality of the spray is checked, after which the nozzles are cleaned in an ultrasonic bath in a gentle mode. When this work is completed, the check is performed again. If the result is not achieved, cleaning is carried out a second time.
If necessary, install a new filter and O-ring. Then the nozzles are returned to their place.
According to experts, it is possible to clean the injector using ultrasound even after 100 thousand kilometers. But here everything depends on the degree of contamination of the part.
As for the disadvantages of this method, there are two of them: high price and risks for nozzles that may not work during the cleaning process.
There is a danger that the car owner will spend a lot of money on cleaning, but there will be no result.
Chemical method (liquid washing)
Another way to clean the injector is to use special chemical compounds.
The bottom line is that the cleaning equipment is connected to the nozzle through adapters. In this case, it is not fuel that is supplied to the injectors, but a detergent composition (for example, Liquid Moli, Carbum Wedge, Vince). The washing mixture is supplied through tubes.
Thanks to the fitting, the fuel pump, filter, tank and fuel line do not need to be cleaned.
The mixture of gasoline and detergent is supplied under pressure, which is set taking into account the manufacturer’s recommendations. As a result, contaminants are broken down and released through the injector openings, after which the residues are burned in the cylinders. The procedure takes 30-50 minutes.
Despite its apparent effectiveness, this method does not always guarantee results. It is rarely possible to clean an injector 100%, because a small amount of detergent remains in the injectors and in the oil system. Therefore, immediately after completing the work, it is recommended to drive 12-15 km in forced mode, and then change the oil and filter.
The disadvantage of this technique is time and high financial costs. The method is suitable for cars that have traveled a short distance, and dismantling the sprayers is very difficult.
Let's look at the liquids that can be used to clean injectors:
- WYNNS Injection System Purge is a flushing fluid for removing deposits and impurities in injection engines. Using the tool, you can clean the combustion chamber, valve and its rods, injectors and other elements of the injection system. The result is restoration of injector efficiency, normalization of engine operation, improvement of the compression ratio and other parameters. The cleaning liquid is safe for catalysts and spark plugs. Used every 20-30 thousand kilometers.
- Toyota D-4 Fuel Injector Cleaner is a formulation that helps clean carbon deposits from various types of fuel systems. The use of the composition helps remove moisture, provides protection against corrosion and the appearance of ice “plugs”. Preventative use ensures that the injectors are clean and operating at peak efficiency. Recommended for use on Toyota vehicles.
- KENT is a powerful carburetor and injector cleaner. Available in 0.5 liter bottles. This is a fast-acting composition with the following advantages: versatility, high drying speed, safety for catalysts, removal of various contaminants (paint, glue, grease), as well as ensuring uninterrupted engine operation.
- Runway is an injector flushing fluid sold in 0.3 liter containers. Its action is aimed at flushing the injector, maintaining and normalizing injection quality. The compound lubricates the system and protects the fuel injectors from contamination. Regular use provides better throttle response, lower emissions, lower fuel consumption. The advantages include the absence of soot and deposits after application. To clean the system, it is enough to pour the liquid from the cylinder into a container with 50-60 liters of fuel. The frequency of manipulations is once every 3-5000 km.
- WYNNS is a German injector cleaner. It is universal and suitable for all types of gasoline engines (direct injection and carburetor). As a result of application, it is possible to clean the fuel system, reduce the amount of harmful emissions and improve the performance of the injector. There is no need to replace plugs after cleaning. The frequency of application is once every 20-30 thousand kilometers.
The use of a cleaner is relevant when fuel consumption increases, engine malfunctions of the twentieth century, and the appearance of “holes” during acceleration. It is not recommended to use the composition on carburetor engines. The optimal time to clean the injector is during the oil change period. To do this, simply add Toyota D-4 fuel injector cleaner to a half-empty tank. Add fuel to 100% immediately after mixing. One cylinder of the composition is enough for 70 liters of gasoline.
Cleaning methods
Currently, there are two main cleaning methods:
One of the simplest methods is to add a cleaning additive to the fuel through the gas tank, which dissolves deposits during operation. It is recommended to carry out such cleaning as a preventative measure approximately once every 5 thousand km. This method is only suitable if the car has low mileage. If the machine has been in use for a long time and the system is supposedly very dirty, such cleaning may only make the situation worse. When there is a lot of contaminants, it will not be possible to completely dissolve them with the help of additives, and the spray nozzles may become even more clogged. More deposits will get from the fuel tank into the fuel pump, which can cause it to break down.- Another method requires special equipment and skills. A flushing device is connected to the injector through special adapter fittings. Instead of fuel, the device receives a special washing liquid such as: Wynn's, Liqui Moly, C arbom clean, etc., from a cylinder, which is connected by tubes. Thanks to the fitting, the system does not need: a fuel filter, a gas tank, a gas line, or an electric fuel pump. A mixture of cleaning fluid and gasoline is supplied to the engine under pressure. The supply pressure must be set according to the technical parameters of the specific engine. Under the influence of the washing liquid, contaminants become limp, pass through the nozzles and burn in the cylinders. The cleaning procedure lasts 30−50 minutes.
It is also useful to read: Goals and means of anti-corrosion treatment of the underbody of a car
It should be noted that this method will not get rid of dirty injectors 100%. After this, flushing fluid remains in the oil system and injector. Therefore, experts recommend driving 10-15 km in forced engine operation, and then changing the oil filter and changing the oil. This method requires a significant investment of time and will cost a lot.
However, both methods are most suitable when the car’s mileage is low, and dismantling the injectors is quite difficult due to their location.
How to clean the injector yourself: the best ways
Now let's look at methods for cleaning injectors that can be used in a garage and that will give the expected result.
The first method of cleaning injectors (using the example of a VAZ-2110)
The work is carried out according to the following algorithm:
- Remove the terminals from the injectors, as well as the two tubes (wireless and reversible);
- Unscrew the nozzle plate and remove the O-rings.
- Start the engine, then remove the fuel pump fuse. This is necessary to reduce the pressure in the fuel supply line. The engine will stop on its own;
The injector can now be cleaned. To do the job, you will need carburetor flushing fluid and a device that allows you to blow the mixture through a nozzle under pressure.
As an option, it is possible to use a combined plastic bottle with a hole at the inlet of the nozzle, as well as a container filled with cleaning liquid. Now run a couple of wires from the battery to the injector terminals.
Then open and close the circuit to ensure the injector closes and opens respectively. At this time, flushing liquid under high pressure passes through the nozzle. According to car owners, after 3-6 runs you can get the optimal spray. If the injector cannot be cleaned, it must be replaced.
Second method (using the example of Mazda 5)
The appearance of carbon on the spark plugs, carbon on the valves and on the piston head, as well as a decrease in engine power indicate the need to flush the system.
For this you will need:
- Tubes and clamps;
- Crocodiles for fastening.
- WYNNS fluid, which allows you to clean the fuel system and not subsequently change the spark plugs;
Additionally, the algorithm looks like this:
- Remove the exhaust gas recirculation solenoid valve.
- All that remains is to clean the components after the dive. To do this, you need to fill in 0.5 liters of clean liquid and start the engine with various loads.
- Collect everything using the reverse algorithm. Pay close attention to the quality of the pipe connections (there should be no leaks).
- To remove the fuel line, remove the rubber bellows connecting the throttle body and the air filter.
- To find an approach to the return pipe, it will be necessary to disassemble the mounting of the electro-pneumatic valve guides. Fold the part back a little and remove the original Mazda hose. Then put on the clamp.
- Press the latch on the left and right and remove the feed tube. Then put on the feed tube from the prepared device.
- Reattach and tighten the corrugation. Then pour 0.5 liters of liquid into the jar, turn on the electric pump, start the engine and let it process all the available composition at XX. This takes 10-15 minutes. To speed up the process, remove power from the ignition coils and run the starter, supplying fluid to the cylinders.
- After preparing the system, it is necessary to disassemble the fuel pump relay (located in the safety box in the engine compartment).
- Collect the plant for cleaning. In this case, the hose from the pump to the ramp should be 28 cm shorter than the return line. This is a necessary condition, because the pipes used are two-layer, so bending is bad.
How to clean injectors by removing them (method No. 3)
To do this job, you will need carburetor cleaner, a snap button, a 5cc syringe. See four-pin wires and power supply from the charger.
To clean the injector, proceed as follows:
- Connect the terminals to the injector and plug the charger into the outlet. Press the button several times and make sure that the nozzle opens when power is applied;
- Press the spray button several times, then press the button 2-3 times. Place a transparent container under the nozzle outlet to analyze the spray quality.
- Repeat the procedure as many times as necessary.
- Assemble the diagram. Insert the button prepared before starting work into one of the wires of the power supply;
- Place the nozzle on the other side of the syringe;
- Attach the cap of the vial to the other side of the thin tube coming out of the “neck” of the syringe. The place of twisting can be sealed with something;
- Insert a thin tube into the outlet of the syringe (make a seal so that it is tight);
Ultrasonic cleaning
A modern way to clean an injector is to use ultrasound. Here you will need to remove the injectors from the engine and place them in an ultrasonic bath. Cleaning is carried out using micro-explosions of ultrasonic waves capable of reaching thousands of atmospheres (cavitation effect). At the bottom of the bath there is an ultrasonic generator. The nozzles are lowered into it and, due to cavitation, the maximum effect of peeling off blockages in the nozzle channels and sediments in the nozzle channels is achieved.
Thanks to the use of an ultrasonic bath, the surface of the nozzle and its internal working cavities are cleaned . possible on the inner surface , since it is located in a working area of high pressure and high temperatures. The internal surface of the device is cleaned exclusively in the active cleaning mode. This mode assumes that the nozzles open and close while being in the working solution with the part that directly sprays the fuel - the spray hole, during ultrasonic cleaning.
Ultrasonic cleaning is considered more effective, since it can also be used to clean those nozzles that cannot be cleaned with flushing liquid. Flushing the injector using this method will cost a little more.
Ultrasonic cleaning steps:
- Removal and inspection of injectors.
- Installation on a stand.
- Initial test on the stand (spray, performance).
- Washing with a special solution in a gentle mode in an ultrasonic bath.
- Intermediate testing of devices on the stand (spray, productivity).
- Additional rinsing if necessary.
- Final test on the bench (spray, performance).
- Install new filters and O-rings if necessary.
- Installation of injectors in the engine.
Bench testing is an advantage of this method. It is recommended to use an ultrasonic bath after 100 thousand km or more often if engine diagnostics have shown the need for this . The main disadvantage of the method is its high cost and the need to resort to the help of specialists. Injectors may be damaged due to improper ultrasonic cleaning. Of course, first make sure that the interruptions in engine operation are due to dirty injectors.
About prevention
Here I would like to talk about a cleaning method in which special additives are added to the gas tank. Unlike others, this method has not received scientific evidence. In addition, an additive that is suitable for one type of engine may not be suitable for another.
The additive is added to the gas tank because its chemical elements will affect the entire fuel system.
If someone decides to use the supplement for preventive purposes, carefully study the reviews and recommendations of the manufacturer. The main thing is not to damage the engine.
And the most reliable and economical way to prevent the fuel system is, if not strange, to refuel with high-quality fuel, use the same fuel filter and change it in a timely manner.
Results
As you can see from the article, you can clean the injector in several ways: at a gas station or at home. The main thing is not to start this process and start prevention after 5-7 thousand kilometers.
If the fuel system has not been cleaned for a long time, then there is no need to rush - you should undergo diagnostics at a gas station and listen to the recommendations of specialists. Otherwise, serious consequences may occur.
You can clean the injector of a new car using auto chemicals (special additives). They are recommended to be used at intervals of 5 thousand kilometers. If the car has driven 100-110 thousand kilometers, it is advisable to use professional washing methods in a special rack or use ultrasound.
If the car has driven more than 150,000 km, cleaning the injectors is useless. In these cases, the part is so dirty that the only solution is to replace it.