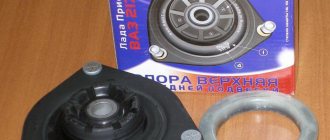
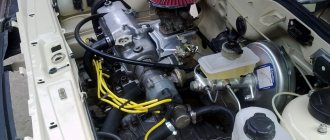
Front hub and its parts
In a VAZ 2109 car, replacing the front hub is necessary if it is worn out. The hubs, in turn, play a very important role. Without them, the wheels will not rotate at the required speed, which will first lead to damage to the brake system, and then to failure of the entire car. Therefore, if there are any problems with the front hubs, they need to be diagnosed in advance so that later it is not too late. Replacing the front hub of a VAZ 2109 is a difficult and responsible task, but you can handle it in your garage yourself.
Front hub wear
Replacing the front hub on a VAZ 2109
Typically hub wear manifests itself in the following ways:
- There is play in the hub bearings, that is, they wobble slightly.
Note: the play should not be allowed to be too strong, as this will require replacing not only the hub, but also the bearing.
- The bearings are “humming”. While driving, strange sounds are heard coming from the wheels. As a rule, with increasing speed they become even more pronounced. After this, when the speed decreases, the noise does not become less quiet.
Note: If the hum is heard on only one side, then only one hub needs to be replaced. If it occurs in both wheels, both hubs need to be replaced immediately.
- Bearings This can cause the caliper to overheat as well, causing it to fly off as well. In addition, the brake fluid also boils too quickly. This leads to rapid failure of the braking system.
Causes of hub wear
Replacing the front hub on a VAZ 2109
Usually there are the following reasons due to which the hub wears out:
- The wheel bearing has completely fallen apart. Perhaps it is only in the early stages of destruction. In any case, it will have to be changed, but after appropriate diagnostics.
Replacing the front wheel hub of a VAZ 2109
- The wheel bearing nut is not tightened properly. Such an oversight can cause backlash. In this case, you can get by by simply screwing in this nut all the way. That is, you should not change the hub or its bearing.
- The steering tip does not work well.
- There are shortcomings in the operation of the upper or lower ball joint.
How to diagnose bearing play
VAZ 2109 front wheel hub
In fact, this process is very simple, and even a beginner can do it. For this:
- Raise the car using a jack to the optimal distance.
Note: It is much easier to diagnose using an inspection hole, but if you don’t have one, a jack will also work.
- Bleed the wheel. This should be done according to a certain pattern: hold the wheel on both sides, squeezing it as much as possible. You should swing your arms in the same direction (preferably away from you). By the way, this procedure is also carried out in car services, so it is advisable to attend it in order to be prepared for its implementation later.
VAZ 2109 front hub
- If there is slight play, the bearing nut should be tightened as much as possible.
Note: if this does not eliminate the play, then the hub or its bearing must be replaced.
- You should still hold the wheel on both sides. However, now you need to pump it not in one, but in different directions. What does it mean? You just need to press the wheel towards you with your left hand, and away from you with your right. If play is also observed, then the reason is not in the hub. In this case, the steering tip is faulty. It should be replaced.
Note: In some cases, tie rod ends are sold complete with tie rods. However, these thrusts do not always need to be changed either. They can be left, replaced if they break soon.
- Pull the wheel, placing maximum emphasis on the top of the wheel. If in this case there is also play in the bearing, then the upper ball joint should be replaced.
VAZ 21093 front hub
- Pull the wheel by the bottom. Accordingly, if there is still play, then the lower ball joint needs to be changed.
Note: if only one bearing has failed, then it is better to immediately change the second one, since it will most likely also break very soon.
Removal and installation procedure
How to determine whether a wheel bearing is faulty?
To do this, you need to drive at least 5 km, and rarely need to brake. After stopping, touch the hub with your hand and if you cannot hold your hand, it means that the bearing has become unusable and requires replacement. Another sure sign of a malfunction is the appearance of extraneous noise from the wheel.
You can cope with replacing the wheel bearing yourself:
- First, we install the wheel chocks. Next, we tear off the nut and loosen it a little, there is no need to unscrew it completely.
- Using a jack, you need to lift the entire front part of the car and place it on supports.
- Next, you need to remove the wheel, to do this, unscrew the wheel bolts.
- Using a 17mm wrench, remove the brake pad guide.
- We remove the caliper, to do this we unclench the brake pads (note that the caliper should not hang on the brake hose, take an ordinary wire and hang it from the body).
- Take a 12mm wrench and unscrew the two guide pins on the brake disc. Now you need to remove the disk itself; for this it is better to use a rubber hammer. We knock down the brake disc with gentle, not strong blows.
- Now you can completely unscrew the hub bearing nut, after which we remove the washer.
- Now you need to pull off the hub. You will need two M12x1.25x130 bolts and a brake disc. We insert the bolts into two holes in the brake disc and screw them into the hub holes to the full depth of the thread. Then, with a sharp movement, pull the brake disc towards you, the hub should pull off
- We find two ball mounting bolts and use a 17mm wrench to unscrew them. We remove the outer hinge from the hole in the hub.
- Carefully knock the hub out of the steering knuckle.
- Then you need to remove the retaining ring.
- To press out the bearing, it is better to use a special puller. (Sometimes there are problems with this point. To make removal easier, you need to preheat the ring. A portable gas torch works well for this.)
Now you have removed the bearing. Next, you need to check the presence of the dirt ring and clean the inner surface of the steering knuckle.
Apply a large amount of lubricant to the outer ring of the bearing. Now you need to place the bearing in the freezer and heat the steering knuckle using the same gas burner.
These operations will greatly simplify pressing the bearing into the steering knuckle.
We carry out further assembly in reverse order.
Replacing the front hub
Necessary:
- Unscrew the wheel nut with a 30 mm socket.
- Raise the car on a jack.
- Remove the wheel.
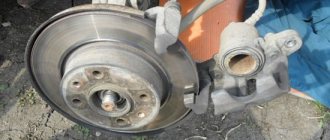
- Remove the brake caliper.
- By removing the brake disc, you will have access to the front hub.
- Unscrew the hub nut. It is secured with three bolts. The bolts are too close to each other, so the head becomes very tight here and is difficult to rotate.
Note: You can loosen these bolts slightly and then remove them. If the bolt is very tight, you can warm it up.
- Using a screwdriver, pull the hub out of its seat.
Mounting the front hub on a VAZ 2109
- Thoroughly clean the seat.
- An oil seal must be inserted into the hub housing. It needs to be pryed off, as it will get in the way (it can be inserted into a new hub). To make it fit better, its seat should be lubricated with oil.
- Traces of dirt will remain under the oil seal, so that in the future dirt does not get under the new oil seal, it is necessary to lubricate it with a special liquid.
- Put the hub in place. Lightly tighten the hub nut so that the hub does not fall out.
- Press it in.
- Tighten all the necessary screws on the reverse side.
Replacement
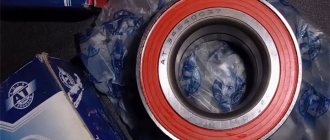
Having selected the set of front wheel bearings required for replacement, you can get to work.
For repairs, in addition to the standard set of tools, you will need special bearing mandrels. If they are not available, you can use a pipe of suitable diameter.
Dismantling works
By following the instructions and relying on video lessons, you can replace the front wheel bearing with your own hands.
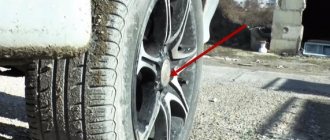
- Loosen the tension of the wheel bolts, remove the decorative plastic plug from the hub bearing and loosen the fastening nut.
- Using a socket and lever, loosen the bearing mounting nut.
- Raise the car with a jack, and then remove the wheels from the part of the front of the VAZ 2109 where you plan to replace the bearing.
- Remove anything that might prevent you from removing the hub. These objects include the brake disc, fastening to the steering knuckle, ball joint, steering knuckle mounting bolts, and front strut fasteners. Dismantle it all and move on.
- Completely unscrew the front hub nut, remove it and remove the thrust washer.
- It is necessary to remove the hubs from the front strut bracket and remove it.
- The hub has been dismantled, so you can press the damaged bearing out of it and put a serviceable unit in its place.
- Place the hub in a vise or in any other way convenient for you.
- Using a drift that fits the diameter, press the hub out of the inner race of the bearing.
- In some cases, the outer part of the inner ring may remain on the hub. In such a situation, you cannot do without a puller. In general, it is better to work with a special tool. It will probably be found among your friends or neighbors in the garage.
- Using the same drift, you need to remove the bearing from the steering knuckle. To do this work, you will have to remove the retaining rings in advance. They can be removed with any available tool, such as an awl. Although there are special clamps for such purposes.
Accuracy is paramount
- That's it, you managed to remove the hub bearing.
- Carefully treat all dismantled parts using clean kerosene. Follow fire safety regulations.
- Assess the condition of the hub itself. If there are signs of damage, defects, or chips on it, it should be replaced with a new one.
- The new bearing is installed in place using a vice or press. In this case, force must be applied to the outer rings.
- Using a tool such as a hammer to drive in a bearing is strictly prohibited, as this will lead to destruction of the new part.
- After installing the front wheel bearing, perform the reassembly procedure
- Don't forget to change the hub nut.
- Once the assembly is fully assembled and the vehicle is lowered to the ground, only then should the mounting nuts be fully tightened.
Repairing the front hub when the bearing wears out or breaks is not as difficult as it might seem at first glance. Our instructions, supplemented by video tutorials, will help you complete the process yourself from start to finish.