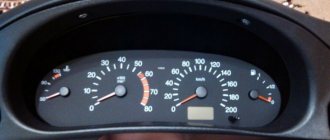
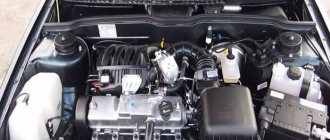
"Ten" is a fairly quiet and comfortable car. The reason lies in the fact that the VAZ-2110 is equipped with a body with good aerodynamics, and modern materials and designs are used in the interior. The standard sound-absorbing panel is also hidden under the hood - it isolates the shield from the engine compartment. And this is not all the standard sound insulation of the VAZ-2110.
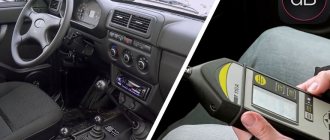
But if the car has already managed to “run” several thousand kilometers, then the situation will be completely different. The dashboard squeaks begin to be heard, and it is worth noting that these sounds directly depend on the temperature. If at 20 degrees above zero squeaks are almost inaudible, then at -20 they can be heard from everywhere. In addition to the “moans” of plastic linings, covers, doors and roofs, high-frequency noises from the operation of the gearbox and engine are added.
In such a situation, the best solution is to soundproof the car. It is not difficult to complete - you only need special materials, tools and skillful hands.
Selection of materials
In order for the sound insulation of a VAZ to be effective, it is necessary to select suitable high-quality materials. They are different: some are characterized by rigidity, others by increased ductility. The material should be selected depending on the location of application.
Vibroplast is a single-layer bitumen material trimmed with foil. This material will require approximately five sheets. The hood, roof, trunk and interior floors, doors, wheel arches, front panel are finished with vibroplast.
Bitoplast is similar to impregnated foam rubber. To completely soundproof a car, a couple of 10mm sheets will be enough. Bitoplast is also used as a cushioning material during interior assembly.
Splen has not only noise- but also heat-insulating properties. To soundproof a car you will need about six sheets of this material. Its cost is low, and any place can be treated with splen without thinking about saving.
Modelen is a fabric with a 2 mm layer of mounting adhesive. About 0.5 m2 of such material needs to be prepared. Modelen is suitable as a gasket if it is impossible to use bitoplast.
Interior and trunk wrapping
Now you need to soundproof the car floor. For this purpose, vibroplast and splen are used. Vibroplast is laid as the first layer; it must be applied to the maximum area. Cover the material as best as possible so that it adheres to the metal surface. Splen is applied as the second layer. It also needs to be glued to the maximum area of the bottom of the cabin.
Recently, this type of sound insulation has become popular, such as applying a rubber-bitumen mixture to the outside of the car’s bottom. This allows you to reduce the level of vibration coming from the wheels and road surface. But it will be much more effective if you simultaneously treat the inner surface of the bottom. Everything inside the trunk needs to be carefully sealed with vibroplast. It will be a little more difficult here, since there is a niche for the spare wheel, protrusions for the shock absorber struts, and sometimes the edges of the screws come out.
Disassembling the interior
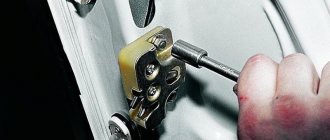
First of all, you need to remove the front and rear seats. After this, you can begin dismantling the console. You'll have to tinker here, although there shouldn't be any particular difficulties. There are few fasteners on the panel, so it can be easily removed.
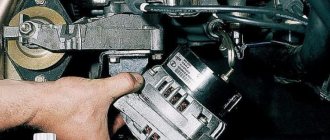
However, it is recommended to remember the order in which the wires are connected - this will save time during assembly. It is best to mark the pads by drawing up a wiring diagram. To remove the dashboard, you will have to remove the steering wheel along with the steering column cover. The rugs also need to be removed.
The standard sound insulation of the VAZ-2110 under the seats is fiber-bitumen, of different structure, thickness and appearance. At the back, the insulation is thinner, more elastic and covered with a film. Under the driver's seat the insulation is thicker, stiffer and without film.
This circuit effectively absorbs the noise of a running engine. But when replacing, the standard insulation must be dismantled, and the work here is complicated due to the many plastic fasteners. Most likely, the thick layer of new insulation will prevent the fasteners from being reinstalled, so they will no longer be needed.
After the dismantling of the old insulation has been completed, the interior has been stripped down to bare metal, and wires are hanging everywhere, you can immediately begin soundproofing the VAZ-2110.
Main difficulties
If you have already disassembled the interior of the car, you may have noticed that in the VAZ 2110 this is done quite simply. Even if you are new to this business, relying on the instruction manual, the work will be completed quickly enough. Additionally, we advise you to rely on video lessons. They can highlight a lot of useful and important things.
The main difficulty when disassembling the interior, without which it will not be possible to carry out full sound insulation, is dismantling the dashboard.
When disassembling the dashboard, be sure to mark all the parts, otherwise reassembling will turn into a real challenge.
The same instruction manual contains recommendations regarding dismantling the dashboard, so rely on it. Under no circumstances should you pull out all the cords, otherwise you will have problems later.
Finishing with insulating material
The front panel and the floor are covered with vibrating material - vibroplast. It is cut and packed tightly. To make installation convenient, heavy and inflexible material can be heated - ideally it should exactly follow the shape of the floor. Laying is carried out gradually with careful gluing into uneven areas. The entire surface is covered with vibroplast. The front panel can be insulated in several layers.
The splen is fixed on top of the vibroplast. Here you need to work carefully: the thickness of the splen sheet is 8 millimeters, and given that it does not want to deform, some elements will not be easy to install. A small amount of material is placed in the places where the sled is attached, and there is no need to attach splen under the central plastic tunnel at all. The front panel is pasted over quite simply; there is enough free space.
The rest of the car's sound insulation is carried out during assembly. The instrument panel is glued from the inside with 10- or 5-mm bitoplast. The joint of the air duct that leads to the legs is processed with modelling. Biplast is glued on top.
Other air ducts do not need insulation, but it is recommended to finish the joints with vibroplast. The joints of the central tunnel are covered with the same model, and biplast is also installed at the joints of the air ducts with the panel, but only after removing the factory seal.
After this, factory insulated carpets and floor upholstery are installed. The panel is installed in its place. When fixing the panel at the joints, it makes sense to fix the bitoplast to seal and provide insulation from extraneous sounds. Then you can install the remaining interior elements in place and connect the wires. When installing the panels, you can cover them from the inside with modelin or biplast.
Soundproofing a VAZ also involves gluing the trunk floor and rear wheel arches. Particular attention should be paid to arches; they use more insulation. Niches in the body - the bottom of the doors, pockets for storing tools, luggage spare tires - do not need to be taped: moisture often accumulates in such places, and the insulation can harm the body.
Stories from our readers
“Fucking basin. "
Hi all! My name is Mikhail, now I’ll tell you a story about how I managed to exchange my two-wheeler for a 2010 Camry. It all started with the fact that I began to be wildly irritated by the breakdowns of the two-wheeler, it seemed like nothing serious was broken, but damn it, there were so many little things that really started to irritate me. This is where the idea arose that it was time to change the car to a foreign car. The choice fell on the melting Camry of the tenth years.
Like any other process of car soundproofing, you need to start with disassembly. First, we unscrew the frill and wipers, then remove the factory sound insulation, and then the plastic wall behind which there is a cabin filter (for cars before 2003). By the way, it’s convenient to immediately modify the installation of the cabin filter, which is what I did