Speed sensor VAZ 2109 Repair VAZ 2108 2109 21099
Carburetor models VAZ 2108 2109 21099 have a mechanical connection between the gearbox and the speedometer: a cable. When the car moves, the cable rotates and turns the gear in the speedometer, from which the speedometer needle deviates and shows the speed of movement. Injection models have an electronic speed sensor, the operating principle of which is based on the Hall effect. The electronic sensor is installed in the same place as the old mechanical cable. The sensor also has a roller that is inserted into the gearbox and, when rotated, rotates the Hall sensor drum. The speed sensor is connected to the electronic engine control unit. When the drive part of the sensor rotates, it begins to send impulses to the control unit. The higher the frequency of the pulses, the higher the speed of the vehicle; the lower the frequency of the supplied pulses, the lower the speed of movement. When moving at a speed of 1 m/s, the sensor sends 6 pulses per second. When driving at a speed of 10 m/s, the sensor sends 60 pulses per second, the ECU processes these pulses, converts them into km/h and displays them on the speedometer.
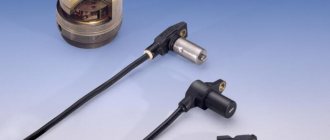
speed sensor VAZ 2109
Naturally, if non-standard tires are installed on a VAZ 2108 2109 21099, the speed will be displayed incorrectly. For example, if R14 tires are installed, the speedometer will underestimate the readings. If, on the contrary, low-profile R13 tires are installed, then the speedometer will show a speed higher than it actually is. The controller firmware has special conversion factors that must be changed when installing non-standard wheels. Three versions of the speed sensor were installed on the VAZ 2108 2109 21099: - GM, American standard with a round connector and article number 311.3843. - With a flat connector and a plastic roller. Due to the plastic bead, this sensor is unreliable.— With flat connector and metal bead, article number 344.3843. This sensor is reliable and it is better to take it. There is also a nuance with the number of pulses per revolution, nine-speed sensors have 6 pulses per revolution, but on sale you can find sensors marked 10 pulses per revolution. If the speed sensor fails, then the light should light up CHECK. But this does not always happen, the fact is that it is difficult for the controller to diagnose the speed sensor, since it is unclear whether the car is driving or standing still. Only in powerful modes, with high air flow from the mass air flow sensor and fuel consumption, the controller can determine a faulty sensor. The cost of a speed sensor for the ninth family is 300-400 rubles.
Speed sensor ECM VAZ 21083, 21093, 21099 injector
The speed sensor of injection vehicles VAZ 21083, 21093, 21099 is an element of the electronic engine control system (ECM).
Purpose of the speed sensor
The speed sensor is designed to determine the speed of the vehicle by the ECM control unit (controller).
Speed sensor device
The speed sensor of injection VAZ 21083, 21093, 21099 (low and high panels) is an electromagnet installed on the output shaft of the speedometer drive in the vehicle's gearbox. The speedometer drive shaft is mounted on top of it.
The DS has a block with three terminals: current, pulse and ground. A multi-pole magnet is installed on the internal axis of the sensor, connected to the speedometer drive, and there is a master disk. The internal axis of the sensor rotates together with the speedometer drive.
Speed sensor with square connector
Location by car
The speed sensor on VAZ 21083, 21093, 21099 cars with an injection engine is installed on the gearbox, on the drive side of the front left wheel (on the speedometer drive housing).
Operating principle of the speed sensor
The control unit supplies the speed sensor with a voltage 2 - 3 V lower than the voltage in the vehicle's on-board network. The DS sends back pulses of a certain frequency, with a voltage from 1 to 5 V, to the control unit. Based on their frequency, the control unit calculates the speed of the car. Six sensor pulses correspond to 1 meter of distance traveled by the car (one wheel revolution) and one revolution of the speedometer drive output shaft axis. Pulses occur when the master disk passes through the magnetic field of the sensor (Hall effect). Their voltage varies from 1 V to 5 V.
Read more “The principle of operation of the vehicle speed sensor.”
Speed sensor malfunctions
If the speed sensor fails, the controller cannot determine whether the car is moving or stopped and switches to calculating the fuel supply based on a signal from the mass air flow sensor and the throttle position sensor. Such work has some negative consequences: the forced idle speed (ISR) when the car is moving becomes lower than normal (they should be slightly higher than the idle speed when the car is stationary); as a result, the engine may stall when changing gears while moving or coasting (with gear and the gas pedal released).
In addition, the engine loses throttle response when trying to quickly gain speed (for example, during a sharp start or acceleration while driving). Fuel consumption increases slightly.
If the engine fails, an error code is entered into the controller's memory and the Chech Engine light comes on.
When troubleshooting a DS fault, first of all you should check its connector and the wiring going to it, as well as the speedometer drive.
Speed sensor applicability
Speed sensors with a round connector of the wiring harness block 2112-3843010-30, 2112-3843010 are used in the ECM with the GM VS 5.1 and January 4.1 controller. With flat 2110-3843010-10 (-13, -18) - ECM with BOSH and January 5.1 controllers.
Notes and additions
— The speed sensor readings are also used by the vehicle speedometer on vehicles with the 2114 instrument panel.
— The use of larger or smaller wheels changes the speedometer readings down or up.
Twokarburators VK - More information on the topic in our VKontakte group, on Facebook Twokarburators FS and on Odnoklassniki - Twokarburators OK
More articles on the VAZ injector
— Crankshaft position sensor for injection VAZ 2108, 2109, 21099
— Mass air flow sensor (MAF) for injection VAZ 2108, 2109, 21099
— Camshaft position sensor (phase sensor) for injection VAZ 2108, 2109, 21099
— Applicability of ECU controllers in injection engine control systems of VAZ 21083, 21093, 21099 cars
— Throttle position sensor for injection VAZ 21083, 21093, 21099
Verification methods
Fuel level sensor FLS for VAZ 2108, 2109, 21099 cars
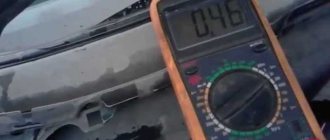
The first thing that needs to be done is to make sure that a voltage of 12 V is supplied to the DC contacts. Because the operation of the DC is based on the Hall effect, the test is carried out by torsion. The voltage in this case varies between 0.5-10V.
Nowadays, three main methods are used to check the performance of the speed sensor. The first two require the use of a multimeter. Which one to choose, decide for yourself. We will carefully talk about all 3 methods of checking DS.
Verification method
Your actions
- Remove the sensor;
- Use a multimeter to check which pin does which function. It is necessary to find a pulse contact;
- Connect the positive probe of the multimeter to the pulse contact, and the negative probe to the engine, or, in other words, the car body. It will be a mass;
- Put a piece of tube on the DS axis and start turning it at low speed;
- Immediately check how the voltage changes;
- As the speed increases, the pulse frequency and voltage should increase
- There is no need to dismantle the device;
- Use a jack to lift one of the front wheels of the car; Connect the multimeter to the sensor wires, as in the first method;
- Spin the wheel with your hands and watch the multimeter readings;
- If impulses occur immediately, the DS is working normally. In this case no, it is out of order and needs to be replaced
- This test method does not require the use of a multimeter;
- Instead, a control lamp is taken, or an ordinary 12-volt light bulb;
- Disconnect the impulse wire from the DC;
- Turn on the ignition and use the test lamp to find the plus and minus;
- Raise one of the front wheels using a jack;
- Connect the test light to the signal wire and spin the wheel;
- If the minus light on the control lamp lights up, this indicates the normal state of the sensor;
- If you don’t have a control, take any 12V light bulb. On a VAZ 2109 you can find one in the turn signal. Connect the signal contact and the plus of the battery with a wire. The functionality of the sensor is indicated by the lamp starting to blink.
If checking the DS shows that everything is fine with it, be sure to check the functionality of the sensor drive. It is necessary to hang up the front wheel and find the DS drive by touch. Now start rotating the wheel with your foot and check with your hand whether there is rotation in the drive and how stable it is. The help of a partner will not hurt you here.
How to check the VAZ speed sensor
A failed speedometer sensor in a VAZ car is easily determined - in this case, the speedometer stops working, and it may also show some signs of life, but display incorrect information.
Useful: VAZ-2107 diagram
Using a tube, pliers or other available tools, rotate the sensor axis. In this case, you should see the voltmeter readings changing: the higher the speed, the higher the voltage (from 0.5 to 10 V). If this does not happen, the sensor requires replacement.
Similar
| Digital portable anemometer ap1m irsha. 402131. 001 Tu is intended...Purpose: digital portable anemometer AP1M Irsha. 402131. 001 Tu is designed to measure the average speed of directed air… | Instructions for use en. 401 ReConnecting en4, en6, ez6 sensors to on-board monitoring controllers of the “Autograph-gsm” series 84 |
| Instructions for use en. 401 ReConnecting en4, en6, ez6 sensors to on-board monitoring controllers of the “Autograph-gsm” series 84 | 1. Requirements for technical means of controlRequirements for the subject of purchase: for the right to enter into an agreement for the supply, installation, calibration and activation of Mercury ta-001 tachographs... |
| The program must periodically poll the internal memory of the electronic...The general diagram of the system is shown in Fig. 1 and should consist of temperature sensors (1), pressure sensors (2), sensor power supply... | Application of a Doppler meter to determine the speed of moving railway unitsOts of radar Doppler speed meters. The possibility and scope of their application in railway transport is considered.... |
| 5. Operation of the filtration deviceCheck that the diffuser holders (26) and manifold (13) are in perfect condition, as well as the air duct connection to... | Technical description and operating instructions for the speed control device UX-1MU. The speed control device UX-1M, hereinafter referred to as UX, is designed to control the speed of transport equipment of mills, elevators... |
| Manual for installation, operation and calibration of aviation electronic... Monitoring and setting the minimum speed value is carried out by the minimum speed indicator ims-1M (hereinafter referred to as the “indicator”) during... | Algorithm for checking access speed... |
| Terminology in the technical literature Automatic transmission is driven by the output shaft and creates pressure proportional to the speed of the vehicle; in fact, Governor is a hydraulic... | The operating manual contains technical data, description...Measurement of parameters, regulation and configuration of a single-limit sensor |
| Product Name Vector control algorithm combines fine speed calculation and self-emission function of motor parameters. This achieves... | Instructions for complex setup and testing of the Mercury-115 cash register. The instructions apply to the Mercury-115 cash register with software - 115UZ107 for the following version of the cash register. |
| “Monitoring the opening speed of the Top 100 websites in Russia” This informational...Creation of a system for constant monitoring of the opening speed of popular web pages and prompt identification of resources (hereinafter referred to as the System),... | Operating manual for usd mercury 250 Part Software manual During the setup and operation of usd mercury 250, the following types of software are used |
Speed sensor device, malfunctions, check, repair
Manual, instructions for use Instructions, instructions for use
Symptoms of speed sensor failure
The driver must react in time if the speed sensor fails by replacing it with a new one. If this is not done, the engine will not perform optimally and its components will suffer additional wear and tear. The following symptoms indicate a speed sensor failure:
- The engine is unstable at idle;
- In the usual operating mode, the engine began to consume more fuel;
- The speedometer erroneously displays information about the vehicle's speed. If the sensor is completely out of order, it may not report it at all;
- The car began to accelerate worse.
In many modern cars, error information appears on the on-board computer when the speed sensor fails. The Check Engine light may also come on.
Sensors VAZ 2109 carburetor
Modern cars have a microcontroller to control the operation of all vehicle systems. In order for the microcontroller to receive information from various components of the car, a large number of different sensors are installed on them. One sensor indicates the temperature in the cabin, another is responsible for exhaust toxicity, the third monitors the position of the headlights, the fourth determines whether the driver is sitting in the seat or not, and so on. It gets to the point of insanity: the low beam light on the car burns out, but it won’t start. The controller throws an error, which is also not so easy to decipher. This is understandable - this is the bread and butter of automaker service centers. In this regard, the old nines look very attractive: they have very little electronics. Yes, and that one is very primitive. The coolant temperature sensor has failed - no problem, the generator does not work - also a problem, drive until the battery runs out. For modern foreign cars this is impossible: the controller will see a malfunction, prohibit the engine from operating and will require the driver to eliminate the malfunction. Compared to the injection model, the carburetor Zhigul has fewer sensors. Of these, the only one that really affects engine operation is the Hall sensor. The remaining sensors are needed to inform the driver about the state of the vehicle systems, or to turn on/off actuators. Let's list the sensors: 1. Hall sensor 2. Coolant temperature sensor. 3. Oil pressure sensor. 4. Fan switch sensor. 5. Reverse sensor. 6. Parking brake sensor. 7. Throttle valve limit switch. 8. Speed sensor. * Many people mistakenly claim that the car has an idle speed sensor. It is not true. Carburetor models have an idle air solenoid valve. A valve is not a sensor, it is an actuator. It does not transmit its signal, but rather receives control voltage from the idle speed economizer. 1. I would call the Hall sensor the most important sensor of this car.
Hall sensor VAZ 2109
Without it, the car engine will not start. Remove every single other sensor and the machine will work. It will not work without a Hall sensor. The purpose of the Hall sensor is to transmit pulses about the rotation of the engine camshaft to the commutator. The sensor is designed to determine the moment a spark is formed by the switch. Without it, there will be no spark and, accordingly, the engine will not start. The sensor is installed in the ignition distributor housing and connected directly to the switch. In case of malfunction, we can easily replace it. 2. The coolant temperature sensor is designed to display the engine temperature on the panel.
Coolant temperature sensor
The coolant temperature sensor (hereinafter referred to as DTOZH) is a thermal resistance, that is, a resistance that varies with temperature. The engine is cold - the resistance of the coolant temperature indicator is high and the coolant temperature gauge needle does not move. As the engine warms up, its resistance drops and the indicator needle rises vertically. If the temperature gauge stops showing engine temperature, the sensor needs to be checked. 3. The oil pressure sensor is designed to inform the driver about the presence of oil pressure in the engine lubrication system.
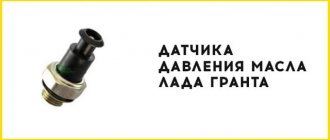
Oil pressure sensor
Classic models show oil pressure in the range from 0 to 5 atmospheres. It only shows the PRESENCE of oil pressure, without indicating its value. 4. The fan switch sensor is installed in the radiator of the engine cooling system and is designed to turn on the fan when the coolant temperature is above 90 degrees.
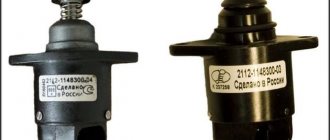
Fan switch sensor
The fan switch is a regular thermal switch that is closed at temperatures above 90 degrees and open at lower temperatures. 5. The reverse sensor is designed to turn on the reversing lights when reverse gear is engaged. This is also a regular limit switch, which is shorted to ground when the driver engages reverse gear. 6.The parking brake sensor simply turns on the parking lamp on the instrument panel. Also a regular limit switch, activated by the parking brake lever. 7. The throttle limit switch is designed to determine whether the gas pedal is pressed or not. Connected to forced idle economizer.
Throttle limit switch
8. The speed sensor is a gear shaft inserted into the gearbox and connected via a cable to the speedometer to display the speed of the vehicle.
Speed sensor
Replacement
If you have a desire to save money and want to try and repair an old speed sensor first, we hasten to disappoint you.
We remove and change
The speed sensors installed on the VAZ 2109 (as well as on other cars) cannot be repaired or restored. The only way to solve the problem is to replace the device.
Take a pair of keys for 21 and 10. Disconnect the negative from the battery to de-energize the car. Disconnect the connector going to the speed sensor. Unscrew the sensor itself
Another time the rod may break, so you will also have to remove the drive. Be sure to be careful when removing the drive, otherwise you risk dropping a broken rod into the gearbox. After removing the device, change the drive, if necessary, and screw the new speed sensor into place. The drive rod should be inserted into the DS bushing, and the rubber seal ring should be treated with oil. All that remains for our client is that you can quietly screw the device into the socket.
We got to DS
How to connect a speed sensor to a VAZ 2109.
After completing the repair, be sure to reset the error that was generated by the electronic control unit on the on-board computer. Otherwise, the system will assume that the sensor is faulty. Therefore, even its presence in the socket will not allow the DS to start working.
Changing the speed sensor for VAZ-2109
In order to make a replacement, we will need the following: a new speed sensor (the old one cannot be repaired), as well as keys for “10” and “12”. First we need to disconnect the battery, then the speed sensor.
When dismantling a faulty device, you need to be very careful and carefully remove it from the stem to avoid breaking it. That's it, now we can install a new sensor - we'll do all the steps in reverse order. Carefully place the new sensor on the rod, connect it and at the very end, when all contacts are sealed (it is advisable to do this), connect the battery.
But that is not all. In order for our new sensor to display true results, immediately after its installation it is necessary to reset the electronic on-board computer data. Otherwise, do not expect correct data even if a new sensor is installed. Good luck with your installation, dismantling and long-term operation of your car!
Speed sensor Lada Kalina Car Hobby
I encountered the following problem - the speed sensor on Kalina quickly failed. More specifically, in about a year and a half I replaced 3 speed sensors. Moreover, the latter did not work even a day. This arrangement of events did not suit me and, to be honest, I was a little fed up. I decided to figure out the reason for such a quick “demise” of the sensors.
A speed sensor can break down mainly for 3 reasons - the first, and most common, is liquid (water or antifreeze) getting on the sensor contacts. This occurs due to leaking pipes or driving through a large puddle. The second reason is transmission oil getting inside the sensor. This is due to the design features of the sensor itself. And third, the speed sensor chip may begin to melt; no one knows for sure why this happens.
The first time my speed sensor failed was due to antifreeze getting on it. I fixed the leak (the pipes leading to the stove were leaking, just above the sensor) and replaced the sensor. The second time the speedometer stopped showing after a trip in rainy weather, although it didn’t seem to drive through puddles. The third time I didn’t understand at all why it stopped working.
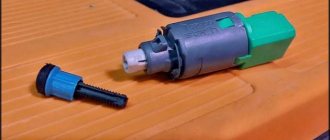
Through my own experiments and reflections, I came to the conclusion that the reason for such rapid breakdown of sensors is their quality. The last two times I bought a sensor with the number 1118-3843010-04 approximately “StartVolt”
Pay attention to its shape - it’s all square
For the third time I bought a speed sensor-1118-3843010-02 (Kaluga). It looks better quality when you pick it up and it's noticeable. It has an oval shape. The bottom of the sensor is not made of plastic, but is filled with a substance like epoxy resin (I don’t know exactly). I originally had the same sensor. Why I didn’t buy the same one right away, I don’t know.
Speed sensors for Kalina have three varieties 1118-3843010-00 (02, 04). That is, they differ only in the last two digits. Sellers at the market claim that you only need to install the one that was there before. But actually it is not. All of them are interchangeable (personally verified).
So this is what I'm getting at, buy high-quality sensors (I recommend Kaluga). Come to the AvtoVAZ branch and ask for a speed sensor, they will offer you a branded, high-quality sensor. And you don’t need to run around the market, shops, check numbers, listen to the persuasion of sellers and end up buying crap, excuse the expression.
Another reason could be rotting of the contacts on the connector itself or a break in its wires.
In this case, you will have to buy a new connector. Changing it is quite simple - cut off the old one and screw (solder) a new one in its place. Be careful with the wires, do not mix them up.
Causes of failure
There are several main circumstances due to which the DS may stop working:
- There has been a break in the electronic circuit. Therefore, we first recommend checking the condition of the wiring and contacts. They could become dirty or oxidized. They are easy to clean. Additionally, we recommend treating the contacts with Litol.
- Break near the connector. Here the wiring is often bent and chafing occurs. Don’t forget to also check the condition of the insulation of the wires that are located near the exhaust manifold. Often they melt under the influence of temperature, which leads to short circuits.
- The speedometer cable is worn out. After some time during the operation of the car, the cable becomes covered with burrs, cracks, and breaks. As a result, the speed sensor stops working perfectly.
Replacing the speed sensor
, how to correctly change the speedometer sensor Signs of malfunction: Unbalanced.
What should be done in such cases
In the first case, we do not necessarily need to change the speed sensor itself. First, we have to familiarize ourselves with the connection diagram of the device and all the electrical wiring. First, let's check the contacts. They need to be cleaned and it is advisable to insulate them somehow - liquid rubber or oil-water-resistant electrical tape are quite suitable. If you don’t have this on hand, you need to at least lubricate them with Litol or some other product that you have in your garage.
Secondly, if the cause has not yet been eliminated after cleaning and sealing the contacts, we carefully review all the wiring, since even minor damage to them will lead to this type of malfunction. Most often, the rupture occurs near the contacts or near the exhaust manifold.
If the integrity of the entire chain does not give you any doubt, let’s move on to the second, more common reason for the speed to not work on the VAZ-2109 – worn out cable on the speedometer. If you look closely at a worn speedometer cable and a new one, you will undoubtedly see the difference. Wear manifests itself in unevenness on the cable, burrs, and micro-tears visible to the human eye. Due to these irregularities, the device fails quite quickly.
If your speedometer cable is brand new and the contacts are intact, you can check the speedometer sensor by removing it and connecting a special device - a multimeter. Since, as we found out, the sensor transmits pulses, the following values should be displayed on the multimeter: 0.5-10 W. If no fluctuations are detected on the multimeter, you should replace your old speed sensor with a new one.
Verification methods
The first thing you need to do is make sure that a voltage of 12 V is supplied to the DS contacts. Because the operation of the DS is based on the Hall effect, the test is performed by torsion. The voltage in this case varies between 0.5-10V.
Nowadays, three main methods are used to check the performance of the speed sensor. The first two require the use of a multimeter. Which one to choose, decide for yourself. We will carefully talk about all 3 methods of checking DS.
Verification method
Your actions
- Remove the sensor;
- Use a multimeter to check which pin does which function. It is necessary to find a pulse contact;
- Connect the positive probe of the multimeter to the pulse contact, and the negative probe to the engine, or, in other words, the car body. It will be a mass;
- Put a piece of tube on the DS axis and start turning it at low speed;
- Immediately check how the voltage changes;
- As the speed increases, the pulse frequency and voltage should increase
- There is no need to dismantle the device;
- Use a jack to lift one of the front wheels of the car; Connect the multimeter to the sensor wires, as in the first method;
- Spin the wheel with your hands and watch the multimeter readings;
- If impulses occur immediately, the DS is working normally. In this case no, it is out of order and needs to be replaced
- This test method does not require the use of a multimeter;
- Instead, a control lamp is taken, or an ordinary 12-volt light bulb;
- Disconnect the impulse wire from the DC;
- Turn on the ignition and use the test lamp to find the plus and minus;
- Raise one of the front wheels using a jack;
- Connect the test light to the signal wire and spin the wheel;
- If the minus light comes on on the control lamp, this indicates the normal state of the sensor;
- If you don’t have a control, take any 12V light bulb. On a VAZ 2109 you can find one in the turn signal. Connect the signal contact and the plus of the battery with a wire. The functionality of the sensor is indicated by the lamp starting to blink.
If checking the DS shows that everything is fine with it, be sure to check the functionality of the sensor drive. It is necessary to hang up the front wheel and find the DS drive by touch. Now start rotating the wheel with your foot and check with your hand whether there is rotation in the drive and how stable it is. The help of a partner will not hurt you here.
KEY-DOP
Signs of breakdown
The car itself can tell you that the DS is out of order. To do this, you just need to pay attention to the characteristic signs of such a breakdown:
- The speedometer does not work at all or provides incorrect information about the current speed;
- Idling behavior is unstable;
- Gasoline consumption is increasing;
- The motor does not produce full power.
The practice of VAZ 2109 owners shows that the most obvious sign of a breakdown of the engine is the engine stopping at idle while coasting, or the engine stopping when the clutch is pressed to change speed.
If the engine breaks down, the “Check Engine” light on the dashboard should light up. If the car is equipped with an on-board computer, then the error code corresponding to the malfunction is 24.
Causes of failure
There are several main reasons why a DS may stop working:
- There is a break in the electrical circuit. Therefore, first of all, we advise you to check the condition of the wiring and contacts. They could become dirty or oxidized. It's not difficult to clean them. Additionally, we recommend treating contacts with Litol.
- Break near the connector. Here the wiring often bends and chafing occurs. Don't forget to check the condition of the insulation of the wires that are located near the exhaust manifold. Often they melt under the influence of temperature, which leads to short circuits.
- The speedometer cable is worn out. Over time, as the vehicle is used, the cable becomes covered with burrs, cracks, and breaks. As a result, the speed sensor stops working properly.
Verification methods
The first thing you need to do is make sure that a voltage of 12 V is supplied to the DS contacts. Since the operation of the DS is based on the Hall effect, the test is performed by torsion. The voltage varies within 0.5-10V.
Today, there are three main ways to check the performance of a speed sensor. The first two involve the use of a multimeter. Which one to choose, decide for yourself. We will talk in detail about all three methods of checking DS.
| Verification method | Your actions |
| Method one |
|
| Method two |
|
| Method three |
|
If checking the DS shows that everything is fine with it, be sure to check the functionality of the sensor drive. It is necessary to hang up the front wheel and find the DS drive by touch. Now start rotating the wheel with your foot and check with your hand whether there is rotation in the drive and how stable it is. The help of a partner will not hurt you here.
Replacement
If you have a desire to save money and want to try and repair an old speed sensor first, we hasten to disappoint you.
We remove and change
The speed sensors installed on the VAZ 2109 (as well as on other cars) cannot be repaired or restored. The only way to solve the problem is to replace the device.
Take a pair of keys for 21 and 10. Disconnect the negative from the battery to de-energize the car. Disconnect the connector going to the speed sensor. Unscrew the sensor itself
Another time the rod may break, so you will also have to remove the drive. Be sure to be careful when removing the drive, otherwise you risk dropping a broken rod into the gearbox. After removing the device, change the drive, if necessary, and screw the new speed sensor into place. The drive rod should be inserted into the DS bushing, and the rubber seal ring should be treated with oil. All that remains for our client is that you can quietly screw the device into the socket.
We got to DS
How to connect a speed sensor to a VAZ 2109.
After completing the repair, be sure to reset the error that was generated by the electronic control unit on the on-board computer. Otherwise, the system will assume that the sensor is faulty. Therefore, even its presence in the socket will not allow the DS to start working.
How to connect a tachograph
These devices are required to be installed in long-distance vehicles - regular buses, long-distance trucks, taxis, and so on.
But it is not prohibited to equip any car with such a device at the request of its owner.
This device measures speed, as well as the driver’s physical condition, rest mode, and so on.
The tachograph is connected to the circuit between the speed sensor and the speedometer, due to which the data from the DS enters two devices simultaneously.
When installing this device, you must follow some rules:
- It is not recommended to place the device antenna on surfaces made of metal;
- It is recommended to place the wires in such a way that they are not exposed, since they are quite fragile and can be damaged even by the salt that is sprinkled on the roads in winter;
- If, when installing the tachograph, the speedometer suddenly stops functioning, it may be necessary to connect it in parallel to the DS.
How does he work
The working mechanism is based on the following. For every kilometer traveled, the speed sensor (DS) transmits a certain number of pulses to the controller.
The number of impulses transmitted per 1 km is 6004. The faster the car moves, the faster the impulses are transmitted. Due to this, the controller determines the speed based on the time interval between received pulses.
It is necessary to see that the DS also has an additional function that allows you to partially save fuel for the VAZ 2109. When coasting at a speed of more than 20 km per hour, the controller, focusing on data from the DS, does not open the fuel supply.
Speed sensor VAZ 2109 carburetor, injector location, malfunctions
Why do we need a speed sensor on the VAZ-2109? Let's figure it out. This device is responsible for the correct display of data on our speedometer and tachometer. He does this by transmitting electronic impulses to the electrical control unit. But due to long-term operation and significant load on the speed sensor itself of the VAZ-2109 car (more than 6 thousand pulses are transmitted to the control unit per 1 km), an error occurs during data transfer. Then car owners have questions: how to check the speed sensor? How to change it correctly?
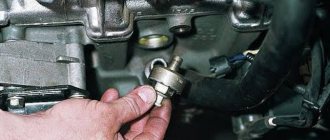
First, let's tell you where the speed sensor is located in the VAZ-2109 car.
As on most domestic cars with front-wheel drive, the speed sensor for the VAZ-2109 is located in the gearbox, or more precisely, on the speedometer drive itself. In order to get to it, you need to open the hood and it is recommended to remove the adsorber to make it easier to replace.
How to find out if our device is faulty
We may not always notice problems right away. This can turn into a huge problem - from a fine for speeding to road accidents and accidents.
Let's look at the main symptoms of a malfunction:
- It seems to you that the speedometer does not display the speed of your car correctly.
- Faulty idle.
- Lately you have been experiencing increased gas mileage.
- You can hear from the sound of the engine that it is not working at full power.
If we consider the complaints of car owners, then most often problems arise precisely with stopping the engine when the car is coasting, or during gear changes when the clutch is depressed.
The most common causes of failure of the VAZ-2109 speed sensor.
There are two main causes of malfunction:
- There are problems in the wiring: broken contact, wires, contacts are dirty or not connected correctly.
- Your speedometer cable is very worn.
What should be done in such cases
In the first case, we do not necessarily need to change the speed sensor itself. First, we have to familiarize ourselves with the connection diagram of the device and all the electrical wiring. First, let's check the contacts. They need to be cleaned and it is advisable to insulate them somehow - liquid rubber or oil-water-resistant electrical tape are quite suitable. If you don’t have this on hand, you need to at least lubricate them with Litol or some other product that you have in your garage.
Secondly, if the cause has not yet been eliminated after cleaning and sealing the contacts, we carefully review all the wiring, since even minor damage to them will lead to this type of malfunction. Most often, the rupture occurs near the contacts or near the exhaust manifold.
If the integrity of the entire chain does not give you any doubt, let’s move on to the second, more common reason for the speed to not work on the VAZ-2109 – worn out cable on the speedometer. If you look closely at a worn speedometer cable and a new one, you will undoubtedly see the difference. Wear manifests itself in unevenness on the cable, burrs, and micro-tears visible to the human eye. Due to these irregularities, the device fails quite quickly.
If your speedometer cable is brand new and the contacts are intact, you can check the speedometer sensor by removing it and connecting a special device - a multimeter. Since, as we found out, the sensor transmits pulses, the following values should be displayed on the multimeter: 0.5-10 W. If no fluctuations are detected on the multimeter, you should replace your old speed sensor with a new one.
Changing the speed sensor for VAZ-2109
In order to make a replacement, we will need the following: a new speed sensor (the old one cannot be repaired), as well as keys for “10” and “12”. First we need to disconnect the battery, then the speed sensor.
When dismantling a faulty device, you need to be very careful and carefully remove it from the stem to avoid breaking it. That's it, now we can install a new sensor - we'll do all the steps in reverse order. Carefully place the new sensor on the rod, connect it and at the very end, when all contacts are sealed (it is advisable to do this), connect the battery.
But that is not all. In order for our new sensor to display true results, immediately after its installation it is necessary to reset the electronic on-board computer data. Otherwise, do not expect correct data even if a new sensor is installed. Good luck with your installation, dismantling and long-term operation of your car!
Where is the VAZ-2109 speed sensor located and faulty?
Why do we need a speed sensor on the VAZ-2109? Let's figure it out. This device is responsible for the correct display of data on our speedometer and tachometer. He does this by transmitting electronic impulses to the electrical control unit. But due to long-term operation and significant load on the speed sensor itself of the VAZ-2109 car (more than 6 thousand pulses are transmitted to the control unit per 1 km), an error occurs during data transfer. Then car owners have questions: how to check the speed sensor? How to change it correctly?