If when driving your car you hear extraneous sounds, the engine quickly overheats, the car’s power drops and high fuel consumption, then these are clear signs of incorrect operation of the ignition system.
On cars with a contact ignition system, you can set the timing with your own hands, without using a special device for this. A strobe light is needed when the machine operates on an engine with a non-contact system. In order to set the ignition on a VAZ-2101, you will need some tools:
- Open-end or spanner wrenches 13.
- Crankshaft wrenches.
- 12-volt lamp (if you don’t have one at hand, you can make your own using a light bulb, a socket and a couple of pieces of wire).
Carburetor engines often malfunction in the ignition system. This manifests itself in the form of extraneous sounds from under the hood when the car is driving in fourth gear and they are trying to increase its speed. This occurs due to early fuel detonation.
If you do not fix this problem right away, then in the future it can lead to:
- problems with the starter;
- vibration and shaking of the engine when slowing down or turning off the engine;
- “triple” of the engine or failures at low speeds.
Such problems are very familiar to domestic car owners.
It becomes necessary to adjust the ignition so that the spark occurs at the moment when it is needed and the detonation of the air-fuel mixture does not occur ahead of schedule.
Let's take a closer look at how to adjust the ignition system on a VAZ-2101.
Experienced car owners know several ways to adjust the ignition. The simplest thing is to unscrew the distributor fixing bolt and turn the coil itself in the direction required. It should be turned carefully and clockwise if the ignition is early and counterclockwise if it is late.
This method is considered the simplest and most common; it is performed “at random.” Simply put, you must carefully turn the distributor, turn on the ignition and try to start the penny. If it starts up without any problems, without any extraneous noise or vibrations, then everything is fine and there are no problems. At the moment when the engine is turned off, there should also be no extraneous noise or vibrations.
It is worth considering that the car may behave differently while driving. Therefore, after you have adjusted and tightened the coil fixing bolt, you need to check the result on the road. You need to accelerate the car to 50 km per hour and try to give it gas. If detonation does not occur, then everything is fine; if the problem recurs, the distributor must be slightly turned in the opposite direction again.
We recommend: How to repair a heater fan on a Ford Focus
It is important to know that such problems can arise due to low quality fuel. In addition, the above method is not accurate, since it becomes necessary to simply adjust the ignition at random. In this case, both the starter and the battery suffer.
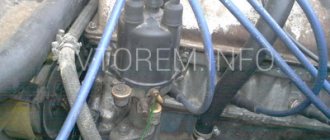
Ignition system VAZ 2101
Classic Zhiguli models with carburetor engines are equipped with an ignition system that requires periodic adjustment. The efficiency and stable operation of the power unit depends on the correct setting of the ignition timing and the uninterrupted operation of this system. Since ignition adjustment is one of the most important measures for setting up an engine, it is worthwhile to dwell on this process, as well as on the constituent elements of the ignition system, in more detail.
What it is
The ignition system is a combination of several devices and devices that ensure sparking and further ignition of the combustible mixture in the engine cylinders at the right time. This system has several functions:
- The formation of a spark at the moment of compression of the piston, according to the order of operation of the cylinders.
- Ensuring timely ignition timing according to the optimal advance angle.
- Creation of such a spark as is necessary to ignite the fuel-air mixture.
- Continuous sparking.
Principle of spark formation
When the ignition is turned on, current begins to flow to the contacts of the distributor breaker. When starting the engine, the ignition distributor shaft rotates simultaneously with the crankshaft, which, with its cam, closes and opens the low voltage circuit. The pulses are supplied to the ignition coil, where the voltage is converted to high voltage, after which it is supplied to the central contact of the distributor. Then the voltage is distributed through the slider across the contacts of the cover and supplied to the spark plugs via explosive wires. In this way, a spark is formed and distributed.
Diagram of the VAZ 2101 ignition system: 1 - generator; 2 — ignition switch; 3 — ignition distributor; 4 — breaker cam; 5 — spark plugs; 6 — ignition coil; 7 - battery
Why is adjustment needed?
If the ignition is set incorrectly, many problems arise:
- power is lost;
- the motor is troublesome;
- fuel consumption increases;
- pops and shots appear in the silencer;
- unstable operation at idle, etc.
To avoid all of these difficulties, the ignition needs to be adjusted. Otherwise, normal operation of the vehicle will be impossible.
How to adjust the torque on a VAZ 2101 with your own hands?
After a new lock has been installed as a result of repair or replacement, it is imperative to set up and adjust the advance angle. Without this, the VAZ 2101 engine will not function correctly.
How to install by spark?
To set the ignition on a VAZ 2101 using the simplest method, you need to perform a series of sequential actions:
- The car's engine compartment opens.
- The crankshaft of the power unit is set to the required position according to the marks.
- The central cable is disconnected from the ignition distribution device (distributor). Its contact must be fixed at a distance of about 5 mm from the mass of the car. To do this, you can use the car body or the cylinder head.
- Then the screw that secures the distribution assembly housing is loosened. The ignition is activated.
- The distributor housing rotates clockwise approximately 10-20 degrees.
- After this, it must be turned in the opposite direction. The turning procedure is carried out until a spark appears between the tip of the distributor and the ground. If this happens, the distribution unit is fixed by tightening the bolt.
The “Auto Repair and Maintenance” channel spoke about the nuances of adjusting the ignition angle by spark.
How to adjust the timing using a light bulb?
Before setting up and adjusting the ignition, you need to make sure that the spark plugs are working, otherwise there is no point in carrying out this task.
There should be no carbon deposits on these elements. If it is present, the devices are removed and cleaned; for this you can use an iron brush or special means. Before starting work, you need to find the marks located on the crankshaft, as well as the chain drive pulley, they are cleaned.
The adjustment procedure looks like this:
- First, the crankshaft is rotated so that the mark aligns with the mark on the chain drive housing. If the vehicle is equipped with an engine in which the cylinder diameter is 7.9 cm, then the mark on the shaft must be placed opposite the middle one located on the chain drive. If the size of the cylindrical elements on the car is 7.6 cm, then the mark is aligned with the outermost mark on the cover. This action will allow you to set the engine crankshaft to the top dead center position.
- After aligning the marks, the wire that goes from the ignition coil to the distribution mechanism is disconnected. It must be disconnected directly from the clamp on the distributor. After this, a conductor from a light source is connected to it, which will be used as an adjusting element.
- The other wire from the light bulb is connected to the positive terminal on the battery.
- Using a 13mm wrench, loosen the bolt that secures the distribution unit.
- After this, this mechanism rotates counterclockwise. Then it must be turned in the opposite direction.
- The scrolling procedure is performed until the light source goes out. As a result, the fastening nut on the device body is tightened. The timing gear wire is connected back.
We recommend: Do-it-yourself oil change in the Nissan X Trail T31 variator
Adjustment with strobe light
If such a device is available, the configuration can be performed using it.
For this:
- The car engine starts and warms up to operating temperature, this will take approximately 10 minutes. Then the motor stops.
- After this, the vacuum corrector hose is disconnected from the distribution device - it must be plugged. Not all “kopecks” have a regulatory unit, only models released after 1980.
- The strobe contacts are connected to the on-board network of the machine. The connection can be made to the battery terminals. There should be three cables coming from the strobe, two of them are equipped with crocodiles; they are connected to the negative and positive contacts of the battery.
- The remaining conductor from the device must be connected to the “high voltage” of the spark plug installed in the first cylinder. To do this, you need to move its upper part and fix it.
- Using chalk, a mark is made on the metal surface of the cylinder block near the crankshaft pulley. In the diagram below, this is o.
- Then the strobe light is directed to the place where the risk is made, and the power unit starts. If after start-up the mark is in the area where o, then adjustment of the advance angle is not required. If in a different place, then the ignition must be moved back a little. When the engine speed increases, the mark may shift slightly; when this does not happen, it is necessary to check the centrifugal regulator. If the engine is idling, the risk should not move.
- At the final stage, the pipe from the vacuum regulator is connected.
User Pavelmjoy spoke in detail about adjusting the lead angle using a strobe light on classic VAZ models.
Checking the setup results
The diagnostic procedure for the completed task is carried out while driving, while:
- The power unit of the machine starts and warms up to operating temperature.
- On a flat road, you need to accelerate to about 50 km/h, and then move the gearshift lever to the fourth speed position.
- The gas pedal is pressed sharply. For two seconds, detonation (a metallic clatter) may be heard from under the hood, and the speed of the car will quickly increase.
- If such sounds are not heard, then the switchgear must be turned counterclockwise one degree. After this, the diagnostic procedure is repeated. The duration of detonation should be no more than two seconds.
We recommend: Dashboard VAZ 2107
BB wires
High-voltage wires, or, as they are also called, spark plug wires, are different from all others installed in the car. The purpose of these wires is to transmit and carry voltage passing through them to the spark plugs and protect other elements of the vehicle from electrical charge.
Spark plug wires provide connection to the ignition coil, distributor and spark plugs
Malfunctions
The appearance of problems with explosive wires is accompanied by the following characteristic signs:
- problematic engine starting due to insufficient voltage on the spark plugs;
- shots at start-up and vibrations during further operation of the engine;
- unstable operation at idle speed;
- periodic engine tripping;
- the appearance of interference during the operation of the radio, which changes when the engine speed changes;
- smell of ozone in the engine compartment.
The main reasons that lead to problems with wires are wear and aging of the insulation. The location of the wires near the engine leads to temperature changes, especially in winter, as a result of which the insulation gradually cracks, moisture, oil, dust, etc. get inside. When cracks reach the conductor, the explosive wire can be pierced to ground, and a spark to the spark plug simply it won't arrive. In addition, wires often fail at the junction of the central conductor and the contact connectors on the spark plugs or ignition coil. To avoid mechanical damage, the wires must be correctly laid and secured with special clamps.
One of the malfunctions of high-voltage wires is a break
How to check
First, you should visually inspect the cables for damage to the insulating layer (cracks, chips, melting). Attention should also be paid to the contact elements: there should be no traces of oxidation or soot on them. Checking the central core of explosive wires can be done using a conventional digital multimeter. During diagnostics, a broken conductor is identified and the resistance is measured. The procedure consists of the following steps:
- Remove the spark plug wires.
Pull off the rubber caps with wires from the spark plugs - We set the resistance measurement limit on the multimeter to 3–10 kOhm and connect the wires in series. If the current-carrying wire breaks, there will be no resistance. A working cable should show about 5 kOhm.
Serviceable spark plug wires should have a resistance of about 5 kOhm
The resistance of the wires from the kit should not differ by more than 2–3 kOhm.
I check the wires for damage and spark breakdown as follows: in the dark, I start the engine and open the hood. If a spark strikes ground, it will be clearly visible, especially in wet weather - a spark will jump. After this, the damaged wire can be easily identified. In addition, one day I was faced with a situation where the engine began to misfire. I started checking with the spark plugs, since the wires had been replaced recently, but further diagnostics led to a malfunction in the cable - on one of them there was no contact with the terminal itself connecting the conductor to the spark plug. After contact was restored, the engine started running smoothly.
Video: checking explosive wires
Which ones to put
When choosing and purchasing high-voltage wires, you should pay attention to their markings. There are many manufacturers of the elements in question, but it is better to give preference to the following:
- BERU;
- NGK;
- PARTS-MALL;
- AMD;
- Bremi;
- Tesla Technics.
Today a large selection of spark plug wires is offered, but it is better to give preference to well-known manufacturers
Recently, more and more car owners prefer to purchase silicone explosive wires, which are characterized by higher strength and protection of the internal layers from high temperatures, abrasion, and aggressive chemicals.
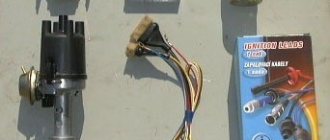
Contact distributor
Stable engine operation is impossible without timely combustion of the working mixture. One of the main components in the ignition system is the distributor, or ignition distributor, which has the following functions:
- by disconnecting the contacts in the device, the beginning of sparking is set;
- the high voltage generated in the ignition coil is distributed to the desired spark plug;
- the beginning of the moment of spark formation changes;
- accumulation and discharge of energy in the coil is ensured.
The VAZ 2101 distributor consists of the following elements: 1 - spring cover holder; 2 — vacuum ignition timing regulator; 3 - weight; 4 — vacuum supply fitting; 5 - spring; 6 — rotor (runner); 7 — distributor cover; 8 — central electrode with a terminal for the wire from the ignition coil; 9 — side electrode with a terminal for the wire to the spark plug; 10 — central contact of the rotor (runner); 11 - resistor; 12 — external contact of the rotor; 13 — support plate of the ignition timing regulator; 14 - wire connecting the ignition distributor to the output of the primary winding of the ignition coil; 15 — breaker contact group; 16 — distributor body; 17 - capacitor; 18 — distributor roller
The distributor is called contact because in such a device the low voltage circuit, which is supplied to the ignition coil, is broken through a contact group. The distributor shaft is driven by the corresponding engine mechanisms, as a result of which a spark is supplied to the desired spark plug at a certain point in time.
Examination
To ensure stable operation of the power plant, periodic checking of the distributor is necessary. The main elements of the assembly that are subject to diagnosis are the cover, slider and contacts. The condition of these parts can be determined by visual inspection. There should be no signs of burning on the slider, and the resistor should have a resistance in the range of 4–6 kOhms, which can be determined with a multimeter.
The distributor slider should not be burnt, and the resistor should have a resistance of 4–6 kOhm
The distributor cap must be cleaned and inspected for cracks. The burnt contacts of the cover are cleaned, and if cracks are detected, the part is replaced with a whole one.
The distributor cap should not have cracks or severely burnt contacts.
The contacts of the distributor are also inspected, cleaned with fine sandpaper to prevent scorching and the gap is adjusted. If they are severely worn, they are also replaced. Depending on the current situation, more detailed diagnostics may be required, during which other problems may be identified.
If the breaker contacts are severely worn, they need to be replaced.
Adjusting the contact gap
The distance between the contacts on a standard VAZ 2101 distributor should be 0.35–0.45 mm. If there are deviations, the ignition system begins to malfunction, which affects the incorrect operation of the engine:
- power does not develop;
- the car jerks;
- fuel consumption increases.
Problems with the breaker occur due to the fact that the contacts are constantly working. Therefore, adjustments have to be done quite often, about once a month. The procedure is carried out using a flat screwdriver and a 38 wrench in the following order:
- With the engine off, remove the cover from the distributor.
- We rotate the crankshaft with a special key and set the breaker cam to a position in which the contacts will be maximally open.
- We evaluate the gap between the contacts with a feeler gauge. If it does not correspond to the required value, then loosen the corresponding fastening screws.
Check the gap between the contacts with a feeler gauge - We insert a flat screwdriver into groove “b” and turn the breaker stand to the desired amount.
Top view of the distributor: 1 - bearing of the movable plate of the breaker; 2 - oil can body; 3 — screws securing the rack with breaker contacts; 4 — terminal clamp screw; 5- bearing lock plate; b - groove for moving the stand with contacts - After completing the adjustment, tighten the fastening and adjusting screws.
After adjusting and checking the gap, it is necessary to tighten the adjusting and fastening screws
VAZ car repair
- Before starting this article, where we will tell you how to check the ignition timing in VAZ engines, adjust and install it correctly, let us remember what ignition timing is, in simple words, this is the moment when a spark jumps at the spark plug, which ignites (detonates) the working mixture in the engine cylinder according to the order of their work.
- The main task for which the ignition timing is to achieve detonation of the working mixture (gasoline and air) when the piston is in a certain position from the top dead center (TDC).
- The engine ignition timing is an angular measure, accordingly measured in degrees, it can be advanced, retarded and normal.
Location of marks for setting ignition timing
1 – TTM mark on the crankshaft pulley; 2 – ignition timing mark by 10°; 3 – ignition timing mark by 5°; 4 – ignition timing mark at 0°
Ignition timing
Ignition timing
To check the torque on the timing cover there are special marks 2, 3 and 4, you may ask, where is the first number 1, it is located on the crankshaft pulley and corresponds to TDC 1 and 4 of the pistons if it coincides with mark number 4 on the timing cover ( gas distribution mechanism).
We will consider the initial ignition timing angles for various VAZ engine models and gasoline brands below, as well as additional data.
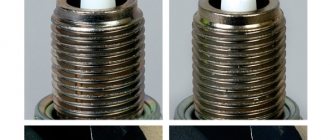
Initial advance angle to TDC for the VAZ-2101 engine when using gasoline, degrees: – AI-91 2 ± 1 (0 ± 1)* – AI-93 6 ± 1 (4 ± 1)* Gap between the spark plug electrodes, mm 0.5 – 0.6 Deflection of the generator drive belt with a force of 100 N (10 kgf), mm 10 – 15
First, let's check the ignition timing.
1. To check and correctly set the ignition timing on your engine, it is advisable to use a strobe light. 2. Connect the positive terminal of the strobe to the positive of the battery, the ground terminal to the negative of the battery, the strobe sensor to the high-voltage wire of the 1st cylinder. 3.
For convenience, mark mark No. 1 with chalk. See the car and warm up its engine so that it works normally at minimum idle speed. 4.
Point the flashing light of the strobe beam at the pulley and check whether the position of mark 1 of the pulley corresponds to the initial ignition timing data (see above).
Adjusting the ignition timing in a VAZ engine
1. Turn off the engine and unscrew the nut of the ignition distributor holder, turn it to the angle we need. 2.
The ignition timing needs to be increased , then we turn the distributor housing counterclockwise, and decrease it clockwise. 3.
Then tighten the nut of the ignition distributor holder and check that the settings are correct.
Installation of the ignition distributor on a VAZ engine, work procedure
1. The procedure for installing the ignition distributor on the engine is as follows. 2. Remove the cover from the distributor, if necessary, adjust the gap between the breaker contacts (read below). 3. Turn the crankshaft of the VAZ engine until the compression stroke begins in cylinder No. 1, and then align mark 1 with mark 3 by turning the crankshaft. 4. Turn the rotor to a position in which its outer contact will be directed towards the contact of the first cylinder on the distributor cap. 5. While holding the distributor shaft from turning, install it in the original place of the cylinder block so that the center line passing through the spring latches is approximately parallel to the center line of the engine. 6. Put everything back together, screw on the distributor, install the cover, connect the high-voltage wires, check and, if necessary, adjust the set ignition timing.
Gap between breaker contacts in the ignition distributor
Check and adjustment
Gap between breaker contacts in the ignition distributor
1. Check the gap between the contacts of the breaker as follows. 2. Switch the gearbox to neutral and apply the car parking brake. 3. Remove the cover from the ignition distributor and, turning the crankshaft, achieve maximum opening of the breaker contacts. 4. Using wood chips, we measure the size of the gaps, they should be in the range of 0.35–0.45 mm, if necessary, adjust by loosening screws 33 , using a small flat screwdriver inserted into groove “ b ”, move the breaker stand to the required value . Remember to tighten the screw after adjustment.
Initial (factory) installation angle of ignition timing of VAZ car engines
| Ignition timing, degrees | Engine | Automobile |
| 5—7 | VAZ-2101, -21011 | VAZ-2101, -21011, -21013, -2102, -21021 |
| 5 | VAZ-2105, -2101, -2103, -2106 | VAZ-2105, -21051, -21053, -2104, -21043, -2107, -21072, -21074 |
| 3—5 | VAZ-2106, -2103, -21011 | VAZ-2106, -21065, -21061, -21063 |
| 1±1 * | VAZ-2108 | VAZ-2108, -2109 |
| 6±1 * | VAZ-21081 | VAZ-21081, -21091 |
| 4±1 * | VAZ-21083 | VAZ-21083, -21093, -21099 |
| 1±1 | VAZ-1111 | VAZ-1111 "Oka" |
| 4±1 | VAZ-11113 | VAZ-11113 "Oka" |
| 3—5 | VAZ-2106-70 | "Moskvich-2141" |
Precautions when performing work on setting the ignition timing and working on the engine
Do not forget to adhere to safety rules , especially when working with rotating parts and mechanisms of the engine, ignition system and others.
Checking the correct setting of the ignition timing . In order to find out whether we did everything correctly, we accelerate the car on a flat road to 40-50 km/h in fourth and press the accelerator pedal all the way, this action can cause small short-term detonation knocks in the engine.
- If the ignition is late, then you will not hear knocks, to correct the situation, you need to turn the distributor one or two divisions of the octane corrector scale towards the advance “+”, in case of strong detonation knocks - towards the delay “-“.
- All operations are carried out until the car engine operates stable.
- Popularity: 66%
Source: https://www.vaz-avto-remont.kiev.ua/ustanovka-momenta-zazhiganiya-dlya-avtomobilej-vaz/
Contactless distributor
The VAZ 2101 non-contact type ignition distributor is practically no different from the contact type, except that a Hall sensor is used instead of a mechanical breaker. This mechanism is modern and more reliable, since there is no need to constantly adjust the distance between the contacts. Structurally, the sensor is located on the distributor shaft and is made in the form of a permanent magnet with a screen and slots in it. When the shaft rotates, the screen holes pass through the magnet groove, which leads to changes in its field. Using the sensor, the distributor shaft revolutions are read, after which the information is sent to a switch that converts the signal into current.
A non-contact distributor is considered a more modern and reliable device
Diagnostics
The contactless ignition distributor is checked in the same way as the contact one, with the exception of the contacts themselves. Instead, attention is paid to the Hall sensor. If problems arise with it, the engine begins to work unstably, which manifests itself in the form of floating idle speed, problematic starting, and also twitching during acceleration. If the sensor fails completely, the engine will not be able to start. At the same time, problems with this element arise infrequently. A clear sign of a Hall sensor failure is the absence of a spark at the central contact of the ignition coil, so not a single spark plug will work.
The Hall sensor does not fail very often, and if this happens, the fault can be identified by the absence of a spark
You can check the part by replacing it with a known good one or by connecting a voltmeter to the output of the element. If it turns out to be working, the multimeter will show 0.4–11 V.
You can check the Hall sensor with a multimeter by connecting the device to the output of the device
Many years ago, I installed a contactless distributor on my car, after which I practically forgot what a distributor was and problems with ignition, since there was no longer a need to periodically clean the contacts from burning and adjust the gap. It is necessary to adjust the ignition only if any repair work is carried out on the engine, which happens quite rarely. As for the Hall sensor, during the entire operation of the contactless device (about 10 years) it has never changed.
Setting the timing using a light bulb
The need to adjust the ignition switch circuit, in particular, the timing of the advance, arises among owners of “kopecks” quite often. Adjusting the ignition distributor is necessary in case of increased fuel consumption, decreased power of the power unit, as well as in case of detonation and ring knocking. So that the set parameter no longer bothers you, the unit must be repaired, that is, configured correctly. Please note that before making a connection and adjusting the ignition distributor, you need to make sure that the spark plugs are working, and if necessary, dismantle them and clean them, as we reported above.
Before you begin, you need to find the marks on the chain pulley and crankshaft, these marks should be cleaned. The room where you are working should have good lighting, otherwise use a flashlight. If you have doubts about whether you can do everything correctly, it is better to contact a service station.
Stages
- First of all, you are required to rotate the crankshaft so that the mark on it is aligned with the mark located on the chain drive housing. If our “penny” has a power unit with a cylinder diameter of 79 mm, the crankshaft mark should be aligned with the middle mark of the chain drive. If the cylinder diameter is 76 mm, then the mark on the crankshaft should be combined with the outermost mark on the cover. This mark allows you to install the crankshaft in the MT.
- When all the marks on the shafts are aligned, you need to disconnect the cable that goes from the coil to the breaker-distributor device. The wire is disconnected from the terminal itself on the distributor, then you will need to connect the cable from the test lamp to it, which we will use for adjustment.
- The second lamp cable will need to be connected to the positive terminal of the battery.
- Using a 13mm wrench, loosen the screw that secures the breaker-distributor device.
- Then turn the body of this assembly slightly counterclockwise. Once you've done this, start slowly turning it in the other direction. As you can see, in general the adjustment principle is quite similar to that described above.
- The mechanism body rotates until the light goes out. Having achieved this, the assembly fixing nut should be tightened. All you have to do is install the cable from the distributor in place.
In principle, connecting the lamp and setting up the unit is not a problem. The ignition system of the VAZ 2101 is designed in such a way that in any case it will need periodic adjustments, this need especially often arises for drivers at the onset of a new season. If you are faced with a problem with the lock itself, then the VAZ 2101 ignition switch connection diagram will help you replace the device and connect it.
When installing a new VAZ ignition switch, it is necessary to correctly pinout the wires. After adjustment, check the quality of the work performed - if the engine knocks a little when accelerating to 50 km/h and switching to fourth gear, this indicates that the procedure was performed correctly.
Each car owner chooses which adjustment method he likes best!