Print this article Font size 16
As practice shows, the main reason for failure of wheel bearings is their long-term operation. Over time, a kind of buzzing begins to be created, indicating wear of this element.
Such a problem cannot be called very serious, but we still strongly recommend carrying out repairs in the near future. Such work is relatively easy to do with your own hands in ordinary garage conditions.
List of new parts and tools for replacing them
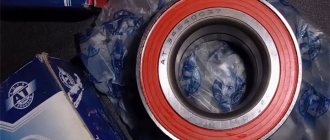
Replacing the front wheel bearing on a VAZ 2114 begins with the purchase by the car owner of the following spare parts:
- front wheel bearing (original art. 11180 – 3103020 – 04);
- front hub retaining rings (usually included in the repair kit under art. 11180 – 3101800 – 86);
- a new front hub (art. 11180 - 3103012 - 00), which will be needed if there is excessive wear of the bearing and rotation in the seat.
It is possible to carry out all the work to eliminate this malfunction without damaging other suspension parts using the following set of tools:
- tire remover;
- a set of open-end spanners from 12 mm to 24 mm;
- socket heads from 12 to 19 mm and wrenches;
- specialized wheel bearing puller;
- specialized steering wheel end remover;
- duckbills for removing retaining rings;
- carriage;
- Screwdriver Set;
- regular pliers.
The cost of work to eliminate this malfunction from official dealers (at the end of autumn 2021) ranges from 4 to 6 thousand rubles. In small private service workshops they will ask for work from 2500 to 3000 rubles. After reading the instructions below, carrying out repairs yourself will not cause big problems for the owner of a VAZ model 2113, 2114 or 2115.
How to change a bearing yourself
Before starting work, you should carefully study all its stages:
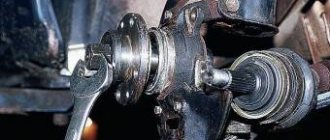
- We jack up the car from the side of the faulty bearing, remove the wheel and, having access to the lock nut of the outer CV joint, unscrew it using a 30 mm socket. It is worth considering that when subjected to high loads, the nut can be heavily tightened; in this case, the wheel is put in place, the car is released from the jack, after which we engage first or second gear in the gearbox and with great force and an elongated wrench, it can be torn off.
Next, we proceed to dismantling the brake cylinder, for which we need to unscrew the two bolts that secure it from the inside of the hub with a 17 mm wrench, and using a flat-head screwdriver, carefully pressing the pads away from the disc, we remove this unit to the side.
- We unscrew the nut securing the steering tip from the steering knuckle, and using a specialized puller, squeeze it out of its seat, then we perform a similar operation with the tip of the ball joint located at the bottom of the hub
- The upper part of the steering knuckle is attached to the suspension shock absorber strut with two bolts, the lower of which regulates the vehicle's wheel alignment, mark its position and, after unscrewing these bolts, remove the entire hub assembly. We also remove the brake disc secured with two screws.
- Using a specialized puller, we press the front hub out of the inner race of the bearing, then remove the retaining rings on both sides, and with the same puller, we squeeze the old bearing out of its seat.
- Before installing a new wheel bearing, we clean its seat from old contaminants, carefully inspect it for possible damage, small chips and cracks, and if they are found, the steering knuckle must be changed, otherwise there is a possibility of its rapid breakdown.
- We lubricate the bearing seat in the steering knuckle, which will greatly facilitate its pressing, install one retaining ring and mount the new part using a specialized puller until a characteristic click is heard, after which the second retaining ring is inserted.
- We clean, inspect for damage and, if there is none, lubricate the seat of the front hub. Then, using a puller, we carefully press it into the inside of the new bearing and mount the entire assembly into its seat. After that, we carefully insert the splined flange of the drive, install the brake disc, caliper, ball joint and steering end, after which we tighten the new nut securing the outer CV joint, which comes in the repair kit for new parts, roll its edges into the locking grooves and put the wheel in place.
This completes all work on replacing the front wheel bearing. Also watch the video for a detailed analysis of replacing the front wheel bearing on VAZ 2113, 2114, 2115 cars:
Source: autorn.ru
Replacing the front wheel bearing of VAZ 2113, 2114, 2115
Due to the increased loads on the suspension of modern models of Lada family cars, the front wheel bearing on VAZ 2113, 2114 and 2115 often fails, replacing which requires a certain skill and the use of some special tools. In addition to all of the above, an important point here is the correct selection of high-quality spare parts, which determines the long, trouble-free operation of the vehicle.
List of new parts and tools for replacing them
Replacing the front wheel bearing on a VAZ 2114 begins with the purchase by the car owner of the following spare parts:
- front wheel bearing (original art. 11180 – 3103020 – 04);
- front hub retaining rings (usually included in the repair kit under art. 11180 – 3101800 – 86);
- a new front hub (art. 11180 - 3103012 - 00), which will be needed if there is excessive wear of the bearing and rotation in the seat.
It is possible to carry out all the work to eliminate this malfunction without damaging other suspension parts using the following set of tools:
- tire remover;
- set of open-end spanners from 12 mm to 24 mm;
- socket heads from 12 to 19 mm and wrenches;
- specialized wheel bearing puller;
- specialized steering wheel end remover;
- duckbills for removing retaining rings;
- carriage;
- Screwdriver Set;
- regular pliers.
The cost of work to eliminate this malfunction from official dealers (at the end of autumn 2021) ranges from 4 to 6 thousand rubles. In small private service workshops they will ask for work from 2500 to 3000 rubles. After reading the instructions below, carrying out repairs yourself will not cause big problems for the owner of a VAZ model 2113, 2114 or 2115.
How to change a bearing yourself
Before starting work, you should carefully study all its stages:
- We jack up the car from the side of the faulty bearing, remove the wheel and, having access to the lock nut of the outer CV joint, unscrew it using a 30 mm socket. It is worth considering that when subjected to high loads, the nut can be heavily tightened; in this case, the wheel is put in place, the car is released from the jack, after which we engage first or second gear in the gearbox and with great force and an elongated wrench, it can be torn off.
Next, we proceed to dismantling the brake cylinder, for which we need to unscrew the two bolts that secure it from the inside of the hub with a 17 mm wrench, and using a flat-head screwdriver, carefully pressing the pads away from the disc, we remove this unit to the side.
- We unscrew the nut securing the steering tip from the steering knuckle, and using a specialized puller, squeeze it out of its seat, then we perform a similar operation with the tip of the ball joint located at the bottom of the hub
- The upper part of the steering knuckle is attached to the suspension shock absorber strut with two bolts, the lower of which regulates the vehicle's wheel alignment, mark its position and, after unscrewing these bolts, remove the entire hub assembly. We also remove the brake disc secured with two screws.
- Using a specialized puller, we press the front hub out of the inner race of the bearing, then remove the retaining rings on both sides, and with the same puller, we squeeze the old bearing out of its seat.
- Before installing a new wheel bearing, we clean its seat from old contaminants, carefully inspect it for possible damage, small chips and cracks, and if they are found, the steering knuckle must be changed, otherwise there is a possibility of its rapid breakdown.
- We lubricate the bearing seat in the steering knuckle, which will greatly facilitate its pressing, install one retaining ring and mount the new part using a specialized puller until a characteristic click is heard, after which the second retaining ring is inserted.
- We clean, inspect for damage and, if there is none, lubricate the seat of the front hub. Then, using a puller, we carefully press it into the inside of the new bearing and mount the entire assembly into its seat. After that, we carefully insert the splined flange of the drive, install the brake disc, caliper, ball joint and steering end, after which we tighten the new nut securing the outer CV joint, which comes in the repair kit for new parts, roll its edges into the locking grooves and put the wheel in place.
This completes all work on replacing the front wheel bearing. Also watch the video
detailed analysis of replacing the front wheel bearing on VAZ 2113, 2114, 2115 cars:
A little about the device and functionality
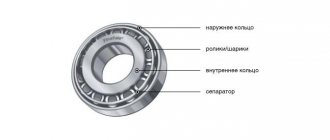
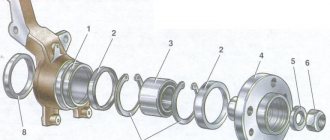
The main purpose of the part is to ensure uniform rotation of the car wheels. Given the name of the part, it is easy to guess that wheel bearings are the connecting link between the hub and the axle to which the brake disc and wheel are attached.
The design of the part fully corresponds to the classic type of rolling bearings. These are two metal rings into which conical rollers are pressed, protected from the body by a durable rubber insulator.
Unlike foreign competitors, domestic bearings are created using outdated HUB technology. They are quite difficult to install, require very precise tightening torque and require plenty of lubrication.
The operation of the mechanism lasts for several years. It is recommended to change a spare part for a VAZ 2114 approximately once every 100 thousand kilometers. But negative operating factors can accelerate the wear process:
Bearing diagnostics
Let's talk about how to check a wheel bearing.
An indirect sign that you need to pay attention to the bearing on the VAZ 2114 is the appearance of a characteristic hum or hum from one of the wheels while driving. Typically, the noise increases at high speeds, making it easier to hear on the highway.
The driver, being in the cabin, is not always able to correctly determine the source of the noise. For example, a hum from the left wheel may be perceived as coming from the right. Or vice versa. To accurately determine by ear where the damaged bearing is located, you need to watch how the sound changes when turning when the mechanism is subjected to a higher load. If the sound disappears when turning right, but appears when turning left, the right bearing has worn out.
Diagnostics is carried out in the following way.
- We raise the car so that the wheel being diagnosed is hanging out.
- We rock it with our hands, holding the top part.
- We turn the wheel by hand.
- Pay attention to the smooth deceleration of movement and to extraneous sounds.
- An emerging backlash may also indicate a problem.
Replacement instructions
Replacing the rear wheel bearing on a VAZ 2114 is carried out as follows:
- Loosen the wheel bolts and wheel locknut before jacking up the vehicle.
- Raise the car using a jack. Tighten the hub nut completely and remove the wheel. Unscrew the mounting bolts on the drum.
- Remove the drum. If it is rusty, pre-treat the joint with WD-40. If after this the drum still does not budge, use long pins. Screw them into the holes and tighten them one by one until the part moves out of place. You can gently help with a hammer by tapping it on the back side.
- Unbend the stopper and unscrew the locknut. If it is tight, use a wrench extension.
- Using a universal puller, press the hub.
- The inner race remains on the shaft, and the outer part of the bearing remains in the housing. If you want to replace the pads at the same time, you need to remove the axle mounts.
- Now it's time to demonstrate the entire mechanism.
- As a rule, the rear part of the axle is attached to the brake shield. To dismantle you will have to use a hammer.
- Remove the wheel bearing race using a universal puller. If the brake system does not need to be changed, this operation can be performed directly on the vehicle's axle shaft.
- We place the hub on bricks or bars, as shown in the photo. Use a hammer to knock out the old rear wheel bearing.
- Be sure to remove dirt and wash the hub in gasoline. Clean the axle shaft in the same way. Use thick lubricant to treat the seating surface. Place the new bearing in the hub bore. Mounting chamfers will help avoid distortions.
- Press the bearing with your hand and press it in about 3 millimeters. Place the old bearing on top.
- Using the side of the hammer, carefully hammer the part inward. If the process is difficult, you can cool the bearing in the freezer and warm up the hub.
- Once the rear hub bearing is in place, you can install the circlip. For this purpose, round nose pliers are used. Don't forget to lubricate the axle first.
- Carefully attach the assembled mechanism to the trunnion. Be careful to avoid distortions. Then place a washer on the threads and screw on the hub locknut.
- Using a nut, press the hub onto the axle. Tightening torque: 220 N*M. Place the drum, secure it and screw the chassis.
As you can see, replacing a bearing is a rather complicated and time-consuming task. You need to have a special tool. Sometimes it’s easier to ask a car service for help.
Source: 7vaz.ru
Wheel bearing for VAZ 2114: diagnostic and replacement instructions
Experienced car owners know that the chassis needs to replace the wheel bearing from time to time. And it’s good if the car owner worked ahead of the curve. It is much worse when a howling bearing ultimately leads to a serious accident. Today we will talk about how to replace a wheel bearing on a VAZ 2114.
- A little about the device and functionality
- Bearing diagnostics
- Replacement instructions
A little about the device and functionality
The main purpose of the part is to ensure uniform rotation of the car wheels. Given the name of the part, it is easy to guess that wheel bearings are the connecting link between the hub and the axle to which the brake disc and wheel are attached.
The design of the part fully corresponds to the classic type of rolling bearings. These are two metal rings into which conical rollers are pressed, protected from the body by a durable rubber insulator.
Unlike foreign competitors, domestic bearings are created using outdated HUB technology. They are quite difficult to install, require very precise tightening torque and require plenty of lubrication.
The operation of the mechanism lasts for several years. It is recommended to change a spare part for a VAZ 2114 approximately once every 100 thousand kilometers. But negative operating factors can accelerate the wear process:
- Bad roads. The entire force of the shock load falls on this mechanism of the system. Over time, the metal gets tired and the bearing begins to fail.
- Aggressive reagents. In Russia, in order to save money in winter, aggressive chemicals are often used to remove ice from roads.
- Sudden temperature changes. In winter, owners of warm garages unknowingly shorten the service life of many metal parts, for which sudden temperature changes when leaving and entering the garage create a large load.
Bearing diagnostics
Let's talk about how to check a wheel bearing.
An indirect sign that you need to pay attention to the bearing on the VAZ 2114 is the appearance of a characteristic hum or hum from one of the wheels while driving. Typically, the noise increases at high speeds, making it easier to hear on the highway.
The driver, being in the cabin, is not always able to correctly determine the source of the noise. For example, a hum from the left wheel may be perceived as coming from the right. Or vice versa. To accurately determine by ear where the damaged bearing is located, you need to watch how the sound changes when turning when the mechanism is subjected to a higher load. If the sound disappears when turning right, but appears when turning left, the right bearing has worn out.
Diagnostics is carried out in the following way.
- We raise the car so that the wheel being diagnosed is hanging out.
- We rock it with our hands, holding the top part.
- We turn the wheel by hand.
- Pay attention to the smooth deceleration of movement and to extraneous sounds.
- An emerging backlash may also indicate a problem.
Replacement instructions
Replacing the rear wheel bearing on a VAZ 2114 is carried out as follows:
- Loosen the wheel bolts and wheel locknut before jacking up the vehicle.
- Raise the car using a jack. Tighten the hub nut completely and remove the wheel. Unscrew the mounting bolts on the drum.
- Remove the drum. If it is rusty, pre-treat the joint with WD-40. If after this the drum still does not budge, use long pins. Screw them into the holes and tighten them one by one until the part moves out of place. You can gently help with a hammer by tapping it on the back side.
- Unbend the stopper and unscrew the locknut. If it is tight, use a wrench extension.
- Using a universal puller, press the hub.
- The inner race remains on the shaft, and the outer part of the bearing remains in the housing. If you want to replace the pads at the same time, you need to remove the axle mounts.
- Now it's time to demonstrate the entire mechanism.
- As a rule, the rear part of the axle is attached to the brake shield. To dismantle you will have to use a hammer.
- Remove the wheel bearing race using a universal puller. If the brake system does not need to be changed, this operation can be performed directly on the vehicle's axle shaft.
- We place the hub on bricks or bars, as shown in the photo. Use a hammer to knock out the old rear wheel bearing.
- Be sure to remove dirt and wash the hub in gasoline. Clean the axle shaft in the same way. Use thick lubricant to treat the seating surface. Place the new bearing in the hub bore. Mounting chamfers will help avoid distortions.
- Press the bearing with your hand and press it in about 3 millimeters. Place the old bearing on top.
- Using the side of the hammer, carefully hammer the part inward. If the process is difficult, you can cool the bearing in the freezer and warm up the hub.
- Once the rear hub bearing is in place, you can install the circlip. For this purpose, round nose pliers are used. Don't forget to lubricate the axle first.
- Carefully attach the assembled mechanism to the trunnion. Be careful to avoid distortions. Then place a washer on the threads and screw on the hub locknut.
- Using a nut, press the hub onto the axle. Tightening torque: 220 N*M. Place the drum, secure it and screw the chassis.
As you can see, replacing a bearing is a rather complicated and time-consuming task. You need to have a special tool. Sometimes it’s easier to ask a car service for help.
Replacing the front and rear wheel bearings on a VAZ 2114
As practice shows, the main reason for failure of wheel bearings is their long-term operation. Over time, a kind of buzzing begins to be created, indicating wear of this element.
Such a problem cannot be called very serious, but we still strongly recommend carrying out repairs in the near future. Such work is relatively easy to do with your own hands in ordinary garage conditions.
How to check
Before you begin replacing the front or rear bearing of your hub, we recommend that you conduct a simple check of the functionality of this unit. This will allow you to accurately determine the culprit of the malfunction and verify the real need to replace the elements.
There are two verification methods, each of which has its own nuances.
Verification method
What to do
After a long ride, touch the area of the wheel where the noise is coming from.
If the area is hot compared to the other side, the bearing needs to be replaced
Raise the car, unscrew the wheel bolts, lift the side you are checking. Rock the wheel with more force
If the sound is dull, have a second person apply the brake and repeat the procedure. If there is no noise, the bearing must be replaced
What to choose?
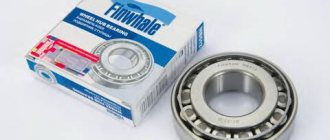
Rear and front wheel bearings today are produced by both domestic and foreign manufacturers. The choice, as they say, is yours.
But we still want to give some recommendations on this matter.
- Chinese analogues. We strongly advise against choosing them to repair your VAZ 2114. They are of dubious quality, although they are the most affordable. Such bearings will not be enough for a long service life.
- Imported, mainly from Europe. The price is higher compared to analogues, but the quality is at the same level. When buying imported bearings, pay attention that they are not successful Chinese counterfeits. There are many of these now, unfortunately.
- Domestic. Pay attention to the parts made by Vologda or Samara craftsmen. The quality is quite high, and the price is affordable and adequate. What you need for the VAZ 2114.
To work on replacing the element yourself, you will additionally need:
- Special puller for bearings;
- 30mm socket wrench;
- 19 and 17 mm wrenches.
Replacement
First, let's set priorities. If you just want to save money, so you do the work yourself without any experience, then this is a wrong decision that can lead to dire consequences. If you have experience and certain knowledge, you can safely do the repairs yourself.
In any case, we recommend watching the training video instructions, where you will be told in detail about all the nuances of such work. This way you will gain additional experience and useful knowledge.
After this, we proceed directly to the work of replacing the wheel bearings. There are several ways. We will tell you about each of them in more detail, and you will decide for yourself which option suits your skills and capabilities.
- The first method involves carrying out work without removing the steering knuckle from the car. But here you will definitely need a special puller to dismantle the bearings. The advantage of the method is that there is no need for subsequent wheel alignment adjustment. But this is the most inconvenient way. To press out and reinstall the wheel bearing, we recommend driving the car into an inspection hole.
Puller
- The second method will require removing the steering knuckle. A workbench will also be useful for removing the bearing. In this case, you will definitely break the collapse. If you don’t want to go to a service station after repairing yourself, use a couple of tricky tricks: Before removing the lower bolt of the strut and steering knuckle, apply marks;
- One mark will allow you to determine the position of the bolt;
- The second mark will be responsible for the position in the steering knuckle strut;
- During the reassembly process, try to ensure that the marks match each other as accurately as possible. This method allows you to simultaneously make adjustments to the chassis and check the condition of the components.
The third method will require removing the bearing along with the stand and dismantling it using a vice. This method is complex compared to others.
It remains to press out the element
Before work, do not forget to turn on the handbrake and place wheel chocks under the wheels to avoid accidental movement of the vehicle.
- Remove the strut, knock out the tie rod ends and unscrew the fasteners of the upper support to the body of your car.
- Position the jack so that it does not become an obstacle during operation. It all depends on your personal understanding of comfort.
- The wheel bolts are unscrewed, after which the nut of the desired bearing is removed using a 13 mm wrench.
- Using a 17 mm wrench, you dismantle the caliper, which is secured with wire to prevent sagging on the brake hose.
Step-by-step replacement of a VAZ-2114 wheel bearing
As practice shows, the most common cause of wheel bearing failure is the too long service life of this part. Like other spare parts, bearings have a limited service life, and therefore there comes a time when they require replacement. The wear of this part is indicated by a characteristic sound resembling a hum. If such a symptom is detected, the best solution would be to replace the wheel bearing in a VAZ-2114 car.
First make sure that it is the bearing that needs to be replaced. After you have driven your car for a long time, touch the area of the wheel that is making the humming noise with your hand. If this area is much hotter than the other side of the wheel, then the bearing does need to be replaced. Another way to check is as follows. Using a jack, you need to lift the car and unscrew the wheel bolts. You only need to lift the side where the sound is coming from. The raised wheel must be rocked with great effort. If you hear a dull sound, you need to ask someone to press the brake and rock the wheel again. If the noise disappears, then the problem is in the bearing and it needs to be replaced.
Do-it-yourself replacement of the VAZ 2115 wheel bearing
If while driving your car you often hear a characteristic creaking or knocking sound in the front part, in the wheel area, this may indicate problems with the brake system or a failed wheel bearing.
If the first option with the brakes is not confirmed, then most likely the wheel bearing will need to be replaced. To make sure the “diagnosis” is correct, perform a simple diagnosis.
To check the wheel bearing you do not need to have any special devices. To do this, it is enough to compare the temperature of the wheel rim after a long trip, from the side from which squeaks and knocks are heard. If the disc is very hot and cannot be touched, this indicates that the pads are seizing or the wheel bearing has failed. A faulty wheel bearing causes the wheel to become misaligned, causing friction.
A more accurate check is made using a lift or jack.
Jack up the suspect wheel, then grab the bottom of it with both hands and rock it slightly. If, when rocking, you feel play and hear a dull knock, this will mean that the hub bearing needs to be replaced.
Today we’ll talk about how to replace a VAZ 2115 wheel bearing with your own hands, but before that, a few words about the tool.
You will need:
- “30” wrench for unscrewing the central hub nut;
- Puller for pressing out/pressing in the wheel bearing;
- Circlip pliers (or pliers);
- Jack.
Replacement
If you do not have experience in such matters, it is better not to undertake the replacement yourself. In this case, it is strongly recommended to seek the help of a specialist. If you have ever been involved in car repairs, then you can most likely easily and quickly cope with this task yourself. In any case, it is recommended to first watch the training video instructions that you will find on this site.
The first method is that the replacement is carried out without dismantling the steering knuckle. However, you can’t do this without a puller. The main advantage of this technique is that there is no need to adjust the wheel alignment. However, this replacement method is one of the most inconvenient. To reinstall the machine, you will need to drive it into the inspection hole.
The second method involves removing the steering knuckle. In addition, replacement will require a workbench; it is needed to remove the old bearing. With such removal, the camber will be disrupted. To avoid having to go to a service station later, follow these steps during the replacement process:
- Before removing the lower strut and steering knuckle bolt, mark the position of the bolt and the position in the steering knuckle strut.
- When performing reassembly, you must ensure that the marks clearly coincide with each other.
This way you will be able to make adjustments to the chassis.
In any case, it is better to have a special device for squeezing out and pressing in the wheel bearing. The absence of a puller will significantly complicate the replacement procedure, since in this case there will be a need to disassemble and knock out parts that have failed. The tools you will need to replace the bearing are:
- ring and open-end wrenches;
- union head (for unscrewing the bearing nut);
- wheel wrench;
- jack;
- round nose pliers (for removing retaining rings);
- rags;
- gloves.
Start by disassembling the chassis. Replacing the front bearing is a simpler procedure than replacing the rear one. After you have lifted the wheel, you need to loosen the hub nuts. Remove the decorative cap and remove the boot from the socket. Place the prepared socket on the nut and loosen it using a lever and a wrench. After this, unscrew the wheel bolts and remove the wheel.
After this, you need to remove the brake caliper. To do this, unscrew the two bolts and move the caliper in any direction so that it does not interfere with further work. Secure it with rope or wire to the lower arm. Remove the brake disc.
After unscrewing the hub nut, you need to pull the front axle shaft out of the steering knuckle. To do this, unscrew the ball joint bolts. Then remove the hub itself.
Using round-nose pliers, remove the retaining rings (located on both sides of the bearing). Use a puller to press out the bearing. The rear cup must be rested against the steering knuckle. The front one should be placed on the holder.
If you do not have a puller, it is better to completely dismantle the steering knuckle. The bearing can be knocked out using a hammer and round bits. Then put the steering knuckle in place. Place a new bearing in the seat and reassemble.
Often, car owners in the process of performing this work are faced with such a problem as the inability to tighten the clip without damage. A situation may arise when the race of the old failed bearing remains on the hub or (in the case of the rear wheel) on the axle axle. To remove without damage or other negative consequences, it is best to use a two-jaw puller for these purposes.
Using the “paws” you need to hook the clip on different sides, and screw the rod in the middle. It should rest against the center of the axle axis. In this position it will be possible to pull the old bearing out of place. This type of puller is quite widespread among car enthusiasts and car service technicians. You can find it in almost any auto store.
Source: ladaautos.ru
Self-replacement of the VAZ 2115 wheel bearing
1. Put the car on the handbrake and install wheel chocks or place stones.
2. Remove the mounting bolts.
3. Remove the wheel.
4. Install the jack and hang the wheel.
5. Using a “30” wrench, remove the central nut securing the hub.
6. Disconnect the drive shaft CV joint from the hub and remove the caliper along with the disc.
7. Remove the two mounting bolts that secure the ball joint to the lower arm.
8. Disconnect the lower suspension arm from the steering knuckle and move the lower part of the shock absorber strut aside.
9. Using a suitable extension, knock the hub out of the steering knuckle. For this it is better to use a special puller.
10. Using special pliers, remove the outer retaining ring of the hub bearing, then the inner one.
Good advice: Fix the steering knuckle on the lower arm by connecting it to the ball joint arm, in this position it will not interfere with you.
11. Install a special puller on the steering knuckle.
12. Install the outer snap ring into the steering knuckle using pliers.
13. Install the puller with the new wheel bearing on the steering knuckle, slowly tightening the power nut of the puller, press the bearing into the seat in the knuckle until it stops.
14. As a rule, when the hub is knocked out of the steering knuckle, the inner race of the bearing comes out with it. Therefore, if you have the necessary puller for this, then with its help you can easily remove the ring, but if you don’t have it, then you will have to use a grinder to remove it. In the second case, you need to be extremely careful not to accidentally damage the hub, otherwise you will have to change it as well.
15. Install the hub onto the puller, thread the puller into the steering knuckle. Place the puller against the inner ring of the bearing and press the hub into the bearing. If there is no puller, the bearing can be driven in using a tool and a hammer.
16. Take snap ring pliers and install the inner snap ring.
Further assembly is carried out in reverse order. After the wheel bearing has been replaced, I recommend doing a wheel alignment.
Manual for replacing the front wheel bearing of Lada 2114
bearing The power parts connecting the front suspension units are bearings installed with interference inside the steering knuckles and on the hubs. A hum during movement, clicks when a raised wheel rotates, and axial runout are key signs indicating wear of the inner and outer rings of the support or unsuitability of the hub seating surface.
Organization of repair conditions
Convenient places for replacing the front wheel bearing on a VAZ 2114 are a lift or a pit. However, you can get less comfortable access to the necessary components on a monolithic horizontal platform.
The initial task of the performer is to open access to the steering knuckle. To do this you need:
- unscrew the hub nut located on the front wheel CV joint shaft (behind the protective cap);
- remove the wheel;
- brake caliper assembly with guides and brake pads;
- brake disk.
Method for loosening the hub nut:
- align the nut shoulders using a narrow chisel;
- tighten the handbrake;
- engage first gear;
- secure the wheel with shoes;
- Loosen the nut using a 30mm socket with a long knob (the clamping force is quite large).
How to remove and change the rear wheel bearing on a VAZ-2115
Before replacing, unscrew the bolts from the rear wheel and loosen the nut on the axle shaft. Raise the car body, remove the wheel and drum.
The sequence of removing and installing the wheel bearing on the VAZ-2115:
- Unscrew the nut from the hub. Use a 30mm socket and a wrench.
- Remove the mounting springs and dismantle the pads. Take out the axle shaft. Pull out the retaining ring using round pliers.
- Place the axle shaft on any stable support so that the lower part is open. Select a head of the required volume for squeezing out the old ball bearing.
- Remove the worn part. Knock out with a sledgehammer using additional attachments.
- Treat the socket and surface of the new spare part with lubricant.
- They put it in place. The old consumable is placed on top, and the replacement is pressed in with gentle blows of a sledgehammer.
Return the retaining ring. Mount all the parts of the rear assembly in their original places.
How to choose the right wheel bearing
On the VAZ-2115, the rear wheel bearings are closed type, double-row, angular contact with article number 256706. Domestic products are considered original according to GOST 520-2002. Parts comply with international standard BA2B33313C:
- 20 GPZ;
- SPZ-4;
- 23 GPP;
Imported products for VAZ-2115 15:1998 (ISO) for replacement are selected in accordance with the technical parameters of the rear consumables: width - 37 mm, internal diameter - 30 mm, external - 37 mm.
Replacement of the FRONT HUB BEARING VAZ 2108,2115,2110,2114. Replacing the wheel bearing
- NB722 HOLA;
- PWP1307NB722;
- HF301045;
- CR001 CORAM;
- CS256 TRIALLI;
- GLBE11 GALLANT;
- ATT1208 ATTEX;
- BLS0108R B-RING;
- K151208
The front ones are from the factory with article number 2108-3104020-02 and 2108-3104020. To replace the front of a VAZ-2115, wheel bearings with a technical specification of 643437 mm are suitable:
- 214 633 0001 Meyle;
- BR 2108-4020 Weber;
- HB321 Finwhale;
- 2108-3104020-ST-PCS-MS Master-sport;
- PW-P 1307 Pilenga;
- K151208 Kroner;
- 802 658 Optimal;
- DAC 30600037 Torque;
- 200068 ABS.
Bearings on the same axis wear out equally. When replacing, for example, the right wheel, it is better to purchase two parts. The left hub should be repaired immediately.
Instructions for replacing the front suspension wheel bearing on a VAZ 2114 on your own
Having opened access to the hub, you should remove the previously loosened “30” nut and washer from the CV joint shaft. You can get to one side of the bearing after removing the part with the developed flange:
- select two bolts with a length of at least 130 mm with threads similar to those of the wheel fasteners (M12 x 1.25);
- pass the selected bolts through two holes in the brake disc located opposite each other;
- Using sharp forward movements, hit the bolt heads several times with the brake disc (the process of pressing the hub out of the steering knuckle).
Access to the back side opens like this:
- unscrew the two bolts at “17” with a head, fastening the ball joint flange and the steering knuckle;
- move the steering knuckle towards you;
- remove the CV joint from the steering knuckle (you will need to use a pry bar: leaning on the stabilizer bushing body
- bend the two lower suspension arms to move the ball joint away from the swivel assembly).
Alternative method for removing the hub:
- disconnect the ball joint;
- remove the CV joint from the repair unit;
- knock out the hub by hitting the rear end of the part flange with a hammer through a soft metal drift (bronze, aluminum, brass...).
The actual replacement of the wheel bearing on a VAZ 2114 is carried out according to the following method:
- Use special pliers to remove the retaining ring located inside the steering knuckle on the front side;
- press out the support using a puller;
- clean and lubricate the inner surface of the unit on which the outer ring of the bearing is based;
- press in a new bearing (using an alternative method in the form of hitting the bearing ring with a hammer is highly not recommended);
- install the retaining ring;
- press the hub into the inner ring of the support;
- Carry out the preparatory operations in the reverse order (be sure to tighten the hub nut to a torque of 225-247 Nm and bend the collars to prevent unscrewing).
How to replace the front wheel bearing on a VAZ-2114
In order to replace the front left wheel bearing of a VAZ 2114, you need to remove the wheel and gain access to the lock nut. To do this, you need to unscrew the nut using the union head.
READ Replacing the Front Wheel Bearing of VAZ 2112
Next, you can begin dismantling the brake cylinder. To do this, unscrew the two mounting bolts from the inside of the hub and use a flat-head screwdriver to move the assembly to the side. From the steering knuckle, unscrew the nut that secures the steering tip. Next, use a puller to squeeze it out. Then repeat the operation with the tip of the ball joint.
The upper part of the knuckle must be secured to the suspension strut with bolts. Moreover, the lower one regulates the wheel alignment of the car. The position of the bolts is marked and the bolts are unscrewed, after which the hub assembly is removed. Remove the brake disc in the same way. Then the front hub is pressed out. Next, remove the retaining rings and push the old bearing out of its seat.
Before replacing the step bearing on a VAZ 2114, the seat should be cleaned of dirt. Next, it is inspected for damage and chips.
If damage is found, the steering knuckle must be replaced
The seat in the fist needs to be lubricated to improve pressing. Then install the retaining ring and mount the new part using a puller until you hear a characteristic click. After this, the second retaining ring is inserted. The landing site is cleaned and lubricated. Then the bearing is pressed in and the assembly is mounted back.
Then you need to return the disc, caliper, ball joint and steering tip to their place. After this, tighten the nut and put the wheel in place.
Using a puller
hub The repair operation is often carried out using two types of pullers:
- cup, which is a bolt with large and small washers, a cup and a nut;
- two-legged.
Technique for handling the cup puller:
- when pressing out the wheel bearing, rotate the nut from the side of the cup: the cup rests against the end to which the flange was previously adjacent; the bolt head presses through the washer onto the inner ring of the bearing;
- when pressing a wheel bearing (the cup is not used): install a large washer on the bolt, insert the bolt into the steering knuckle (the washer rests against the rear end of the unit), install new and old bearings on the bolt, a washer that transmits force to the outer ring, and a nut (its rotate);
- when pressing the hub (the cup is not used): install a washer on the bolt that rests on the inner ring of the bearing, insert the bolt into the bearing from the rear side, install a washer that rests on the small end of the hub, mount and rotate the nut.
It happens that during the process of replacing a faulty VAZ 2114 wheel bearing, the inner ring remains on the hub. The procedure for removing it is often carried out using a two-legged puller:
- install the paws to the outer end of the rolling support ring (has the largest diameter);
- place the central screw in the end of the hub;
- By rotating the screw, remove the support ring.
Sometimes the puller is powerless in this procedure. An alternative is to use a thin chisel and hammer:
- pry off the dirt protection ring with a screwdriver;
- place a chisel between the hub flange and the end of the ring;
- Gently hit the chisel with a hammer to move and remove the ring;
- clean out the resulting nicks with a file;
- Install the dirt ring and seal.
- the dismantled ring then participates in the procedure of pressing out the bearing using a cup puller;
- it is necessary to check the suitability of the hub for further use: the new bearing should be difficult to put on.
Do-it-yourself technology for replacing the rear wheel bearing of a VAZ 2114
Removing the rear wheel bearing
- We start by loosening the wheel bolts and hub locknut before jacking up the car.
- Now we lift the car with a jack. Screw the hub nut all the way and remove the wheel. Unscrew the drum mounts.
- We remove the drum. Try to loosen it with your hands first.
- If that doesn't work, treat the joints with WD-40.
Tip: The drum is difficult to dismantle; it has not been removed for a long time. To facilitate dismantling, screw the studs into the holes and tighten them one by one, as in the photo. You can also use a hammer.
- We gain access to the hub and locknut. Unbend the stopper and unscrew it. To enhance the torque, we use an extension for the wrench in the form of a pipe.
- We compress the hub. To do this, install a puller with paws, as shown in the photo. We grab the back of the hub, focusing on the end of the axle. We tighten the removable device, so the part will gradually be removed.
- Inside the housing there will be an outer part of the product with a separator and rollers, and an inner race on the shaft. If you are going to change the pads, then unscrew the axle shaft fastenings.
Attention: If the pads do not need to be changed, proceed directly to step No. 10.
- Having unscrewed the bolts, we dismantle the structure (trunnion, brake flap with pads). We help by hitting the screwed hub nut with a hammer. Don't turn the axle shaft!
- The brake shield will be removed along with the axle, the rear part of which is usually stuck. We knock on it and dismantle it.
- We remove the wheel bearing race from the mounting surface of the axle using a puller. The same operation is also carried out directly on the car, without removing the axle shaft, if replacement of the brake system is not required.
- Now let's move on to the hub. We install it as shown below, for example, between two bricks or bars. We select a head to match the diameter of the inner race, with the help of which we knock the part out of the hub with hammer blows. Dismantling is complete.
Installing the rear wheel bearing on a VAZ 2114
- We clean the hub from dirt, wash it in gasoline, and do the same with the axle shaft. Next, lubricate the seating surface of the hub with thick lubricant. We place the ball bearing on the hub hole, evenly and without distortions, for this there are mounting chamfers.
- We press the new spare part with our hands and insert it 3 mm. Now you will need an old bearing, which we install on top.
Tip: You can first cool the ball bearing in the freezer and heat the hub.
- Using even blows from the side of the hammer, we gradually hammer the part into the hub. Make sure there are no distortions.
- After the ball bearing goes all the way, it becomes possible to insert the retaining ring; install it using pliers. We also lubricate the axle.
- We attach the assembled structure to the axle, evenly, without distortions. Next, we put the washer on the thread and screw on the hub locknut.
- Now we tighten the nut, with which we press the hub onto the axle, do not forget to lock it. The tightening torque is shown in the table below. After this, we install the drum, fasten it and screw the chassis.
Important to know: Finally tighten the threaded connections with the car lowered, without a jack.
Total
Tools needed: a set of wrenches and sockets, circlip pliers, cup and two-jaw pullers, hammer, chisel, soft metal drift, screwdriver.
A summary map of the technology for replacing the VAZ 2114 front wheel bearing looks like this:
- loosen the collars and unscrew the nut on the CV joint shaft;
- remove the wheel;
- remove the brake disc and caliper assembly;
- unscrew the ball joint housing;
- press out or knock out the hub through a “soft” drift;
- remove the CV joint;
- remove the retaining ring;
- press out the bearing;
- press in a new support;
- install the hub;
- assemble the brake system;
- install the wheel;
- tighten the hub nut and bend its shoulders.
Elements protecting hinges on front-wheel drive VAZ vehicles
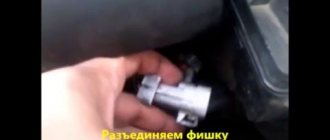
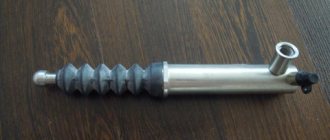
The boot is a hinge protection element on front-wheel drive Zhiguli cars, made of special corrugated rubber. It is installed on the internal and external drive joints and protects them from external factors. It also holds the lubricant necessary for operation inside the joint.
Self-replacement of front bearings on VAZ cars
Hubs are an important element of a car's front suspension. When the wheel bearings malfunction, the first thing that appears is a hum, and sometimes a grinding sound, in the front wheels of the car. The hub begins to heat up, which can cause problems with the brakes. Play in the front suspension hubs leads to
Power Torque: Front Wheel Bearing Replacement
Basic concepts on how to replace a defective front wheel bearing. The list of main transitions will allow you to independently carry out this operation.
Replacing bearings yourself
Modern drivers often encounter such a problem as the occurrence of hum and various extraneous noises in the car suspension. The main reason for this is usually the presence of faults in the bearings. This means it's time to replace them. To carry out repair work
How to independently replace CV joint boots on a VAZ 2109.
CV joint boots are a front-wheel drive unit, which is popularly called a “grenade”. The reasons that lead to their damage can be different: aging of the material, hitting an obstacle, as well as careless operation of the car.
Fault diagnosis
In some cases, the humming sound turns into vibration, this happens when the wheel bearing begins to fail. Then its replacement is inevitable. It should be noted that the unit in question is not a consumable item and the frequency of its replacement is not regulated by the operating instructions. This procedure is performed when wear or destruction of the wheel bearing is detected. Checking the technical condition of the unit is quite simple. You need to use a jack to lift the wheel of the car from which suspicious sounds are coming from, and carry out the following actions.
- Hold the top and bottom of the wheel with both hands and try to move it back and forth relative to the plane of rotation with sharp movements. Before doing this, it is advisable to check the tightness of all bolts securing the hub and strut. If during such a test you feel play, then it occurs precisely in the worn bearing.
- It often happens that no play is felt, then you just need to turn the wheel back and forth at different speeds. A failed bearing will definitely make itself felt with an unpleasant sound. Sometimes there is difficulty rotating with the wheel braking in a certain position; all these signs indicate a faulty wheel bearing.
Replacing this part on a VAZ 2114 car, despite all its apparent simplicity, includes several operations that are best performed using a special device - a puller. The remaining operations do not pose any problem and consist only of proper disassembly and subsequent reassembly of the unit.
The presence of a puller for squeezing out and pressing in the VAZ 2114 wheel bearing will greatly simplify the process and help save your time and effort. Otherwise, you will have to perform additional operations to disassemble and knock out worn parts. The following tools and materials need to be prepared:
- a set of spanners and open-end wrenches;
- 30 mm socket for unscrewing the bearing nut;
- round nose pliers with pointed ends for removing retaining rings;
- wheel wrench and jack;
- cloth gloves;
- rags.
To carry out the work, it is enough to have a flat area in the garage or just on the street. Replacing this spare part does not require any special conditions. The car must be secured by placing any anti-roll bars under the wheel located diagonally from the one being removed.