Why are fuses needed?
Fuse links are required in the on-board network as a protective element. Each line provides a small safety margin, but in case of a short circuit this is not enough. In the event of a critical power surge, the wires or powered part may melt or ignite, which leads to serious consequences for the car.
Fuse links are calibrated by the factory to a certain threshold. When the mark is exceeded, the thin element is destroyed and the circuit opens, which “saves” the entire machine from fire.
Where is the main and interior fuse box of the VAZ 2114 located?
The car is equipped with two main mounting panels. The first part is installed inside the engine compartment. You can find the module on the left side in the direction of travel of the car. It is distinguished by a black or orange plastic cover. You can get to the fuse links and relays by opening the protective cover. This is done by pressing two latches.
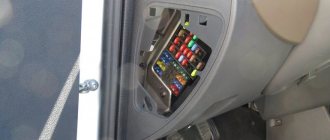
The second part is mounted inside the cabin under the dashboard. To access the panel, you will need to open the service hatch in the front passenger's feet on the left side of the heater casing. Unscrewing 4 screws opens the panel itself. Here are relays and fusible links that control the operation of the main components of the machine.
Location of VAZ 2114 fuses in the main block
On the fourteenth Lada model, in 90% of cases two types of mounting blocks are used. The location of the internal parts and the pinout of the fuses of the VAZ 2114 are not significant, but they are different. Therefore, it is most convenient to consider both options separately.
Note!
Some modifications of the vehicle may be equipped with other module designs. You can find out the name of the variety on the inside of the lid.
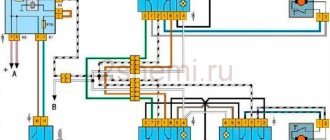
Fuses for VAZ 2114 injector (block 3722010-60)
The module contains fuse links and automatic circuit breakers. All elements are marked in order.
Main unit relay
- 1 – Head optics wiper switch;
- 2 – Contact insert breaker of the turn signal and hazard warning signal mechanism;
- 3 – Responsible for the proper operation of the windshield wipers;
- 4 – Fuse for monitoring stop lines and vehicle lighting;
- 5 – Power supply to electrical accessories (window regulators);
- 6 – Horn control, main circuit;
- 7 – Power line for heating the aft glazing;
- 8-9 – respectively, control of high and low beam head optics.
Decoding the fuse diagram of the VAZ 2114 head unit
- F1 – fog lights at the rear of the car;
- F2 – control circuit for turn signals and hazard warning switch;
- F3 – power supply to the interior and luggage compartment lamps, also ignition indication, ECM;
- F4 – fuse for the aft wind window heating relay circuit; the portable lamp contact is also energized here;
- F5 – fuse for the signal of the VAZ 2114 and the head fan of the cooling system;
- F6 – is fully responsible for the electrical package circuit;
- F7 - standard fuse for the VAZ 2114 heater, also responsible for electric drives for the windshield washer, glove compartment lighting and headlight wipers;
- F8/9 – fusible links responsible for the front fog lights;
- F10/11 – backlight for the left and right sides, respectively, also responsible for illuminating license plates, cigarette lighter, and instrument panel;
- F12/13 – light fuse for VAZ 2114 for low-range mode on the right and left sides, respectively;
- F14/15 – similarly for the long-range lighting mode on both sides of the car separately;
- F16 - VAZ 2114 instrument panel fuses are responsible for indicating sensors and device status.
Main relays and fuses for VAZ 2114 in block type 3722010-18
A more modern modification, installed on cars since 2010. Here the arrangement of elements and fusible links is more thought out. Thanks to a more logical layout, individual elements are easier to access.
At the same time, not only the location of the fuses is different, their functionality and area of responsibility are also changed.
Head relays
- 1 – optical wipers;
- 2 – is responsible for the switch for turn signals and emergency lights;
- 3 – cleaners for the front part of the car glass;
- 4 – module for serviceability of lighting elements and backlight;
- 5 – control of the electrical package circuit;
- 6 – horn power supply;
- 7 – power conductors for heating the rear window;
- 8-9 – circuit breakers for high and low beam head optics, respectively.
Deciphering the VAZ 2114 fuse box diagram
- F1 – headlight cleaner contact connectors, also refers to the sprinkler tank motor activation valve;
- F2 – turns and opens the alarm when activated;
- F3 – illumination of the interior space of the cabin, power supply circuit for the side lights of the rear part of the vehicle;
- F4 – cigarette lighter fuse for VAZ 2114, overload protection for the heating element of the rear window, this also includes a portable lamp;
- F5 – VAZ 2114 fan fuse is responsible for cooling the antifreeze, also responsible for the horn;
- F6 – power supply for windows and electrical accessories;
- F7 – control lines for the front and rear sets of headlight and windshield washers – a complete circuit of equipment, this also includes the glove compartment lighting;
- F8/9 – front fog lights for the right and left sides, respectively;
- F10 – fuse for the lighting of the VAZ 2114, the cigarette lighter, the instrument panel indication, the engine compartment lighting, also the left side of the side light;
- F11 – separately for the right side of the side lights;
- F12-15 – power supply for head optics, complete lighting set;
- F16 – fuse for VAZ 2114 instruments, also coolant temperature indicators, voltmeter.
Cabin fuses for VAZ 2114 - decoding of circuits and areas of responsibility
A separate fuse panel for the cabin unit is designed to control secondary circuits of electrical equipment. The main task of the module is to relieve the engine compartment and minimize the likelihood of breakdowns due to board overload.
In 90% of cases, the mounting block is equipped with a small set of inserts. This is due to the intended purpose of the device. In fact, such modules are installed here.
Relay
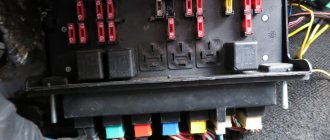
In the mounting panel, the control relays are arranged in sequence from left to right:
- Control of the fuel pump power cores. From here voltage is supplied to the main line.
- Main engine relay. Responsible for powering the ECU and parallel circuits of the primary control system of the vehicle.
- Breaker element for the power cores of the main fan of the engine cooling system.
There is also a similar number of fuse links. Each element works in tandem with a relay and is responsible for protecting the system from overload:
- F1 – VAZ 2114 fuel pump fuse, is responsible for monitoring the correct supply of voltage to the main line;
- F2 – fuse VAZ 2114 injector 8 valves, responsible for controlling the voltage of the car’s main circuit;
- F3 – fuse link going to the electronic control unit.
Repair and diagnostics
All possible malfunctions of the mounting block are divided into:
- exit from fuse building;
- relay malfunction;
- damage to conductive paths;
- contact damage.
Blown fuses are the most common reason for a car owner to begin examining the contents of a “black box.” Before changing the fuse, it is necessary to determine the cause of the blown. The circuit is “ringed” for a short circuit, and the latest devices are checked. After diagnosing the circuit and eliminating the breakdowns, the old fuse is replaced.
It must be taken into account that the fuse being replaced must have the same amperage rating as its predecessor. Installation with a higher rating is possible. A lower reading of the electric current on the fuse causes its immediate blowout and, as a result, the lack of protection of the electrical circuit.
Diagnosis of relay failures is carried out by the fuse replacement line. Installing the relay into the mounting block on the connectors does not require soldering, and replacement is quite simple.
With conductive paths everything is a little more complicated. Possible damage is not always obvious. Modern plastic blocks require jewelry soldering skills, which are difficult to work with even for experienced electricians. Soldering wires is only permissible if separation of printed circuit boards is not required. Sometimes it's easier to buy a new unit.
There are a large number of contacts in the mounting block. Corrosion or normal contamination does not always allow one to determine the functionality of the contact. The most common way is to clean the contacts with sandpaper or an ordinary knife. If the contact breaks off, you can try to solder it, but unsuccessful experiments with soldering lead to the need to replace the block.
The fuse being replaced must have the same ampere rating as its predecessor.
Before starting to work with electricians, it is necessary to disconnect the negative terminal from the battery. It is undesirable to use metal screwdrivers and check the circuit for a spark, because this sometimes leads to short circuits and burnout of current-carrying paths.
Despite all attempts by manufacturers to simplify the work of diagnosing and repairing the mounting block as much as possible, the abundance of parts and all kinds of wires require basic knowledge of electrical engineering. If there are none, and if you have no experience working with a soldering iron, the best option is to contact a professional auto electrician.
Removing the head unit
In some situations, it may be necessary to remove the mounting block. This is usually caused by voltage surges or part of the circuit burning out. Also, if fuses burn out on a VAZ 2114, the reason may be hidden in oxidized or melted tracks or connecting terminals.
When asked how to remove the fuse box on a VAZ 2114, you must follow the simple dismantling instructions:
- open the negative terminal on the battery;
- from the inside of the cabin, you will need to disconnect the five main connectors of the wiring harnesses;
- dismantle the cover of the mounting block by clamping two terminals;
- the sixth pin connector is disconnected on the top side of the module;
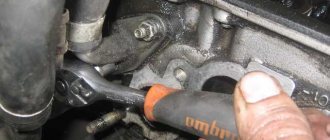
- using a key No. 10 with an adapter, you need to unscrew the fastening of the main module;
- lift the mounting diagram with a screwdriver;
- remove the last terminal blocks from the bottom side;
- remove the mounting device.
Reinstallation is performed in the opposite order. The simplicity of the procedure is due to the fact that all terminals are different from each other and it is impossible to confuse their location.
Fuse box price
The functions with which fuses are endowed in the car’s protection system from extreme situations oblige car owners to take their choice seriously. The reputation of the manufacturer, the material used - information that will help you avoid possible significant financial expenses. The cost of the fuses themselves is low, and, as a rule, does not exceed 10 rubles. The relay, depending on its purpose, costs no more than 200 rubles. The cost of the mounting block, subject to modification, varies from 2000 to 3000 rubles.
VAZ 2114 fuse blown, what to do
Periodically, voltage surges or other failures occur in the vehicle's electrical circuit. This leads to an overload in the circuits and the fuse link is destroyed.
If the breakdown is caused by a momentary failure, it is enough to replace the damaged element and everything will be fine. In the case of a larger defect, the new element will burn out as soon as the car starts. To fully diagnose the system and troubleshoot the problem, you will need to look at the entire line from the fuse to the consumer.
Important!
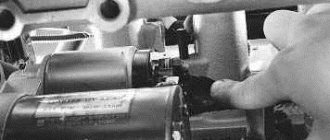
It is recommended to remove the fuses of the VAZ 2114 injector 8 valves only with special pliers or tweezers. From swinging to the sides, the thin legs of the part may break off.
Knowing the source of the problem will help make the search easier. Failure of the fuse element only occurs when there is a serious increase in voltage within the network, which is caused by a short circuit or system failure of the ECU.
The sequence of actions looks like this:
- remove the damaged element from the socket;
- find the corresponding wire on the back of the diagram;
- move along the highway to the consumer;
- detected damage must be eliminated; if the powered unit itself is damaged, replacement is carried out with a known good one.
How to check the fuse?
Next you need to find the faulty one. There are two ways (depending on the type of fuse).
Circuit breakers
We either simply take it out and see if the middle part is intact (in the photo - burnt out on the left, serviceable on the right).
The second method is more accurate. The fact is that the human eye may not notice a burnt jumper.
We do the following: Turn on the non-working circuit (for example, dimensions), without removing the fuse, look at the voltage at one end of the fuse, then at the other. If there is voltage at one end, but not at the other end, then the fuse has blown.
VAZ 2114 fuses burn out - how to prevent
The easiest way to eliminate a breakdown is to take proactive action. High-quality and timely diagnostics help prevent breakdowns and sudden circuit failures.
The manufacturer recommends performing basic procedures in a timely manner.
- Treatment of contact groups with special oils. The products isolate metals from exposure to oxygen and water.
- Periodic control of the seating density of elements. Over time, mounting connections can become loose, leading to loss of contact and the potential for arcing, which can burn out metal parts.
- Strength of fastening of consumers in sockets. The size fuse of the VAZ 2114 may blow out if the light bulb dangles in the lampshade or water gets inside when it rains.
- Serviceability of blocks and main mechanisms. It is necessary to carry out diagnostics of vehicle devices in a timely manner. The VAZ 2114 starter fuse often fails when there is damage to the electric motor or the retractor element touching the body.
Which fuse is blown?
Your car, like any other, has quite a few fuses. And each protects a specific light bulb or device. How can you find out which one is burned out?
It's simple! For example, if the windshield wiper does not work, then open the unit and look for the corresponding icon on the cover. The position of the fuse in the block corresponds to the position of the figure on the cover.


