Preparation
Many craftsmen advise removing the dashboard before painting. When dismantling, disconnect the negative terminal of the battery, put the car on the handbrake, and remove the screws. Then comes the disconnection of the wires, removal of decorative parts and the steering wheel. The panel is carefully processed; the design must match the material of the torpedo. Wash it with soapy water. Then degrease with acetone or another substance. Then the plastic is sanded with fine sandpaper and treated with a special primer for plastic. Then they degrease again.
Do-it-yourself car torpedo reupholstery
Reupholstering the front panel begins with its dismantling. This is a rather labor-intensive process. In addition, the pattern of fasteners and clamps is not the same on different car models. There are a large number of wires connected to the panel, and if you are afraid of damaging them, contact a car service center for help.
If you want to do this yourself, do not neglect the car’s operating instructions: all parts and fasteners are described in detail there. Removing a torpedo always begins with disconnecting the battery terminals. Once you have de-energized your car, you can begin dismantling.
Before you start reupholstering the panel, it should be dismantled
Video: how to remove a torpedo
As a rule, dismantling the steering wheel takes longer than reupholstering itself. Be careful and remember to disconnect any wires you encounter.
Tools
In order to retighten the torpedo, you will need the following tools:
- set of screwdrivers for dismantling;
- sandpaper (both coarse and fine grain);
- degreaser;
- antistatic cloth;
- self-adhesive interlining or masking tape;
- marker;
- sharp tailor's scissors;
- roller or spatula with a plastic sheet;
- a sewing machine with a foot and a leather needle (if you chose this material);
- special glue for leather (or the material you are using);
- hair dryer (preferably a construction hair dryer);
- material for upholstery.
Painting with liquid rubber
Before starting work, it is necessary to either dismantle the front panel or seal the non-paintable areas with tape. The method of painting with liquid rubber has not been thoroughly studied, and reviews from drivers are contradictory. Some complain that the gloss goes away quickly, others say that this coating is not reliable, it is easy to scratch and tear off. Still others complain that when they try to paint again, it is impossible to remove this rubber in some places. Liquid rubber is sold in aerosol cans, usually 400 milliliters each. The price ranges from 600 to 800 rubles. The application of a layer of rubber is carried out in 3 - 4 passes, allowing each layer to harden first.
Rubber paint has a number of advantages and disadvantages:
- The surface is pleasant to the touch. Slightly rough - the rubber surface has a positive effect on a person when touched.
- There are no sun glares.
- The paint dries quickly.
- Moisture resistant.
- No smell.
- No seams or bubbles.
- There is no cracking from panel bending.
The cost of reupholstering the front panel of a car yourself
The amount you spend on reupholstering a torpedo directly depends on the cost of the material. The average price for high-quality natural perforated leather is about 3 thousand rubles per linear meter. A standard size panel will take no more than two meters.
Eco-leather is already much cheaper: it can be found for around 700 rubles, although there are more expensive options. The price of vinyl film ranges from 300–600 rubles, depending on the type and quality. As for Alcantara, its cost is comparable to genuine leather, so you won’t be able to save on artificial suede.
High-quality high-temperature glue will cost you 1.5 thousand rubles per jar. We do not recommend using cheap superglue or Moment glue: you will be bothered by an intrusive smell, and the coating itself will deteriorate if the car heats up too much. Threads for leather products are sold at a price of 400 rubles per spool. Let's assume that you already have a hair dryer and a sewing machine at home, which means there will be no additional expenses for equipment.
Thus, we receive from 1.5 to 7 thousand rubles for the material, plus 2 thousand for consumables. As you can see, even when choosing expensive leather, you can spend 10 thousand rubles. In the salon, the price tag for this procedure starts from 50 thousand rubles.
Liquid vinyl treatment
Liquid vinyl is a modern product that is successfully used for painting car parts. A thin layer of this coating decorates and protects many suitable surfaces well. This is a high-tech product of excellent quality. Treatment with liquid vinyl will increase the resistance of the panel to the influence of bright rays of the Sun, ice, frost or other harmful compounds. The beauty of this substance is that after prolonged use it comes off easily. And this fact does not reduce its strength qualities.
Painting with liquid vinyl is a simple and understandable procedure for everyone. The processed part will become matte and clean. Liquid vinyl is usually sold in cans. Before use, you need to shake it, it is advisable to do this for at least a minute. The paint and solvent must mix well. Do not touch liquid vinyl until it is completely dry. Otherwise there will be stains.
The process takes place in several stages. The initial level is connecting. They try to make it translucent. This makes it possible to bond the paint to subsequent levels. The first layer will dry for about 30 minutes, this time must be maintained. The number of layers applied depends on you. The more there are, the more durable the coating will be. The recommended quantity is five. Distance from the can to the torpedo: 7 - 9 centimeters. If you did not dismantle the torpedo and sealed parts that were not to be painted, remove the tape and protective material immediately after painting, before the vinyl hardens. The complete drying time for vinyl is 3.5 hours. All this time it is necessary to protect the drying surface from dust and other bodies.
Painting of domestic models
The technique for painting the dashboard of a VAZ car is no different from other cars. The surface is first cleaned of dust and dirt, then treated with soft sandpaper. Primer treatment is required before degreasing. The main thing when spraying is to avoid smudges. This is controlled and achieved by maintaining the correct distance. Before starting the process, shake the can. Plastic is painted in three or four layers. The intervals between visits are from 12 to 25 minutes. Then the panel must dry for more than 10 hours. Then varnish is applied. The number of layers is at your discretion (3 or 4). Downtime between visits is no more than 15 minutes. After complete drying, the panel is put back.
Painting panels and plastic VAZ
One of the most accessible and cheap ways to diversify the interior of your VAZ car is to paint the plastic parts of the panel or the panel itself. This can be done even at home, the main thing is that the smell of varnish or paint does not irritate your household.
First of all, the following should be noted. Painting of door handles, armrests and other parts of the VAZ interior must be done responsibly and carefully, in compliance with technology, since these places are constantly in use and the paint must not be erased or peeled.
First of all, you need to thoroughly degrease the part with White Spirit liquid or its equivalent (but in no case with solvent or acetone), and after drying, wipe it with a dry cloth (the fabric should be such that it does not leave lint) or suede.
Then you need to treat the surface with a primer 2-3 times, allowing it to dry after each treatment. If drips occur, they must be removed immediately with the same rag. If the part has a complex shape, it is better to process one side first, and after the primer has set, the other.
After the last layer of primer has dried, we paint the part in the same way. When painting, you should not try to immediately achieve the desired color, even if the paint shows through somewhere - it is better to wait for the layer to dry and apply the next one, and so achieve a uniform color over the entire surface. Upon completion of painting, it is best to apply 2-3 layers of varnish - it will reliably protect the paint from scratches.
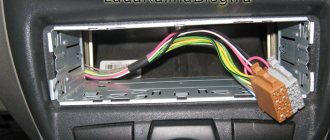
Painting the front panel of a VAZ is a separate issue. This is a labor-intensive job because you have to remove it and remove all the elements from it, such as switches, ducts, sliders, radio and the like. Even if you are going to paint something the same color as the torpedo, this work must be done separately from the main one.
One factor to consider when choosing paint is the texture of the top of the panel. If it is completely smooth, then you cannot use glossy paints - they will reflect strongly, which, you will agree, is not very pleasant.
Varnish can and even should be used, because often, without even noticing it, we can put a phone, a folder with documents, and so on on it. An unprotected layer of paint is very sensitive to any mechanical stress.
When painting the front panel, one coat of primer is enough, but the painting process itself differs from that described above. It is necessary to apply primer or paint to those surfaces that are located horizontally - then the risk of drips is reduced to zero.
Therefore, you will have to periodically change the position of the panel in order to process it completely. The same applies when applying varnish. For example, first you need to paint the upper part, after the paint has dried, the front part, and only then the lower and inner perimeter of the instrument panel opening. Don't forget about the sidewalls.
Separately, we can say about the painting of VAZ air ducts. If you do it in the same color as painting some other elements, such as the armrests and the middle panel (in which the radio is located), it will not take much time, and the effect will be quite interesting - a small number of painted elements will give some individuality without changing the fundamental image of the car interior. To paint air ducts, one coat of primer will be enough, because they are touched much less often than the same armrests.
Of course, painting, especially of high quality, will not take an hour or two, but the result will exceed all expectations. Especially considering the fact that by doing it yourself, you are doing it for yourself and therefore with high quality. And you can choose the color scheme to suit your taste.
Adviсe
You should think carefully when choosing paint. Then changing the tone will be problematic. Matte black paint is often used. A light-colored car can be updated by painting the dashboard white with a light green, purple or blue tint. These are the most popular options. It is not advisable to experiment with flashy colors. It will look provocative and interfere with driving. The dye has a description that must be strictly followed.
It is advisable to start work with small, ordinary parts. This way you can practice. It is advisable to paint the less visible parts first. And then move on to the center console and climate control panel. For sanding, sandpaper sizes No. 60 and No. 80 are useful. And after the primer has dried, use sandpaper No. 80 and No. 90. The process can be repeated until the perfect surface is achieved.
Price
The pricing policy for car panel painting is determined based on a number of indicators. The cost of paint, the complexity of the work, possible repairs during painting work, and the responsibility when painting luxury cars are taken into account. In monetary terms, everything starts from 1500 rubles and above. If there is competition, there is not much difference - a provincial town or a metropolitan car service center.
Hello everyone dear friends and readers
I haven’t written anything for a long time, I didn’t have time, but I finally got around to doing what I’ve been wanting to do for a long time, namely, paint the torpedo in “Ultramarine” color. I took the paint and primer at work)))) as usual, I take everything. Well, what can I tell you about painting: we disassemble the panel, first clean all the parts that need to be painted, then degrease, prime and apply the paint layer by layer, I didn’t need varnish since this paint is not covered with varnish. The painting did not take place in one day. I painted my beard on the balcony because the weather initially did not allow me to do this due to the cold weather, a week later, that is, today I painted everything else - the upper and lower glove box, plus the soap dishes for the door handles. I am very pleased with the result, the paint applied perfectly, when you open the door and the sun enters the interior, everything glitters and shimmers, it’s a pity that it’s hard to see on the camera. Now the next thing is to improve the acoustics, but that's a completely different story)))))
Good luck to everyone))) and the implementation of your plans))))) don’t forget to evaluate)))
Selection of paints and varnishes
It is important to know how to paint a car dashboard with your own hands. Paint and varnish should not only please the car enthusiast in color, but also meet certain requirements:
- intended for spraying onto plastic surfaces;
- match the previous coating;
- varnish – be two-component, fixing.
Upon contact with certain components of paints, certain types of plastic can oxidize and cause the release of toxic substances. It is worth seeking help from specialists to avoid such troubles.
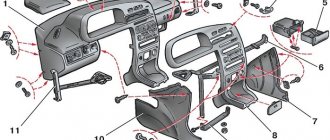
Comprehensive modernization of the VAZ-2114 instrument panel: first steps
Most often, a set of works to improve the dashboard of a VAZ 2114 is important and necessary, but at the same time, an interesting and serious task. The main task is to choose the right details and decorate them beautifully. It is always better to think through all actions related to various updates in advance, in advance.
Subsequently, this will avoid unnecessary mistakes and disturbing fuss. The right decision would be to draw up a work plan that you will follow and thanks to which you will not make mistakes, and the whole process will be a complete pleasure for you.
Tuning the dashboard can be performed in the following sequence:
- First you need to disassemble the car “device”. Every car enthusiast should know how to remove the instrument panel of a VAZ 2114. There is nothing complicated here, everything is quite clear, and the process itself does not require special skills or knowledge.
- Then it is necessary to refine the elements and parts. There can always be many nuances here. They depend on what you want to change and improve in your car. Everything should be thought through very carefully.
- At the end, you need to install the remade, updated “socket” into place.
How to easily update the “tidy” of a VAZ 2114
Upgrading the 2114's dashboard is actually not as complicated as it might seem at first. Buying such a “device” is quite simple. You should consider what options owners can use to update their VAZ 2114 wardrobe (examples in photos and videos).
1. AMS. This model has several features.
- To begin with, it is worth noting that you can order its design yourself;
- This panel is equipped with an integrated oil indicator, which is missing in the classic version. Its appearance is associated with the very persistent requests of many car enthusiasts to install this “component” as standard.
- This instrument panel looks more interesting due to the colored scales with chrome trim.
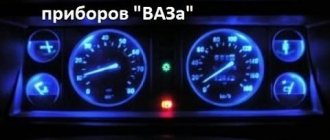
2. PRO-SPORT. This “tidy” is designed as an overlay for the instrument panel on the presented model. The updated design of this device gives them an impressive, completely new look. There are two options for its execution: with a light and dark backing. The backlight of the VAZ 2114 panel has a special brightness adjustment, but there is only one color - blue. The scales are glued after installing the insert. This is to give this element of the car an original look.
3. AMS-2. The central instrument was the tachometer, which was moved from left to center. The white scales create an overall sporty look for the entire panel. This allows you to quickly read the necessary information from it. The backlight has been redesigned and LEDs are used, with the help of which it is not difficult to read information at night. Installation is recommended to be carried out by qualified specialists, since its installation involves significant “redevelopment” of the classic model.
4. STREET STORM. The main feature of this model is its color design. Nothing was changed in the classic arrangement of instruments,
the emphasis was on the color scheme. The “appearance” of the dashboard has undergone certain changes, however, at the same time, its style fits harmoniously into the existing interior. Another feature of this model should be noted – its backlight. During the day it is light with red symbols. In the dark, you can easily change not only the brightness, but also the color.
Withdrawal procedure
- Remove the negative cable from the battery.
- Unscrew the left trim of the instrument panel console.
- Remove the cover. To do this, you need to remove the lower protrusion from the bracket.
- Unscrew the right panel of the instrument panel console.
- Disconnect the wires from the cigarette lighter.
- Disconnect the wires from the cigarette lighter light bulb.
- We push from the inside and take out a niche for small items.
- Unscrew the 2 screws and push the diagnostic connector block inside.
- Remove the heater fan switch handle.
- Using a narrow screwdriver, remove the handle from the lever.
- Unscrew the 2 screws above the instrument panel.
- Unscrew the two screws under the instrument panel.
- Remove the plug and unscrew the screw of the upper fastening of the lining.
- Unscrew the 2 screws of the lower fastening of the lining.
- We move the cover to the side.
- Mark the order in which the blocks are connected to the switches.
- Disconnect the wires from the switches.
- Remove the instrument panel.
- Unscrew the bolts securing the steering column and lower it down.
- Unscrew the 2 screws securing the panel to the bracket.
- Unscrew the 2 screws securing the bracket to the right cross member.
- Unscrew the 2 screws of the lower bracket fastening.
- We move the bracket to the side.
- Unscrew and remove the light guide from the instrument panel.
- We unscrew the 4 screws securing the stove control unit and recess it inside.
- Remove the lamp socket for the heater fan switch handle.
- Press the right lock and remove the air duct from the panel.
- Pull out and remove the headlight hydraulic adjustment handle.
- Remove the instrument lighting control knob
- Remove the decorative insert of the instrument panel.
- Unscrew the light guide.
- Unscrew the nut securing the hydraulic corrector and recess it inside the panel.
- Unscrew the nut securing the instrument lighting control.
- We take out the hydraulic corrector illumination lamp.
- Disconnect the wires from the instrument lighting control.
- Disconnect the wires from the immobilizer sensor.
- Disconnect the wires from the immobilizer unit.
- Disconnect the wires from the glove compartment light bulb.
- Disconnect the wires from the socket of the portable lamp.
- Unscrew the 2 screws of the top panel fastening
- Unscrew the 2 screws on the bottom fastening of the panel.
- Unscrew the self-tapping screw securing the panel to the left cross member.
- Remove the instrument panel.
- Installation of the instrument panel on the VAZ 2114 is carried out in the reverse order.
Tuning for your pleasure
The main thing in the process of modernizing any car is efficiency. Every owner would like his car to look original and, at the same time, to feel comfortable in it. Oddly enough, the instrument panel is considered one of the favorite parts for tuning enthusiasts. It can be modified in different ways and, thus, distinguish your own car from a huge number of similar machines.
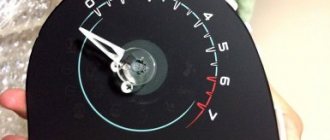
At the starting stage, it is necessary to prepare the material for work. Replacing a VAZ 2114 panel or its original update requires dismantling the standard panel. It will only be necessary to remove the speedometer protective glass. It is important not to break it. After removing the protective glass, you need to “uninstall” the arrows and indicators.
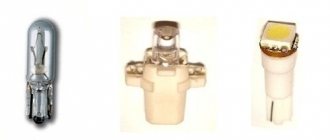
It is important to be careful as the arrows are very fragile. After that, pull out the standard tab. Then you need to change the backlight bulbs. The standard ones were green, but the purchased ones will be blue. We replace standard light bulbs with purchased ones, then check how they work. After that, install a new tab.
All this will look very impressive. At the end we install directional arrows and protective glass. If you modify your car in this way, it will look very beautiful.
Dead battery
No matter how high-quality the battery is, it can fail unexpectedly. A battery acid battery runs out for the following reasons:
- The battery is old and has exhausted its service life;
- the generator is not in order - it has stopped charging the battery;
- one of the consumers in the car is faulty or connected to the battery incorrectly;
- unfavorable weather conditions - the battery often runs out in winter during severe frosts;
- the heating, music or lights were left on at night.
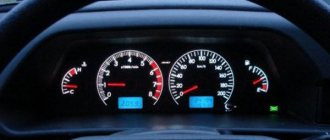
Battery tester
To check the battery condition, it is convenient to use a tester. When the battery is fully charged, the voltage at its terminals should be between 12.6 and 12.7 V. If, when checking, the value is lower, it’s time to charge the battery.
When you don’t have time to charge, but you need to go urgently, use the old method - “light it” from another car by connecting wires with clamps from the battery of a working car.
Car lighting diagram
After this, we recommend visiting a car service center as soon as possible for diagnostic purposes - it’s probably time to install a new battery, repair the generator or other devices in the car.
419c7cu-960.jpg
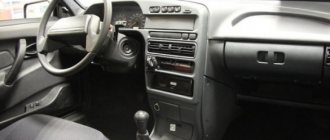
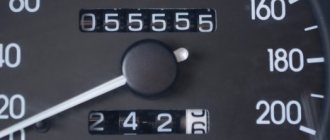
To begin with, the question arises: what is it good for? The old panel was made, to put it mildly, quickly: the steering wheel covers part of the instruments, the “tidy” itself is reflected on the windshield at night, thus turning the road into a computer quest.
Plastic, or rather its quality, does not stand up to criticism. After traveling several hundred kilometers, the entire cabin is filled with an obsessive creaking and terrible roar. Later the glove compartment begins to open. Ventilation is poor and it is cold inside the car in winter. However, all these problems can be solved. However, is it worth buying a car and immediately thinking about repairing it?
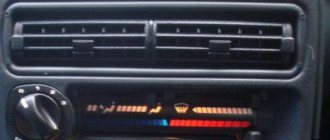
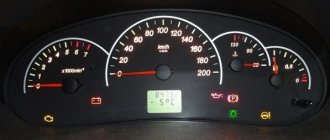
Another thing is the Europanel. She looks modern and fashionable. The material is softer and richer. It is certainly less noisy. Ventilation is also good.
Domestic assembly can be felt everywhere. The air flow control levers move slowly and do not reach the edges of the slots. There are also other little things: there is a big gap somewhere, something else falls off, the glove compartment sometimes opens by itself. But in terms of quantity and frequency, this is completely incomparable with the old version.
In addition, several drawers for small items warm the soul. Europanel is a modern and original solution to many problems associated with the “tidy” of domestic cars.
Diesel, hum, clicks and more: strange car sounds that shouldn’t scare
We have already talked about what engine sounds may hint that he is feeling unwell. Hearing an unfamiliar sound, many begin to worry and worry, and the most suspicious drivers put a Validol tablet under their tongue and go to a car service center. Where, by the way, they often take advantage of their panic and try to repair something that does not need to be repaired. Of course, the appearance of anxiety is the correct reaction. But the machine (and it is still a heap of iron) not only can make noise, but simply must. And some of its sounds should not be scary. Let's see what kind of noise from a car should not make its owner hysterical.
Required Explanation
Before you put one ear to the engine and the other to the gearbox, you need to think about the fact that some sounds have a right to exist on one car, but not on the other. In other words, “dieseling” a Ford or Kia engine are completely different things, and in the first case there is no need to strain, but in the second it is very necessary. Therefore, we will try to discuss such things separately.
The second is a category of sounds, the cause of which is so banal that it is not worth talking about them at all. Such sounds frighten either completely inexperienced drivers, or people who have just changed their car and are not yet accustomed to the fact that it works differently from the previous one. For example, a simple situation: a person in a crisis moved from a foreign car to a VAZ-2115 (ugh three times). I drove all winter, and in the spring I drove for the first time with the window down and suddenly I heard a terrible rumble ahead. And it was just the fan turning on, which was practically inaudible on a foreign car.
Lada Samara (2115) '1997–2012
Or suddenly, at speed, something began to buzz in a recently purchased car. The reason, perhaps, lies in aerodynamics: the side mirrors howled, and on the old “classics” there were drains. This is also too simple and elementary, so we’ll just warn you that there are very simple, loud, but not scary sounds that we won’t talk about. We'll look for something more complicated. Let's start with the engines.
What is good for an American is death for a Korean
Let's start with a light sound that often frightens the car owner - with a barely noticeable clatter. A quiet clattering sound, more like a chirping sound, is the sound of the injectors operating. Whatever they say about the complex design of the nozzle, it is just an electromechanical valve, and it cannot work completely silently. On some engines, the injectors are almost inaudible, while some “slam” noticeably. For example, this sound can often be heard on Korean engines. Of course, there is no need to be afraid of him.
True, if your hearing is not very keen, and you have no experience at all, this noise can be mistaken for a knock in an incorrectly set thermal clearance of the valves. But in fact, the valve clatter is much louder, and, in addition, it usually becomes quieter as the engine warms up (the gap becomes smaller and it does not thrash as much), but the injectors work the same at any temperature. So if the clatter is strong and decreases as it warms up, it’s time to adjust the gaps (or check the hydraulic compensators, if any), and if it is frequent, barely audible and does not change, then there is no need to worry - it’s the injectors that are working.
The second sound is less pleasant and louder. For its characteristic shade it is called “diesel”. Well, a diesel engine always “diesels” - the sound of even a working engine resembles a knock. But running a diesel engine on a gasoline engine can be annoying. But not always.
This phenomenon during a cold start is characteristic of many units, but it is not a sign of their impending demise. As an example, we can cite the engines of the Zetec series, familiar to us from Fords, primarily the 1.6-liter engine with 100 hp. The engine will soon be a hundred years old (okay, okay, a little less), but there is still no exact answer to what is knocking in it.
Most often, the blame is placed on the “pin-piston” connection, in which play appears, and when the piston is moved, a knock appears at the bottom dead center. Short piston skirts are almost as often blamed. Someone is very worried and begins to slowly rebuild the engine or at least adjust the valve clearance (this engine does not have hydraulic compensators). Adjusting the valves has never hurt anyone, but it doesn’t get rid of diesel. And since with this knocking “zeteki” quietly drive for 400 thousand kilometers, diesel engine was recognized as a “design feature” that does not affect the resource in any way.
I note that I myself had a first-generation Focus with such an engine, but with a volume of two liters. It drove without repair until it covered 420 thousand kilometers, was sold with a handwritten contract to Moscow, after which I received fines for another year from Chuvashia, Udmurtia and Tatarstan. Apparently, 420 thousand is far from the limit for a diesel Zetec, and I had to stop registering this car with the traffic police. By the way, there was no “oil burn” during this run. Therefore, if the car’s engine is one of those that has the right to run a little diesel after a cold start, you shouldn’t worry about it. Yes, this is rather an exception, but it exists.
In addition to Zetec motors, this includes motors of the EA111 series - CFNA and CFNB. There the situation is a little more complicated: sometimes the knocking is caused by wear of the piston group, leading to a decent amount of oil leakage. And at the same time, for many, simple 1.6-liter engines with multipoint injection knock on for tens of thousands of kilometers without falling apart or suffering from other “diseases”. The main thing is not to confuse this sound with the knocking of the timing chain. You still have to change the chain.
Although there is an exception here too. For example, the Opel Z12XEL engine produced before 2010. The cause of its characteristic “dieseling” is precisely the chain, but there is nothing terrible: it is enough to replace the not very successful hydraulic tensioner. The chain and gears themselves last a long time, but the efficiency of the tensioner turned out to be insufficient. It was replaced in 2010 and the problem went away. Therefore, if you hear a strange sound from under the hood, for example, of your Opel Corsa D, do not rush to change the entire timing chain drive: very often the reason is much cheaper and simpler. So it’s too early to panic, you need to look for a good specialist.