In short, I wrote a lot of text, the computer became dull and everything was erased... So just about the main thing.
The right rear wheel began to shuffle against the fender liner. The friction point is the internal part in the mudguard area. At first it shuffled when turning, then even on bumps.
I thought the stand was dead. But before purchasing spare parts, I decided to take it apart and see what the problem actually was.
None Started to take it apart.
Full sizeSuch chaos)
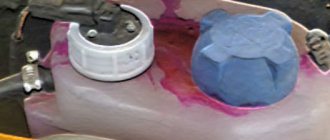
None We remove the rack, wipe off the many years of dirt and what do we see?
1118-2915004-20 Kalinovskaya stand! Not bad... we disassemble it and see a torn boot and a bump stop 2110, which hangs on the strut rod like an omno in an ice hole.
We start googling information and find out the following: Rear pillars 2110 and 1118 have the same characteristics. The only difference is in the thickness of the stem; in viburnum it is thinner. Accordingly, if you are going to install the 1118 rack on the 10th family, you need to use a viburnum buffer - 11180-2912622-11.
No sooner said than done! We go to the store and buy two new buffers.
viburnum bufferBy the way, the stand turned out to be in excellent condition! This means it was definitely not her fault. And since everything was disassembled, I decided to replace the rear springs. According to the info, springs are changed every 100 thousand km, which means it’s definitely time! In addition, I was always bothered by the fact that when the car was lightly loaded, the rear part sagged very much. And this despite the fact that there are “houses” on the beam, albeit in the 1st position.
And so it was purchased: — Rear suspension springs 2111 (Lada, class A with orange stripe) — 840 RUR. — Shock absorber boots 2108-10-15 (VAZ) — 230 re. — Bagels 4 pcs.
(BRT) - 40 rub. - Rear pillar buffer 1118 2pcs (VAZ) - I don’t remember how many, I threw out the receipt...
Springs
None
Strut with new spring
Let's put it in its place!
Simply put, over 11 years of operation and more than 100 thousand km. mileage, the springs have lost their properties. By the way, the springs were exactly the same, with an orange stripe (the paint on the old springs was still 80 percent alive).
The racks 1118 felt great, I don’t know why they were there. Perhaps the previous owner did not find the 2110 and offered this option. But as a fact, after replacing the springs, the rear of the car rose by 2 cm under its own weight.
If I were a low-slung fan, I would scream in horror! )) But that's what we needed. And the impressions completely surprised me!
It’s as if I didn’t change the springs, but the struts. The rear of the car behaves completely differently. More collected, doesn’t wobble as much when turning.
Swallows bumps much better! Overall, I'm pleased with the result! By replacing the springs, we not only added height and eliminated sagging, but also added comfort and that’s a fact!
Well, I replaced the left rear wheel bearing to the heap. It rustled very loudly and buzzed when turning. The whole thing fell apart. When I unscrewed the hub nut, the hub itself fell off and the bearings scattered all over the garage. Tin... But I knocked the bearing itself out of the hub for about 2 hours. It stuck tightly. Delivered by Vologda - 690 rubles! 690 CARL?! Damn...what kind of prices. Now there is silence =))) Well, here we go, since the trunk has been disassembled...
Full sizeto be continued Issue price: 1,800 ₽ Mileage: 118,536 km
(votes: 82) Category: 211021112112
Good afternoon. Today a VAZ 2110 arrived at our car service center. It came to us with problems with the rear suspension.
When hitting potholes, the rear pillar breaks through. Driving brings complete discomfort. Therefore, in this article we will tell you how to remove and replace the rear shock absorber strut on a VAZ 2110, 2111, 2112.
| Article: Rear shock absorber strut – 341824 |
| Tools: To replace the rear pillar on a VAZ 2110, 2111, 2112, you will need a 6″, 17″, 19″ wrench |
| Removing and replacing rear shock absorber struts VAZ 2110, 2111, 2112: |
| First of all, unscrew the top nut on the rod with a 17″ wrench. At the same time, hold the tip of the rod with a 6″ wrench. |
| Then we take out the nut, washer, muffler and strut support. |
| After that, using 2 19″ keys, unscrew the lower part. |
| We take out the bolt. If you can’t pull it out with your hands, you need to knock it out with gentle blows. |
| Next, pull out the rear strut assembly. |
| If you need to replace any part, disassemble the rack. |
| After that, we assemble everything in reverse order. Removing and replacing the rear shock absorber strut on VAZ 2110, 2111, 2112 took us about 50 minutes. After this, the rear suspension began to work like new. Good luck on the roads! |
Video on removing and replacing rear shock absorber struts on VAZ 2110, 2111, 2112:
After 50 thousand km. mileage, it’s time to think about how to change the rear struts on a VAZ 2110-2112.
Even if there are no obvious signs of wear, after such a long period of use, you should worry about this in advance and purchase new rear struts. This operation is not an overly complex or time-consuming job and does not require any special tools, so it is not necessary to go to a service station to carry it out. Replacement of rear shock absorbers can be easily done on your own in a garage.
How to determine the malfunction?
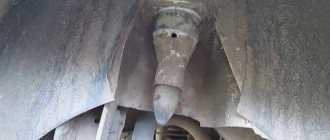
The shock-absorbing unit of the rear beam of the VAZ 2112, although it is distinguished by its simplicity of design, has some “cunning” in terms of detecting malfunctions. Since it does not experience the same loads as the front suspension, the rear shock absorber lasts longer - up to 50 thousand km. The “cunning” of the rear pillar of the VAZ 2110-12 is that there are only 2 clear signs indicating the need to replace the part:
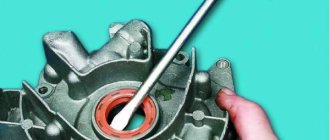
- traces of oil flowing down the element body;
- a dull knock when driving over bumps or small potholes.
The second sign does not always indicate a breakdown of the VAZ 2110 shock absorbers themselves; the rubber bushing of its lower mount knocks much more often; the issue is resolved by replacing these rubber bands. And only when the struts are too loose, a change in the car’s behavior on the track is felt, which is expressed in vibrations or skidding of the rear end during sharp turns of the steering wheel.
Motorists who constantly operate their cars with a full load or with a trailer are recommended to check the condition of the rear springs and struts after each long trip. An immediate inspection of the unit is also carried out after a strong blow to the shock absorber from a wheel that has fallen into a large hole. If an oil leak appears on the body or the behavior of the car changes dramatically, then most likely the rear shock absorber has become unusable. Too strong a blow often leads to bending of the rod, causing the car to start to pull to the side when driving.
Since the rear of the car does not initially bear much load, you can try to check the struts by rocking. By sharply pressing the corner of the trunk from behind, you should make sure that the shock absorber immediately extinguishes the vibration. If the body swings a second time after pressing, then the element does not cope with its task.
Recommendations for changing front springs
- You need to disassemble the front wheel. The side where the spring needs to be replaced is disassembled.
- The wheel is removed.
- The steering wheel turns in the direction opposite to the removed wheel.
- The cotter pin is removed.
- The nut connecting the steering rod and the strut is unscrewed.
- The finger is being removed. For this type of work you need a puller. If it is missing, there is no need to completely remove the nut. It is enough to make the fastening weaker and remove the finger with light blows of a hammer.
- The brake hose coupling is removed.
- The upper part of the guide post rests on a rubber plug. It must be replaced.
- The shock absorber rod mount is unscrewed. To prevent the nut from turning, you need to firmly clamp the opposite part.
- Before releasing the bolt holding the strut, you need to mark the mounting bracket and the bolt itself.
- The nut tightening the upper bolt is unscrewed. There should be no scrolling. If necessary, it must be firmly secured.
- The washer is removed. Using a drift, the bolt is released. The lower bolt is removed using a similar method.
- The steering wheel tip is released. There should be no sagging of the brake hose. Its tense position is not allowed.
- The upper support is secured with three nuts. Each one needs to be unscrewed with a 13 key.
- The stand is removed, the ties are installed at the same level on the springs. Typically five turns are attached.
- The tie screws are turned until the spring is completely free. The spring is removed.
Selecting new parts
It is not difficult to purchase a rear shock absorber for a VAZ 2112; there is a fairly large selection at any auto store. The question is what type of rack to choose. There are 2 types of them:
- conventional hydraulic (oil);
- gas-oil (gas).
Parts of the first type are cheaper and handle road unevenness much more smoothly. When the car is operated without special loads and with a quiet driving style, oil shock-absorbing elements can last quite a long time, provided that you do not come across a fake. Gas-oil shock absorbers are more expensive and behave more rigidly, which improves car handling and is a definite plus for an aggressive driving style. In addition, they last longer when used under increased loads.
To avoid purchasing low-quality products from unknown manufacturers, you should choose products from brands that have proven themselves on the roads of Russia:
- SS 20 (Samara plant, Russian Federation);
- Kayaba;
- Monroe;
- Sachs.
At the same time, it is necessary to take into account that products of these brands are most often counterfeited in underground workshops. Therefore, it is better to buy parts from official sales representatives of these manufacturers. The same applies to VAZ 2110 springs, which sometimes change due to shrinkage from loads.
If there is an obvious malfunction of one of the shock absorbers, it is recommended to replace both elements.
There is no point in changing them one by one; you will only waste money and time on replacement. Using an old rack together with a new one will cause rapid wear of the latter. A “bad” part will handle irregularities much worse than a new one, which will put a double load on it.
An exception is a situation where, for various reasons, a new shock absorber installed recently has failed. Then it makes sense to replace only it.
Replacing springs yourself
Replacing a spring on a VAZ 2110
Tools
In such cases, it is simply impossible to do without repairing or replacing equipment. You must have the following tools, devices, and parts on hand:
Replacing a spring on a VAZ 2110
When each of the tools is near the car, you need to start replacing the front spring. This work involves some risk of injury. Such work must be performed with care, attention and compliance with all safety rules. Perhaps some help from an experienced mechanic would be helpful. Personnel can be found at the nearest service stations.
Replacement process
If you finally decide to act on your own, you need to perform several actions:
- The front wheel of the car is disassembled from the side where the spring needs to be replaced.
- The wheel is removed from the car.
- The steering wheel of the car must be turned to the maximum in the opposite direction from the removed wheel.
- The cotter pin is removed.
- The nut that secures the tie rod end pin to the strut arm is released and removed.
- The finger itself is removed.
VAZ 2110 replacement of front springs
Note: if a puller is not available, the nut does not need to be removed completely. It is necessary to slightly loosen the fastening and use a hammer to remove the pin.
- The front brake hose coupling is removed from the strut holder (see VAZ 2110: replacing the front struts yourself).
- The upper support of the guide post has a plug made of rubber. It needs to be removed.
- The shock absorber rod nut is unscrewed. Here it is necessary to ensure that the opposite part is clamped, since the nut can rotate.
- Before unscrewing the strut mounting bolt, marks must be applied to it and the strut bracket.
Replacing the front spring of a VAZ 2110
Note: These marks will allow you to place these elements as accurately as possible at the time of assembly.
- The nut of the upper bolt is unscrewed. It is necessary to monitor its scrolling. If necessary, hold it.
- Having previously removed the washer, the bolt is released using a drift.
- The same method is used to remove the lower mounting bolt.
- The steering tip is retracted. The brake hose must be slack and must not remain in a stretched position under any circumstances.
Replacing the front springs of a VAZ 2110
- There are three nuts on the top support. They need to be unscrewed. A 13mm wrench should be used.
- The stand is removed.
- Two ties are used to install five-turn springs at the same level.
- The screws of the ties are unscrewed until the spring is completely released.
- The spring is removed.
Front springs VAZ 2110
- All components are washed with white spirit.
- After washing, the ties are installed on the new spring.
- The spring is compressed by the rotation of the tie screws.
- The spring is installed on the lower support along with the ties.
- The upper support part of the spring is mounted.
Replacing suspension springs on a VAZ 2110
- Next, the upper support is installed.
- The rod nut is tightened.
- The spring ties are removed.
- The spring is installed in the car in the reverse order.
Replacing the front suspension spring on a VAZ 2110
New springs can be purchased in stores. There are quite a lot of them in any city. If it is not possible to purchase springs in a store, you can use the Internet. There are many different versions of springs available here. Their cost can range from 280 rubles to the exorbitant 2000 or more. The product must be carefully inspected before purchasing. If the spring has any defects, this product should not be purchased. If difficulties arise with replacing the spring, it is necessary to leave this work to professional mechanics from the service station. Installing the springs is a major part of the vehicle's successful performance. Repairing springs is almost impossible, and therefore the only correct option is to purchase new products. Here it is necessary to take into account the material of manufacture and additional parameters that affect the operation of the entire car. A detailed video and high-quality photo of the replacement process can help in independent work. The main thing when you work with your own hands is to follow the instructions. Thus, you can not only avoid mistakes, but also save a lot of money. As a rule, the price for such a replacement at a service station is quite high.
Disassembly and assembly of the unit
Replacement of the rear pillars of the VAZ 2110 is carried out on any flat area on the street or in the garage; an inspection hole is not needed here. To disassemble the unit, you need to prepare the following tools and devices:
- jack;
- wooden stand of the required height;
- curved spanner wrench size 19 mm for unscrewing the rod;
- a set of open-end wrenches of standard sizes;
- standard plumbing tools (pliers, hammers, screwdrivers);
- wheel key;
- aerosol lubricant WD-40;
- gloves, rags.
It is better to carry out assembly and disassembly work with gloves to avoid minor injuries when loosening or tightening threaded connections. Replacing the rear struts 2110 begins with disassembling the luggage compartment side of the car. It is necessary to remove the rear seat fasteners and unscrew the seat belts, as well as dismantle all interfering decorative panels. Stuck threaded connections are sprayed with universal lubricant WD-40. The further sequence of work looks like this:
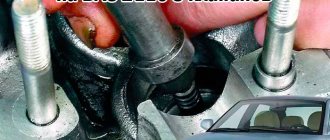
- The upper support of the rear pillar is unscrewed. To do this, unscrew the nut using a 19 mm curved spanner wrench, and hold the rod with a special or open-end wrench. In VAZ 2112 cars it is possible to unscrew the nut with a 19 mm open-end wrench.
- The wheel bolts are loosened, the car is jacked up and the wheel is removed. Don’t forget to secure the car with available anti-roll bars.
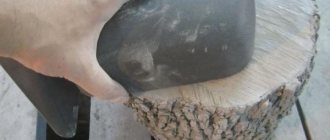
- A wooden support is placed under the bottom of the VAZ, and the jack is released and installed under the rear wheel hub.
- Using 17 and 19 mm wrenches, the lower support of the rear pillar is unscrewed, the bolt is removed and it is removed together with the spring.
To replace the shock absorber, the unit will have to be completely disassembled. You will need to remove the spring, the upper support washer, the boot with the upper cover and the compression stroke buffer. Then all these parts are rearranged onto the new rack. The rubber spacer also changes regardless of whether it knocks while driving or not.
Reassembly does not cause any difficulties. Only at the beginning you need to show dexterity to bring the rod back into the upper hole. Then the lower rack mount is aligned along the holes by pressing the hub from below with a jack. The bolt is put in place and tightened, after which the rest of the assembly is done.
Sometimes old racks can be restored and can serve as a backup option in case the new ones break down. Repair of the shock absorber is possible if it has not received mechanical damage to the body, the rod is not bent, and very little oil has leaked from it. The movement of the rod must remain free, without jamming, otherwise the shock absorber must be discarded. Remember that restoration rarely gives a good effect; about half of the repaired racks fail quite quickly.
Unknown knocking in the car is a very common problem for modern drivers. The source of sound in 50% of cases is wheels. And they are typical for the so-called “wheel stands”.
In the domestic VAZ-2112 car, the rear struts are replaced in the same way as in other models of this brand. It is worth noting that replacing the rear strut is much easier and faster than replacing the front strut. This is due, first of all, to the complex structure of the latter, which is not as easy to disassemble as it seems at first glance.
Repair and adjustment of the VAZ 2110/2112 strut shock absorber
In the video and article you will learn the structure of a two-pipe shock absorber and see the process of pumping compressed air, as well as a lot of useful information that will be useful to you for repairing a shock absorber in a garage.
A twin-tube oil shock absorber is being considered.
To disassemble it, you must first unscrew the outer nut. It should be noted that until 2004, mountain shock absorbers were produced collapsible with an internal nut. Next you need to drain the oil.
Knock down the guide sleeve. It comes together quite well. Oil should drain from everything. Wait a little.
Wash all parts.
Remove the compression foot. It's pretty simple. A couple of hammer blows and you're done.
Next you need to disassemble the compression valve. When using a vice, it is recommended to use aluminum jaws to avoid breaking anything.
Inside the valve there is a disc and a valve that, when pressed on the stem, provide compression. To make the rack more rigid, you need to add disks. A certain number of valves increases rigidity.
After this you can begin disassembling the rod
Clamp the rod in a vice and unscrew the top nut with a 17mm wrench. The design includes a piston, throttle valve and rebound valve. One hard disk, one soft disk and another bypass disk. Note that a small spring also affects the stiffness.
Compression Valve Assembly
We'll add three more valves. The result will be approximately 20% higher compression. Total 4 factory + 3 additional. Total 7. Assemble the disk, insert the spring and assemble the structure. Use a vice to press the structure into place. Check the functionality, there should be no jams.
Rebound assembly
The throttle valves can be left as is. Place the piston in a vice. Install the piston. Next, install a valve with two slots. Can be supplied with a different number of slots. The number of valves does not need to be changed. However, the spring will be replaced - this will provide more resistance. Sometimes you have to run the threads on the nut and on the rod.
Chuck assembly
Install the liner, factory bump stop and lowering bushings. Next, the guide bushing is reassembled. The structure is installed in a vice and a compression valve is installed. The result was shock absorbers with a lowering of -30 and modified characteristics.
Leveling up
Please note that it is necessary to flush the housing from factory oil. Next you need to fill in new oil. There are oils of different viscosities for different temperature conditions. Choose wisely and take into account the climate.
You need to pour 125-130 grams of oil into the front pillar housing. You need to pour oil into another container to pump the cartridge. The bigger, the better. When pumping, the cartridge should not grab air. Excess oil can then be poured back. Insert the cartridge into the container, stem up. Press down and air will come out. It will not be pumped right away; you will need to apply force. The cartridge is pumped.
Place the body in a vice. You can put something down so as not to damage the paint. Pour in 125 grams of oil. Insert the cartridge. All that remains is to install the oil seal and tighten it. However, before doing this, you need to apply lubricant to the oil seal so that the surface of the rod is lubricated. This is not always done at the factory. Carefully insert the oil seal so that the spring does not come off. Clean off excess grease. Secure the spring washer.
Pressure regulation
The pressure should be 4 atm. When pressed, the rod should move out noticeably faster. It's almost the same with monotube shock absorbers.
Source: https://autoremka.ru/podveska/remont-i-nastrojka-amortizatora-stojki-vaz-21102112.html
Description and meaning of the stand
Potholes, uneven surfaces and poor road surfaces are a consequence of frequent replacement of vehicle struts. To replace struts on a VAZ-2112 car, use high-quality equipment, or better yet, entrust this work to an experienced mechanic. Drivers of this car model call these struts “tenths”; their job is to stabilize the car body when driving.
If you drive daily on poor-quality road surfaces, the service life of the struts is reduced by exactly half. In the VAZ-2112 model, due to the peculiarity of the body structure, the rear pillars take the main impact from swinging.
To comply with safety rules and long-term operation of car suspension parts, it is recommended to undergo maintenance at least once every 3 months. The optimal wear of the rear side of the vehicle assembly directly depends on the quality of the struts. When the vehicle oscillates vertically, the struts together with shock absorbers reduce these oscillations to a minimum value. This happens because when the car's wheels leave the road surface, they do not participate in the braking process.
In a VAZ-2112 car, the rear struts should be replaced regularly, since this part of the car mechanism directly affects safety while driving. It is the lack of integrated action of the rear struts that creates a serious danger from even a small unevenness or hole on the road surface.
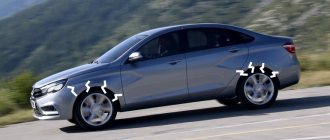
Method three: Air suspension.
Lada Priora with air suspension
This method is the most expensive and difficult to install. To install the air suspension, the car must be completely disassembled. Install special equipment; besides, air suspension is not suitable for cold seasons. Quite often it happens that condensation appears in the tubes, which in cold weather can lead to a blockage in the air channel.
To install this method of understatement, qualified specialists will be required. Large set of tools and equipment. To install the air suspension you will need: a receiver, a compressor, hoses, pipes, special racks, sleeves, etc.
The installation of air suspension has not found much popularity due to its high cost and capriciousness. Due to the large amount of reagents on the road, air leaks often appear in the system, which makes it impossible to drive a car. Also, using a car in winter is quite problematic.
Advantages and disadvantages of air suspension
Pros of air suspension:
Possibility of changing clearance
Disadvantages of air suspension:
- High cost and complexity of installation;
- Inability to move in cold weather;
- Taking away useful space in the trunk;
Rack installation methods
Very often, a loaded VAZ-2112 catches on the reverse wheels when moving and rocking on a bad road. Mechanics have found an original solution and attach so-called “spacers” to the rear struts, placing them between the beam and the car’s shock absorber. After the manipulations have been performed, the characteristics of the machine change as follows:
- The angle of the headlights changes.
- The castor position (wheel angle) changes.
- In contour brakes (rear), the direction of the pressure regulator changes.
If the car's headlights can be adjusted independently, the direction of the front wheels and the angle can only be corrected at a service station.
Knocking in the racks
If the VAZ-2112 has already traveled 30,000 thousand kilometers, you are probably faced with the problem of some knocking in the rear pillars. There can be a lot of reasons for this, and no one can accurately determine which of them was a consequence of the sounds in your car.
- If you hear a characteristic knocking sound in the rear pillar while driving over uneven roads, the shock absorbers are most likely due to deterioration and should be replaced as soon as possible.
- Wear on the rear suspension struts is also the main cause of problems with the car's rear strut.
- A sagging spring is also a cause and requires replacement.
- Severe wear of the bushings that were mounted in the lugs.
- Problems with the compression stroke of the car's rear strut.
- Problems with axis coaxiality due to possible deformation.
In a VAZ-2112 car, replacing rear struts without spring tensioners cannot be properly adjusted. To better identify the problem, empty the trunk of any cargo. If you nevertheless decide to replace the rear struts, the price that you will see on the car markets will pleasantly please you, since it is much cheaper than the prices for a new generation foreign car.
Knock or it's time for replacement
VAZ 2110 knocking rear struts
This often happens. The car runs about 30 thousand km and nothing, and then suddenly the wheel bearings start knocking at the rear. So it becomes necessary to replace the rear struts. In fact, the knocking sound of the rear suspension is a kind of signal indicating the need for replacement. At the same time, it is still unknown which part should be replaced. After all, a knock does not necessarily indicate a breakdown of the rear suspension, but can only indicate defects. Therefore, it will be relevant to touch upon the topic of determining the cause experimentally and professionally. Therefore, let’s consider the main causes of knocking from behind, in order to know what’s what:
- If the car is moving on an uneven road and a knocking sound is heard, then the cause is most likely faulty shock absorbers that need to be replaced with new ones;
- If it is clearly visible that the rubber bushings of the suspension arms are worn out, then the problem is in the suspensions themselves, which need to be replaced;
- If the spring has settled, then it also needs to be replaced;
- A knock may indicate weak fastening of the shock absorber itself or wear of the rubber bushings of the eyes (all worn elements are replaced with new ones, and the nuts and bolts are properly tightened);
- A knock may also appear when the rear suspension is overloaded or due to its breakdown, which is possible due to the destruction of the compression stroke buffer;
- Sediment or breakage of one of the suspension springs also requires replacement;
- A knock can also occur when the rear axle of the VAZ 2110 moves due to destruction of the suspension arm bushings;
- If the knocking comes from the suspension arms, then they simply need to be replaced with new ones;
- The knocking can also be determined by unloading the trunk (passengers are not seated behind the car and thus the cause of the knocking is determined, which most likely lies in the shock absorbers or springs).
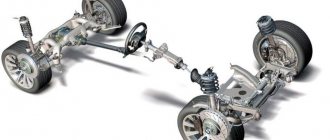
Rear pillar replacement instructions
If you take a closer look at the structure of the front and rear struts, you will see that this is a nodal mount - a kind of device for the interaction of springs and shock absorbers in a bilateral form. Replacing the rear struts on a VAZ-2112 with your own hands is not a very complicated process, but you must carry out a number of steps, as well as have special keys and everything necessary for the work.
Manipulations for removing the rear pillar:
- In the area of the stern fastening arches, dismantle the spare parts.
- Prepare the car seat located at the rear for removal, remove all fasteners and belts.
- Use a special key to unscrew the rod fasteners.
- Raise the car on a lift.
- Remove the lower mount.
- Remove the stand from the mounting socket.
When you have finished removing the necessary elements and removed the desired part, proceed to the next replacement step. Now you need to generate a stroke compression buffer system, remove the protective cover, bushing, support washer, spring and shock absorbers.
Replacing springs yourself
Tools
In such cases, it is simply impossible to do without repairing or replacing equipment. You must have the following tools, devices, and parts on hand:
When each of the tools is near the car, you need to start replacing the front spring. This work involves some risk of injury. Such work must be performed with care, attention and compliance with all safety rules. Perhaps some help from an experienced mechanic would be helpful. Personnel can be found at the nearest service stations.
Replacement process
If you finally decide to act on your own, you need to perform several actions:
- The front wheel of the car is disassembled from the side where the spring needs to be replaced.
- The wheel is removed from the car.
- The steering wheel of the car must be turned to the maximum in the opposite direction from the removed wheel.
- The cotter pin is removed.
- The nut that secures the tie rod end pin to the strut arm is released and removed.
- The finger itself is removed.
Note: if a puller is not available, the nut does not need to be removed completely. It is necessary to slightly loosen the fastening and use a hammer to remove the pin.
- The front brake hose coupling is removed from the strut holder (see VAZ 2110: replacing the front struts yourself).
- The upper support of the guide post has a plug made of rubber. It needs to be removed.
- The shock absorber rod nut is unscrewed. Here it is necessary to ensure that the opposite part is clamped, since the nut can rotate.
- Before unscrewing the strut mounting bolt, marks must be applied to it and the strut bracket.
Note: These marks will allow you to place these elements as accurately as possible at the time of assembly.
- The nut of the upper bolt is unscrewed. It is necessary to monitor its scrolling. If necessary, hold it.
- Having previously removed the washer, the bolt is released using a drift.
- The same method is used to remove the lower mounting bolt.
- The steering tip is retracted. The brake hose must be slack and must not remain in a stretched position under any circumstances.
- There are three nuts on the top support. They need to be unscrewed. A 13mm wrench should be used.
- The stand is removed.
- Two ties are used to install five-turn springs at the same level.
- The screws of the ties are unscrewed until the spring is completely released.
- The spring is removed.
- All components are washed with white spirit.
- After washing, the ties are installed on the new spring.
- The spring is compressed by the rotation of the tie screws.
- The spring is installed on the lower support along with the ties.
- The upper support part of the spring is mounted.
- Next, the upper support is installed.
- The rod nut is tightened.
- The spring ties are removed.
- The spring is installed in the car in the reverse order.