The latest releases of VAZ "tens" engines included rubber valve seals. The kit consisted of an expander spring and a steel bushing. The manufacturer recommends replacing the oil removal part after the car has run 150 thousand kilometers. Many car owners do this within the walls of a car service center. At the same time, they are completely unaware that in a VAZ 2110, replacing the oil seals of 8 valves can be completely done independently.
The main purpose of the valve stem seal is to seal the joint between the rods. This circumstance ensures that engine oil will not flow into the gap.
The engine will operate efficiently only when the components in the gas distribution mechanism are continuously operating. Engine parts are constantly subject to friction. To minimize their wear, they should be lubricated with oil. But it should not enter the combustion chamber. For this purpose, seals are installed.
When they wear out, the oil will end up in the engine cylinders. This will cause a circumstance to arise in which the oil will begin to burn and form carbon deposits on the walls of various elements. The result will be a drop in compression and the valve will not close tightly.
Design of valve stem seals
Content
The valve stem seal has a simple design consisting of three basic elements:
- base . It is represented by a steel bushing. This is a kind of frame to give strength;
- spring _ Thanks to this element, maximum adherence of the edge of the rubber seal to the valve stem is ensured;
- stuffing box . It is made from rubber or recycled rubber. This element removes excess lubricant.
Why do rubber seals wear out?
When the engine is running, heavy loads occur.
This is understandable, since the valve performs over 1000 strokes in one minute. Additionally, it should be noted the effect of the chemical factor, which is caused by heated oil and exhaust gases. The following signs may indicate that the oil seal has worn out:
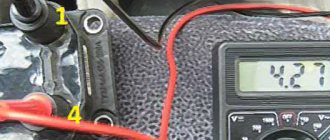
- The candle thread becomes coated with oil.
- Smoke appears from the neck where the oil is poured.
- The car's exhaust pipe itself smokes heavily.
- Soot appears on the spark plug electrodes.
- Fuel consumption increases noticeably.
- The recently filled oil is contaminated.
If such manifestations occur, it is necessary to replace the valve stem seals of the VAZ 2110.
Important! It is recommended to change the caps to those intended for this car model.
However, there are exceptions:
- the price of “original” caps is much higher than those offered to the buyer in the nearest specialized store;
- If the cap is damaged, there is simply no time to search for and purchase exactly the same part. This forces you to use some other options.
Putting parts in place
First, the cap is dipped in engine oil, installed in the mandrel and carefully hammered into the lower plate. The spring is returned to its place. All existing caps must be installed in the same way. In the same order as was done during removal, return all the springs and upper plates to their places. Then install the crackers back so that they fit exactly into the grooves for the rods on the valve.
A tin rod is removed from the hole from which the candles were removed. After installing the crackers, you need to hit the ends of the valve with a hammer or heavy object using a steel rod. They should fall into place. Lubricate the distribution shaft journals, cams and the places under them in the heads on the cylinder block with engine oil.
Install the camshaft into the head supports. In this case, it is necessary to install the cams of the 1st cylinder in the opposite direction in relation to the valve tappets. The area of the last support of the distribution roller is covered with sealant. The housings of its bearings are returned to their place and the studs are fixed in two stages with nuts, which are first tightened until the bearings touch the head.
It is necessary that the bushings fit exactly into the holes on the housings, and only then tighten the nuts until they stop. An oil seal is installed on the camshaft. At the last stage of work, the valve clearances are checked and adjusted. After this, the previously removed parts and devices are returned to their place. If everything described above seems difficult to perform, then you need to contact a car service center - where this work will be done by professionals.
It's easy to replace the caps yourself. The main thing is not to deviate from the above recommendations and follow the order of operations to replace parts. With timely prevention, the car will serve its owner for a long time.
Procedure for replacement
If you need to replace VAZ 2110 8 valve stem seals intended for other cars, then the following points must be taken into account:
- The diameters of the valve stem and the guide bushing, the location of which is the seat belt, must match.
- In comparison with the “original” valve, the height should not be exceeded by more than 0.5 millimeters. Otherwise, the valve stroke will be very large and the spring retainer may be damaged.
- The cap should not have a diameter that is too large. This will ensure freedom of passage inside the valve spring. This is most important for those engines whose valve has two springs. In this case, the outer diameter of the cap will be limited by the internal spring.
- The length of the seat on the cap and the guide sleeve should be close in size. If the belt is short, it may be damaged by the edge of the sleeve.
- Pay attention to the internal profile that the surface of the cap has.
- When replacing VAZ 2110 valve stem seals, the year it was produced is taken into account.
Replacing valve stem seals without removing the head of a VAZ 2112, 16 valves, step-by-step instructions with photos
Dear friends, today we will tell you in detail and with photographs how to independently replace valve stem seals on VAZ-2112, 2111 and 2112 equipped with a 16-valve engine. The beauty of our story is that in order to replace the oil caps we will not remove the head from the engine, and this is a significant saving of time and labor costs, there is no need to drain the antifreeze, unscrew the manifold, etc.
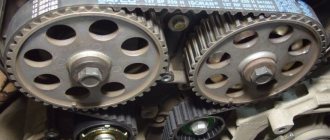
At the same time, we will do this without using an expensive valve depressurizer, which allows us to do this, but will use a regular valve depressurizer for the VAZ-2110, which can be bought on the car market for 200 rubles. Even before starting work, I recommend purchasing this desiccant, if you have little experience in desiccaning and drying, then take a stock of heels of crackers, we will also need an anaerobic (do not use silicone) sealant, unlike conventional silicone, when in contact with oil, it does not clog the channels but dissolves in it, and also buy a key for tensioning the timing pulley for 50 rubles, since the belt will have to be removed and then set according to the marks. By the way, it wouldn’t hurt to replace the timing belt and rollers at the same time, ideally. If you are ready to do it yourself - no problem, if you lack determination - I can recommend contacting the guys in Minsk to replace the timing belt, they will definitely do it well and inexpensively.
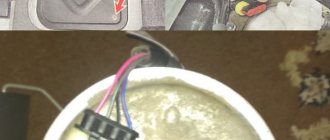
Well, if you’re ready to do everything yourself, then let’s get started. First, remove the plastic cover from the engine and gain access to the “intake manifold”