How to replace the steering column switch on a VAZ 2110
Replacing the steering column switch in a VAZ 2110 is carried out for the following reason: this element of the car is not as beautiful and functional as on foreign cars. On a VAZ 2110, replacing the steering column switch can be easily done on your own. You just need to follow the instructions and do everything in accordance with it.
Modification of the steering columns on the VAZ 2110
Refinement of steering columns
If the driver is not interested in the replacement process itself, but only needs to eliminate the clicking of the steering column switches, then we can advise simply carrying out modifications.
Eliminating clicks
So:
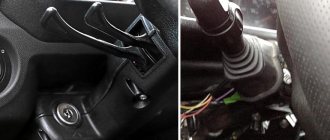
- We remove the switches from the VAZ 2110. Usually, no difficulties arise in this process.
- We disassemble the steering columns by snapping off the top cover with a screwdriver (small size).
- We find a small slide inside the switch (it is this that is responsible for the loud switching).
- Now you need to find a suitable rubber, for example, a car door seal (old and no longer needed). This very piece of rubber will need to be glued to the points of contact between the scenes.
Advice. To make the switching happen more smoothly, it is recommended to slightly file the plastic bump. We try to make the tip more rounded, otherwise it will jump. If this cannot be done, then you can use another method: weaken the spring.
- Let's put everything back together.
- We cover the switch body with some kind of vibration material. It is recommended to do the same with the steering shaft casing.
Closing the openings of the steering column switches
Openings can be closed easily and simply
Sitting behind the wheel of a VAZ 2110, you cannot help but notice the large gaps located near the steering column switches. This looks very unaesthetic and not at all practical. Let's try to close them:
- Take a piece of black carpet.
- We cover the steering column switch with Moment glue.
- We wait until the required time dries.
- We glue the carpet directly onto the steering column switch, closing the gap.
Note. It is not necessary to use only carpet. If you don’t have it, then you can take a piece of modelin or even an old felt boot.
You can easily replace the switch yourself, following the instructions. Thus, it will be possible to save the price of services in specialized workshops. During the work process, it is recommended to study photo and video materials.
Lada (VAZ-2110). Checking and replacing steering column switches
Home Cars - VAZ VAZ-2110 (Lada) 1996+
— maintenance and repair manual search site
content .. 150 151 152 153 154 155 156 157 158 159 ..
Lada (VAZ-2110). Checking and replacing steering column switches
7.8.7. Checking and replacing steering column switches
| GENERAL INFORMATION |
Turn signal and headlight switch type 69.3709
| Turn signal and headlight switch contact numbers |
Windshield wiper and washer switch type 70.3709
| Wiper and washer switch contact numbers |
Steering column switch lever positions
| Bold lines show the initial positions, thin lines - fixed and dotted lines - non-fixed positions of the levers. |
| EXECUTION ORDER | ||||||||||||||||||||||||||||||||||||||||||||||||
Contact closure at different positions of the turn signal and headlight switch levers
* Non-fixed position. Contact closure at different positions of the windshield wiper and washer switch lever
* Non-fixed position |
Removing and installing the steering column switch
| GENERAL INFORMATION |
PERFORMANCE ORDER 1. Disconnect the negative cable (–) of the battery with the ignition off. ATTENTION As a result, information from the electronic memory units, such as the radio code, is erased. Without a code, the radio can only be turned on by the manufacturer or an AUDI service station. Therefore, read the materials in the subsection Entering the radio code. Be sure to read the notes on safety precautions when using the airbag, and refer to the Steering subsection.
2. Remove the airbag unit from the driver's side, and refer to the subsection Removing and installing the airbag unit. 3. Remove the steering wheel, and refer to the subsection Removing and installing the steering wheel.
4. Disconnect the handle of the steering column adjustment mechanism –1–.
5. Remove the 2 Phillips screws –4– and the Allen screw –2– (4 mm wrench). 6. Remove the 2 fastening screws –3– with a thin long screwdriver. 7. Remove the upper and lower parts of the steering column switch trim.
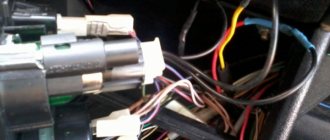
8. Unplug connector –1–.
9. Remove the –2– (5 mm) hexagon socket screw so that the steering column switch can move slightly. 10
Carefully disconnect the electrical connections from the steering column switch. ATTENTION When removing the steering column switch, the spring remains on the switch
Make sure that the spring does not twist and remains in its middle position.
11. Remove the steering column switch from the column and place it to the side.
1. Place the steering column switch –2– on the steering column without securing it.
2. Put on the steering wheel. 3. First secure the steering column switch -2- with a hexagon socket screw -3- on the steering column so that the distance to the steering wheel is a = 3 mm. 4. Remove the steering wheel again and perform further installation in the reverse order of removal. 5. Install the steering wheel, refer to the subsection Removing and installing the steering wheel. 6. Install the airbag, refer to the subsection Removing and installing the airbag unit. 7. Connect the ground cable (–) of the battery
Attention: Activate the high-altitude automatic power window, as well as set the clock and enter the radio code, refer to the subsection Entering the radio code
Repair of Largus steering column switch
This car came to us with a common problem in Largus.
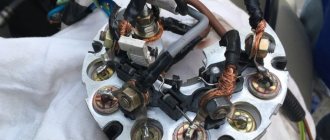
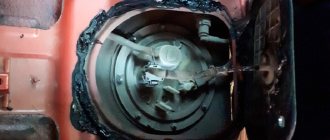
Even though it’s not a Solaris, they helped. Having done the diagnostics, we found a fault - the steering column switch. After removing it we saw the problem. On the rod, which is located inside the handle, the wires came off, because the design there... is so-so =(
There was no time for photos here. I wrapped the "end" of the handle in duct tape to prevent damage and removed it using plastic pullers and a lot of force and anger.
Ready. We collect and enjoy the signal =))
Thank you all for your attention. I hope this information is useful to someone.
The steering column switches on the Lada Largus car perform a number of switching functions in the electrical circuits of the car. If the switches are faulty, you may not be able to fully use the lighting, turn signals, wipers, horn, etc. In this article we will talk about removing the switches in case of replacing them, and also provide a table with the closed contacts of the steering column switches when operating them.
Steering columns from Kalina, Priora and Chevy Niva
Note. On the VAZ 2110 you can easily and simply install switches from Lada Kalina, Chevrolet Niva or some foreign cars.
Features you need to know about
Replacing the steering column switch for a VAZ 2110
Let's look at some features of steering column switches from other cars that we want to install in the VAZ 2110:
- The main thing is the connector, which must match the VAZ 2110 and then there will be no problems.
- It is also recommended to pay special attention to the shape of the switch. For example, the steering column shifters from the Priora become further from the steering wheel than the tenth shift paddles. In this case, you have to lengthen the steering shaft or install another one from the same Kalina.
Steering column switches VAZ 2110
Note. There is another way: bend the steering column switch and cut off the excess part, and then glue it at a different angle, but this is not entirely correct. We need to think about safety, but a glued-on steering column does not fit in with this. Therefore, if we change the steering columns from Priora, Kalina or Niva, we will have to put up with a large distance of levers.
Conventional DIY installation of steering column stalks
- Disconnect the positive wire from the battery.
- Now remove the lower steering column casing by unscrewing the 7 fastening screws.
- Lower the steering column down.
- Remove the upper steering column casing.
VAZ 2110 replacement of steering column switches
- We find two plastic clips and squeeze them to remove the windshield wiper switch (see Replacing windshield wipers on a VAZ 2110 on your own) from the base.
- Disconnect the block with wires.
- We now remove the turn signal and headlight switch, again, squeezing the two plastic clips.
We take a test lamp at 12 and connect it to the corresponding contacts:
Replacing steering column switches VAZ 2110
- If the lever is in the first position, then everything is turned off.
- If the lever is in the second or third position, then the numbers of closed contacts will be 49a-49aL and this is a left turn indicator.
- If the lever is in the fourth or fifth positions, then this is a right turn indicator and the numbers of closed contacts: 49a-49aR.
- If the lever is in the sixth position, then these are low beam headlights and the numbers of closed contacts: 56-56b.
- If in position seven, then this is a high beam alarm and the numbers of closed contacts are 30-56a.
- High beam is position eight and the contact numbers here are 56-56a.
Repair of turn switch VAZ 2110
This article outlines a way to upgrade your steering wheel paddle shifters to make them quieter but just as efficient as before.
First you need to remove the steering column switches. Next, you need to disassemble them by snapping off the top cover with a small screwdriver. There is a small rocker on the turn signal switch that makes the loud knocking noise.
To eliminate these clicks you will need rubber (you can use an old door seal). It must be glued at the point of contact between the scenes (photo below).
To ensure smoother switching of the lever, it is worth slightly filing the plastic bump on the tip so that it becomes rounded - this way it will stop jumping out of its place all the time (photo below).
As one of the alternative upgrade options, you can consider weakening the internal spring (see photo above).
After assembling and installing the levers, you can also additionally cover the housing of the steering column switches and the steering shaft housing with vibration material.
By the way, you can also replace the standard factory steering column switches with similar ones from LADAKalina or LADAPriora.
Of course, the steering column switches on the VAZ 2110 are not as beautiful and functional as on foreign cars. Therefore, many people think about whether it is possible to replace the steering column switches with others and find a solution .
Standard switches can be easily replaced with steering column switches from Chevy Niva, Kalina, Priora .
The steering column switches from Priora, Kalina or Chevy Niva are the same, the only difference is that there is an additional button on the right switch to control the On-Board Computer (there is no button on the switches from Chevy Niva).
The connector for these switches is the same as the decimal one and there will be no problems with installation. But there is one big “ but ” here - the shape of the steering column switch from the Chevy Niva, Kalina, Priora differs in shape from the VAZ 2110 switches. That is, the steering column switches from the Priora are further from the steering wheel than the ten-wheel switches, and this is not entirely convenient. See for yourself. To eliminate this misunderstanding with the remoteness of the levers, all possible discussions begin on the topic ' how to make the steering column switches from the Chevy Niva closer to the steering wheel '.
Do-it-yourself modification of the VAZ 2110 steering column switches
We show how to replace the steering column switches in VAZ 2110, 2111, 21112 cars. The steering column switches are responsible for the operation of the wipers, turn signal indicator, high beam, and washer fluid supply. What problems might arise with them? Personally, while owning a car of the tenth family, I encountered such a problem: when driving without low beam, the high beam could automatically turn on. I constantly had to hold the switch so that it did not turn on spontaneously.
First of all, you need to unscrew the bolts of the steering casing, move the steering wheel adjustment lever down and remove the lower casing, it is advisable to remove the upper one. Now we can clearly see our steering column switches, they are attached to two latches, you can replace them with new ones using two fingers, you don’t have to unscrew anything:
Video of replacing steering column switches in VAZ 2110 2111 2112:
Priora
G.M.
Let's begin! So we need: 1) Straight arms 2) GM steering column switches 3) Insert into helicopter 2108 4) wire 5) small and large male and female males 6) heat shrinkage 7) a pair of relays
relay pads 9) time
Well, now about the hands. knowledge of car electronics and hands growing from the right place is a must, otherwise a fire or something else is possible!
We go to the Korean spare parts store and buy left and right steering column switches (I took them from the Lacetti), then either use ours or buy a new helicopter insert 2108!
We use any wire you like!
dads moms small and large, you can use electrical tape instead of heat shrink, but I don’t recommend it!
The original chips were cut off because I couldn’t find the original matching parts, both from the left and right switch!
Let's start with small chips: Left (turn signals-light) 1) Black - general 2) White - clearance 3) Green-black - low beam 4) Yellow - PTF 5) Red-yellow - PTF So what do we have, but we have a difference from switching circuits from the VAZ, since on the VAZ the power supply is low current and the size is divided into dimensions + it weighs constantly and for low current, after turning on the ignition, we will correct this matter with the help of a relay! It would also be advisable to hang a relay on the dimensions, since the output on the switch is low-current, but on the VAZ there are no relays and the entire load from the dimensions falls on the button! PTF can be hung here if desired + permanent can be from the dimensions or from the ignition, I will hang from the ignition!