Symptoms of ball faults on a VAZ 2101-07
The very first sign of a problem can be considered a knocking sound when driving over uneven surfaces. It may indicate pin wear or lack of lubrication in the joint. If the knocking appears when it is cold and disappears as you move further, then there is nothing to be afraid of.
Other signs of trouble:
- creaking when turning the steering wheel;
- tight steering wheel;
- car yaw on the road;
- crunching sound when turning the wheel
If these symptoms appear, you need to drive into a pit or lift and check the play in the hinges. Lift the wheel, ask your partner to hold down the brake pedal and rock it vertically; if there is play, the ball joints need to be replaced. You can accurately determine a faulty ball joint using a long installation:
Typical symptoms of malfunction
- Creak when turning the wheel to the side;
- A dull knock when overcoming road obstacles, bumps, holes;
- Beating in the steering wheel;
- The car becomes difficult to control already at speeds above 80 km/h;
- Uncharacteristic force must be applied to turn the steering wheel.
Frequent causes of breakdowns and premature failure of the VAZ 2101 suspension
- Failure to comply with the terms of technical inspection at the time of the factory warranty;
- Violation of the technology for installing parts and components;
- Violation of the rules for using a technical device;
- Purchase and subsequent installation of low-quality, non-original parts;
- Third-party mechanical damage to adjacent mechanisms, resulting in suspension malfunction;
- Systematic aggressive driving style.
Before starting repairs, we carry out comprehensive diagnostics in order to study the general condition of the car, identify breakdowns, and their localization. We calculate the number of necessary components, time, effort, and funds.
Since the complex diagnostic procedure is not complicated, we carry out the work ourselves. We turn to a car service center as a last resort when we need prompt assistance from specialists.
The importance of diagnostics is justified by the fact that it is not always possible to correctly identify a breakdown, as a result of which you take the wrong path from the very beginning. Many inexperienced specialists make this mistake. Diagnostics will help to significantly reduce the time spent searching for a breakdown, as well as assess the condition of the car as a whole, its individual elements, and assemblies.
Service center technicians, despite the presence of digital sensors in modern cars, independently carry out basic daily checks. For example: the level of engine oil, antifreeze, fluid in the expansion tank of the main brake cylinder, headlight washer. Assess the degree of fixation of the brake pads with the parking brake lever.
Also, don’t forget about tire pressure. Excess, as well as deficiency, has a detrimental effect on the engine, fuel consumption, control quality, wear of the suspension and shock absorbers.
Replacement process
First you need to purchase the appropriate ball joints. The best ones are Track “Champion”. Price: 2000 rubles per set. The next thing you need when replacing is a ball joint remover. It makes the procedure much easier.
After this, follow the following procedure:
- Lift the wheel and remove it. Secure the machine against accidental falls.
2. Clean the ball nuts and bolts from dirt and apply penetrating lubricant:
3. Using a 22mm wrench, unscrew the lower ball nut not completely:
4. Install the “soldier” puller between the two balls:
5. If there is a jack under the lever, it can be removed. Using a puller, create tension between the two balls. If the puller bolt is difficult to unscrew, apply several blows with a hammer to the eye of the lower ball knuckle. The lower ball should “shoot”.
6. Pull out the puller, unscrew the ball nut until the end. If the pin rotates together with the nut, then it must be clamped using a bench clamp. After unscrewing the nut, lift the steering knuckle and release it from the ball:
7. Unscrew the lower ball mount - 3 bolts and 3 nuts for 13. Remove the old support and clean the seat.
8. Add litol24 lubricant under the boot of the new ball:
9, Install the new ball joint:
The tightening torque for attaching the ball to the lever is 20 Nm. Nut securing the pin to the steering knuckle - 98 Nm.
10. Pull the steering knuckle in halfway to fit the new nut:
As the nut is tightened, the steering knuckle can be pushed in all the way. The nut can be tightened.
The upper ball pin is changed in the same way. Also, using a puller, you need to push it up, then unscrew the nut completely and replace it on the lever. After this, it is inserted into the steering knuckle and tightened with a 22 nut. We recommend treating the threaded connections of the new supports with copper grease.
Ball joints
Oh, how harmful and bad they are. But on the box there are simply fantastic words written about them. I don’t remember which manufacturer, but I came across this fantasy. I don’t know what world these producers live in, or what they use, but here’s the phrase:
Ball joints are an eternal unit!
Yes, of course... Eternal! True, there is a note here that everything depends on the driving style, the terrain on which the car is driven, the loads, and the condition of the boot. In short, we are not children, we all know perfectly well what a VAZ 2101-2107 ball joint is. You also need to look for a unit that changes more often. Now we won’t talk about filters, the fuel pump rod and other little things. Let's talk about the suspension. Okay, we laughed, now let's start looking at what it is all about? And what are they for? It is worth saying that the VAZ 2101 ball joint, the price of which ranges from 350-500 per piece (regardless of whether it is lower or upper), still needs care and lubrication of the inner surface of the boot before assembly.
Their main function is to hold the wheel hub in a vertical position. But at the same time, it must rotate around this very vertical axis in order to be able to make a turn. This, perhaps, is how you can briefly describe the whole essence. The ball joints are attached to the VAZ 2101 levers using bolts. Friends, every time you replace ball joints, install new bolts and nuts, and don’t forget about the engraving washers. The support pin is inserted into the hub hole. It is with the help of this finger that the wheel turns. Do you know how to check the condition of ball joints? If not, no problem, learn quickly.
Checking the upper ball
So, invite your neighbor, put him in the car, let him press the brake pedal. And at this time you grab the top of the wheel and sharply pull it back and forth. Well, to be more precise, from myself, then to myself. In this case, no backlash should be felt. Why hold the brake pedal? Yes, in order to fix the hub in one position, there was no chance that its bearing would play. After all, you know that it is tightened with a small torque and should have a small free play?
But you can use a more effective method to check the ball joints of the VAZ 2101. Take a small pry bar. Place it between the upper suspension arm and the hub. Move it up and down with sharp movements. The backlash will definitely show itself, you will feel it. And the VAZ 2101 suspension will not work correctly when there are ball plays. This is felt when driving, crunching sounds appear, which are quite annoying.
Checking the lower ball
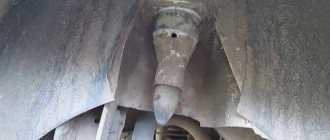
Oddly enough, even the instruction manual advises the first step to clean the entire surface of dirt. Yes, unfortunately, a lot of water and dust accumulate here, and gradually it becomes more and more. And if you wash your car only on major holidays, then a whole cultural layer has accumulated there. Note that there is a small plug in the lower ball. If you think this is for beauty, you are mistaken. Unscrew it and measure the distance from the surface of the VAZ 2101 ball to the finger.
In addition, during operation, Litol or CV joint can be injected through this hole. I don’t know about you, but I sometimes use the latter lubricant even for computer coolers. The distance from the ball surface to the pin should be a maximum of 11.8 millimeters. If the value is greater, then you need to replace the support as quickly as possible. It's no joke; if it jumps out, the wheel will fall on its side. And at high speed this is fraught with serious consequences.
A short video about replacing ball joints on a VAZ 2101:
https://youtu.be/https://youtu.be/Aw1H8p2Kc1E
_
