Description of replacing the VAZ 2106 hub
Replacing a VAZ 2106 hub is done quite rarely, since the part lasts a long time, at least 150 thousand km. The main reason why the replacement operation is performed is wear of the bearing seats, as a result of which the bearing races begin to rotate. The fault can only be determined by removing the hub and removing the bearing races. If they rotate in their seats, then after removing the lubricant, clear marks will be visible on the inner surface.
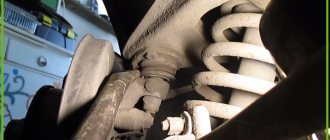
A sign of wheel bearing wear is a hum and vibration from one of the front wheels. To accurately determine the origin of the humming sound, the car is jacked up and the wheel is rotated by hand in different directions. If a loud noise is heard, then the bearings need to be replaced. The service life of these parts averages 40-50 thousand km. Disassembling this unit on a VAZ 2106 car, removing old parts and installing new ones is a simple task and is accessible to every car enthusiast.
Method No. 1 - replacement without removing the strut and without further collapse
Only the wheel, disc, caliper and hub are removed. The replacement itself is carried out directly on the machine, without removing the rack. In addition to the list of replacement tools, you will definitely need a universal wheel bearing puller.
Execution order:
- First, unscrew the bolts from the brake drum.
- We remove the drum, and then unscrew the two bolts securing the ball joints.
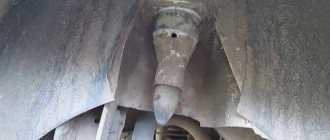
- Now we remove the driveshaft from the front bushing using the steering knuckle; manual force will be enough.
- For ease of replacement operations, it is recommended to disconnect the steering tip from the rack.
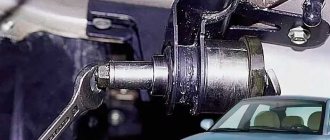
- The next step is to remove the front hub from the knuckle. Use a chisel and knock it out as shown in the photo.
- Another option for dismantling the VAZ 2107 hub. Using a brake drum, bolt it to the hub, as shown in the photo, and then remove the hub with some force.
- Having disassembled the front hub, remove it to the side.
- Remove the retaining ring from the knuckle, which remains the outer part of the old wheel bearing.
- We install the puller on the steering joint as follows.
- Tighten the bolt of the removable device, start the pressing process.
- Gradually the part will come out of the pin, now we move on to the hub.
- Remove the protective cover and then remove the inner support from the hub.
- If you have a universal device, put it on as shown in the photo.
- The ring is pressed from the hub as follows.
- We are starting to install a new product. First we clean the inside of the fist, making sure to lubricate it.
- Install the puller with a new front wheel bearing in the same way as steps 9-10.
- We insert the part into the fist evenly and without distortion, and only then tighten the device and compress it.
- Now put on the hub, press it if necessary. Subsequent assembly is carried out in reverse order. We start with the hub nut and tighten it with a torque wrench to 20 Nm.
See more at:
Replacing the front wheel bearing of a VAZ 2109
Preparing and disassembling the unit
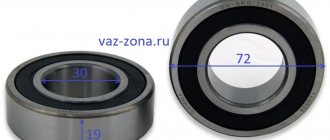
The front rolling bearings are roller, cone type, consisting of two parts: external and internal. Good quality products are sold complete with the required amount of lubricant and two clamping nuts. The nuts differ in their thread, on one it is left-handed, on the other - right-handed, the first will fit the axis of the right axle, the second - to the left.
The manufacturer does not know which wheel will be replaced, so he completes the product with both nuts. Additionally, you need to purchase an oil seal, which is located at the rear of the hub and does not allow grease to leak out. You can carry out the work on a level surface, securing the car with the hand brake so that it does not roll away.
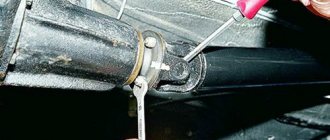
Before lifting the car with a jack, you need to pull out the metal boot covering the hub nut and loosen the latter with a 27 mm wrench. Then the wheel bolts are loosened, the car is jacked up and the wheel is removed. The next step is to remove the brake caliper, which is attached to the axle with 2 bolts; they need to be unscrewed, the part removed and moved to the side.
It is recommended to first remove the brake pads from the caliper, then it will be easier to put it back.
Now you can completely unscrew the nut, pull out the washer and remove the hub from the axle axle by hand. After this, you need to remove the old grease from all parts; it contains metal shavings.
Installation and adjustment of new parts
The insides of the outer bearing are removed, and the old grease is removed from the opened hole. To get to the insides of the second part, you will need to pull out the oil seal by prying it with a mounting spatula or a powerful flat-head screwdriver. It is recommended to wash the inner surface of the hub together with the remaining clips in it with gasoline or diesel fuel. Sequence of further work.
- Place the hub on 2 wooden boards and attach a punch or other metal rod with a pointed end to the holder from the inside. Lightly tapping with a hammer, knock the part out. During the process, the punch needs to be moved so that the clip comes out evenly. Turn the hub over and perform the same operation on the other side.
- Now you need to study the condition of the surface of the hub seats. If traces of turning the clips are visible, you should think about replacing it. It is possible to somewhat extend the “life” of the hub, for this they use the old antiquated method. Small notches should be made on the surface of the seats with a core or chisel. After pressing the clips, they will sit tightly on these bumps and will not turn for some time.
Replacing front wheel hub bearings on a VAZ 2106
External signs of the need to remove the hub bearings for troubleshooting are: increased noise when the wheel rotates; it is impossible to achieve the nominal clearance in the bearings by adjustment. To replace the front wheel hub bearings on a VAZ 2106 you will need: a wrench for wheel bolts, a hammer, a screwdriver, keys “12”, “17”, “27”, a head “27”, a torque wrench, firmware (bit ), a mandrel for pressing the oil seal, kerosene, Li-tol-24 lubricant, a container for washing parts.
USEFUL ADVICE It is more convenient to replace the wheel bearings on a lift. It is allowed to work on a VAZ 2106 car raised with a jack on supports, subject to the necessary precautions.
1. Remove the hub and remove the oil seal, spacer ring and bearing separators with rollers and inner rings (see “Replacing the grease in the front wheel hub bearings”). 2. Wash the bearings and hub cavity with kerosene.
WARNING Inspect the inner and outer race races of the bearings and the roller running surfaces. Pitting, visible wear of cages, rollers and rings, as well as cavities and chips on rollers and rings are not allowed. Be sure to replace defective bearings together with the outer rings. Replace the outer and inner bearings at the same time. Check that the outer bearing rings are securely seated in the hub housing. The rings should not turn by hand.
Sign of a faulty VAZ classic wheel bearing.
A faulty bearing usually produces extraneous sounds in the form of a hum or grinding sound, and the wheel can also hang on such a bearing due to wear or due to a poorly tightened wheel nut.
To diagnose a bearing, it is enough to hang the wheels (or each separately) and rock the wheel in different directions. If there is play when rocking in all planes (wheel rotation left and right and tilt up and down), the wheel bearing may need to be replaced. But the backlash can also be due to tired silent blocks or ball bearings. To exclude a suspension malfunction, you need a second person who will check whether the wheel wobbles together with the steering knuckle or walks separately from it. If the wheel moves separately from the steering knuckle, then the wheel bearing is definitely faulty (in this case, tightening the wheel nut may briefly save the situation).
A sign of a malfunction may also be extraneous sounds when the wheel rotates (usually a hum, sometimes a grinding sound) or its uneven rotation.
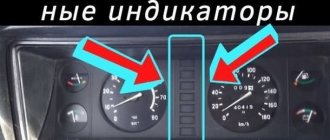
You can also determine a faulty bearing by an excessively heated wheel (for example, if the front right wheel disc is much warmer than the front left one). But you can’t compare the temperature of the rear and front wheels because... They have brakes of different designs.
And so, let’s summarize everything we’ve read. The wheel bearing is replaced if:
- The wheel dangles separately from the steering knuckle.
- A hum and grinding noise is heard when the wheel rotates.
- The wheel does not spin evenly.
- The wheel rim gets very hot.
Replacing the front wheel bearings of a VAZ 2106
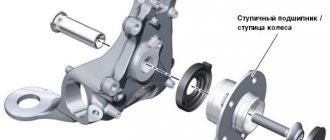
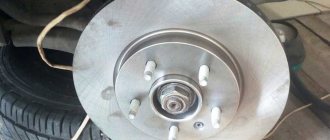
To replace the front wheel bearings on a VAZ 2106, you first need to remove the front wheels and remove the hub with the brake disc from the steering knuckle.
We take out the brake pads and remove the caliper. We hang the caliper in the wheel well so that the brake fluid supply hose is not strained.
Unscrew the hub nut and remove the washer and inner race of the outer bearing. If necessary, if the outer bearing cage is damaged along the way, we do not press out the outer ring of the bearing, but replace only its inner part. However, at the first opportunity we install a completely new bearing
Carefully, trying not to damage the cuff, remove the hub together with the brake disc from the steering knuckle axis
Using a 12mm wrench, unscrew the two guide pins
Remove the brake disc and spacer from the hub. We clean the internal cavity of the VAZ 2106 hub from old lubricant, wash all parts with kerosene and add fresh lubricant
To remove the outer race of the outer bearing, secure the hub in a vice. Using a beard, trying not to damage the hub, we strike along the perimeter of the outer ring of the bearing
We knock it out of the hub
We take out the hub cuff by prying it off with a screwdriver
A spacer bushing is installed under the cuff. We remove the inner bearing from the hub in the same way as the outer one.
We press the outer rings of the bearings in a vice, using the corresponding rings from old bearings. The old rings should be oriented with a smaller cone diameter inside the hub to facilitate their removal after pressing in the new rings.
Using caution, the inner races of the bearings can be pressed in with light hammer blows through the spacer.
We put about 40 g of Litol-24 lubricant in the separator of the internal bearing and the internal cavity of the hub. We cover the new cuff with the same lubricant. Install the inner bearing into the hub. We install the spacer bushing.
Rear axle repair and gearbox replacement
Depending on the cause of the breakdown, the following repair work may be necessary to restore the transmission’s functionality:
- replacing the VAZ 2106 gearbox oil seal;
- replacement and adjustment of the main pair;
- Troubleshooting differential and shank bearings and replacing them if necessary;
- replacement of VAZ 2106 gearbox.
Repair with replacement of bearings and (or) elements of the main gearbox pair is very difficult in technical terms. It requires special knowledge and tools in the process of adjusting the VAZ 2106 gearbox. As a rule, this unit is adjusted either at the factory or in specialized workshops. By watching a video about repairing a VAZ 2106 gearbox, you can see this for yourself. Meanwhile, in order to prevent damage to this transmission element, it is necessary to monitor whether the shank nut is tightened and whether there is any oil leakage from the seals.
How to replace the rear wheel hub bearing. How to remove the rear wheel hub with your own hands? bearing removal and installation
Replacing the VAZ 2106 gearbox oil seal is necessary in case of transmission oil leaking from under it. Simply tightening the nut is not enough. Therefore, before we learn how to adjust the VAZ 2106 gearbox, we will learn how to replace a leaking oil seal. To carry out repair work you will need:
- a set of open-end wrenches and socket heads;
- puller for removing the oil seal;
- Litol-24 lubricant;
- mandrel for installing a new oil seal;
- hex wrench for unscrewing the drain plug;
- hammer;
- container for draining oil;
- transmission oil.
It is best to carry out work on replacing the rear axle gearbox oil seal in the inspection pit.
Replacement is carried out in the following order:
- We unscrew the plug to drain the oil, and, replacing the container, drain it.
- Unscrew the driveshaft from the rear axle gearbox flange.
- Unscrew the flange nut, counting the exact number of turns, and write down the value.
- Remove the flange. It usually comes off easily, but you can easily tap it with a hammer once it's firmly in place.
- If there are shells on the surface of the flange, or wear in the place where the oil seal fits, it must be replaced.
- Using a puller, remove the worn oil seal of the VAZ 2106 rear axle gearbox.
- Lubricate the new oil seal with Litol-24 grease to facilitate its installation.
- Using a mandrel, lightly hammer the oil seal into place.
- We install the flange and tighten the nut exactly the same number of turns that we wrote down.
- We attach the driveshaft to the rear axle.
- Fill the VAZ 2106 gearbox with oil to the level of the filler neck. It is recommended to use gear oil from well-known manufacturers. It would be useful to add a molybdenum additive to it to reduce friction between parts.
After repairs, it is also necessary to check the condition of the breather and, if necessary, clean it. If there is a need to completely replace this unit, then you need to know that the gear ratio of the VAZ 2106 gearbox is 3.9, and the car’s speedometer readings are guaranteed. Read about how to remove a VAZ 2106 gearbox in other articles on our website.