Installation of differential box VAZ-2107
Install the pre-assembled differential case into the crankcase along with the outer bearing races.
Rice. 1. Checking the preload of the differential box bearings using tool A.95688/R
Install two adjusting nuts 4 (Fig. 1) so that they come into contact with the bearing rings. Install the bearing caps and tighten the mounting bolts with a torque wrench.
Preloading the differential box bearings and adjusting the lateral clearance in the meshing of the final drive gears
These operations are performed simultaneously using the device A.95688/R and the key A.55085. Secure the device (Fig. 1) to the gearbox housing with screws 1 and 6, screwing them into the holes for the bolts securing the locking plates of the adjusting nuts.
Rice. 2. Checking the lateral clearance in the meshing of the main gear gears using tool A.95688/R
Move bracket 7 along the guide of the device until lever 5 touches the outer side surface of the cover and tighten screw 8. Loosen screws 1 and 3 (Fig. 2), and install bracket 4 so that indicator leg 2 rests on the side surface of the driven gear tooth at the edge tooth, then tighten screws 1 and 3.
By turning the adjusting nuts, pre-adjust the lateral clearance between the teeth of the drive and driven gears within the range of 0.08–0.13 mm.
The gap is checked using indicator 2 when rocking gear 6. In this case, the bearings should not have preload.
The adjusting nuts must only be in contact with the bearings, otherwise the correct preload measurement will be affected.
Rice. 3. Diagram for checking the preload of the differential box bearings
Tighten the two bearing adjusting nuts sequentially and evenly, causing the differential bearing caps to diverge and, therefore, increasing the distance “D” (Fig. 3).
This discrepancy is noted by indicator 9 (Fig. 1), on the leg of which lever 5 acts. The nuts for adjusting the bearings of the differential box are tightened until the distance “D” (Fig. 3) increases by 0.14–0.18 mm.
Having set the exact preload of the differential box bearings, finally check the lateral clearance in the meshing of the final drive gears, which should not change.
If the gap in the gear mesh is more than 0.08–0.13 mm, then move the driven gear closer to the drive gear or move it away if the gap is smaller.
To maintain the bearing preload set, move the driven gear by tightening one of the bearing adjusting nuts and loosening the other by the same angle.
To accurately perform this operation, monitor indicator 9 (Fig. 1), which shows the value of the previously set bearing preload.
After tightening one of the nuts, the indicator reading will change, as the divergence “D” (Fig. 3) of the covers and the preload of the bearings will increase.
Therefore, loosen the other nut until the indicator arrow returns to its original position. After moving the driven gear, use indicator 2 (Fig. 2) to check the amount of side clearance.
If the gap is not correct, repeat the adjustment.
Remove fixture A.95688/R, install the locking plates of the adjusting nuts and secure them with bolts and spring washers.
Spare parts are supplied with two types of locking plates: with one or two legs; the plates are installed depending on the position of the nut slot.
Adjustment and repair of gearbox components is carried out on a stand, where you can also test the gearbox for noise and check the location and shape of the contact patch on the working surfaces of the teeth, as indicated below.
Checking the contact of the working surface of the final drive gear teeth
For a final check on the stand for the quality of meshing of the main gears:
— install the adjusted gearbox on the stand and lubricate the working surfaces of the driven gear teeth with a thin layer of lead oxide;
— launch the stand; use the levers of the stand to slow down the rotation of the installed axle shafts so that under load, traces of contact with the teeth of the drive gear remain on the surfaces of the teeth of the driven gear;
- change the direction of rotation of the stand and, while braking, get contact marks on the other side of the teeth of the driven gear, which corresponds to the car moving backwards.
Engagement is considered normal if on both sides of the teeth of the driven gear the contact patch is evenly located closer to the narrow end of the tooth, occupying two-thirds of its length and not extending to the top and base of the tooth, as shown in Fig. 4 "e".
Rice. 4. Location of the contact patch in the meshing of the final drive gears
Cases of incorrect divergence of the contact patch on the working surface of the tooth are shown in Fig. 4 (a, b, c, d).
To adjust the correct position of the drive gear and replace the ring, disassembly of the unit is necessary.
When assembling, repeat all the operations for preloading the roller bearings of the drive gear, checking the moment of resistance to rotation, preloading the roller bearings of the differential box and adjusting the lateral clearance of the final drive gears.
Adjustment and installation of the VAZ 2107 gearbox
Before assembling the gearbox, all parts must be thoroughly washed in kerosene. They should be inspected before installation. Gear teeth should not be chipped or scored and have the color of metal, and not be covered with a black coating of oil. Minor scuffs on the satellite axle, journal and axle gear seats can be treated with fine sandpaper. If there are large scuffs or large wear, the parts must be replaced.
The gearbox parts are assembled in the reverse order of disassembly. You can press in the bearing rings using a hammer and a special tool (a socket wrench head will do).
The gaps between the gears of the gearbox are adjusted using an adjusting ring, the thickness of which is selected individually. For selection, you need a caliper and probes of various thicknesses. The flange nut must be tightened with a torque of 18 kgf-m.
Adjusting the VAZ 2107 gearbox
In 90% of cases when contacting a car service center with problems with the rear axle and, in particular, the gearbox of classic Zhiguli cars, the owners are refused. The maximum that most experts can offer is to buy a new VAZ gearbox. There is only one reason for this - basic technical ignorance, because only a few will be able to correctly diagnose and adjust the rear gearbox of a classic. A new gearbox can be bought for 6-7 thousand, it will be a branded factory mechanism, after disassembly the price of the unit will be about 3 thousand, and on hand or on the market a gearbox with traces of long-term use will cost about 2000 rubles.
Only a few can correctly diagnose and adjust the rear gearbox of a VAZ 2106
It’s easier to sell a new one than to adjust or restore an old one, especially since this requires certain knowledge, and it costs the same as a qualified adjustment. Therefore, we decided to theoretically educate the owners of classic Zhiguli cars, so that if something happens, you can confidently remove, adjust, repair and install a full-fledged working unit with your own hands. But first, a few words about the design of the gearbox.
Purpose and principle of operation of the gearbox
The rear gearbox of the “seven” is a transmission link between the axles of the rear wheels and the engine. Its purpose is to transmit torque from the engine crankshaft to the rear wheels while simultaneously converting the rotation speed of the axle shafts.
In addition, the gearbox must be able to distribute torque depending on the load applied to the left or right wheel.
Principle of operation
Here are the main stages of transmitting torque from the motor to the gearbox:
- the driver starts the engine and the crankshaft begins to rotate;
- from the crankshaft, torque is transmitted to the car’s clutch discs, and then goes to the input shaft of the gearbox;
- when the driver selects the desired gear, the torque in the gearbox is transferred to the secondary shaft of the selected gear, and from there to the driveshaft connected to the gearbox with a special crosspiece;
- the cardan is connected to the rear axle gearbox (since the rear axle is located far from the engine, the “seven” cardan is a long rotating pipe with crosses at the ends). Under the action of the cardan, the main gear shaft begins to rotate;
- rotating, the gearbox distributes torque between the axle shafts of the rear wheels, as a result the rear wheels begin to rotate.
Design and technical characteristics of the gearbox
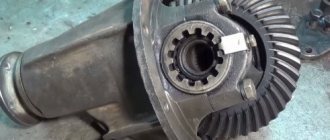
The rear gearbox of the VAZ 2107 car consists of a massive steel casing with a shank, a driveshaft flange, two main gears mounted at right angles to each other and a self-locking differential.
Rear gear ratio
The main characteristic of any gear transmission is its gear ratio. It is the ratio of the number of teeth on the driven gear to the number of teeth on the drive gear. The driven gear of the VAZ 2107 rear gearbox has 43 teeth. And the drive gear has 11 teeth. Dividing 43 by 11 we get 3.9. This is the gear ratio on the VAZ 2107 gearbox.
Hypoid transmission and the magic of VAZ gearbox numbers
Technologically, it is easiest to transfer rotation from one bevel gear to another when they are on the same axis. But in the gearboxes of rear-wheel drive cars, a gear with axles shifted by 31.8 mm is used. This complication of the design is caused by the fact that, along with the transverse slipping of the teeth, the hypoid gear causes the teeth to slip longitudinally.
The photo shows the rear axle gearbox of a VAZ 2106, the cost of which is 6-7 thousand rubles
And this, in turn, gave the following advantages:
- long gear life;
- quiet operation;
- quick grinding of teeth;
- increased ground clearance.
If both main gears are severely worn or damaged, replace them only in pairs. The fact is that in preparation for sending ready-made sets of spare parts, pairs are selected using special precision equipment, taking into account the tolerance, the correction of which is applied to the drive gear shaft. On the driven gear you can read all the necessary information about the gearbox model - gear ratio (on the VAZ 2106 it is 11/43), model 2106, serial number and production date.
In principle, one of four sets of final drive gears can be installed in the gearbox of any Zhiguli model. They differ only in the number of teeth, and this dictates the gear ratio. There is no need to say what importance this parameter has when choosing a gearbox. It affects both the maximum speed of the car and the implementation of engine torque. As garage tuners say, “it either pulls better or goes faster.” In some ways they are right.
However, as we have already mentioned, there are only four options for final drive pairs:
- VAZ 2101 - 43/10 with a gear ratio of 4.3;
- VAZ 2102 - 40/9, the most high-torque gearbox with a gear ratio of 4.44;
- VAZ 2103 - 41/10, this is the most popular medium balanced version of the gear ratio - 4.1;
- VAZ 2106 - 43/11, is the fastest gearbox, especially when paired with a five-speed gearbox, and its number is 3.9.
This set gives classic car owners unlimited possibilities to customize the car's dynamic characteristics. No “tuning” can change the dynamics of a classic as much as a rear axle gearbox.
So, for certain purposes you can buy a specific gearbox, which will change the maximum speed of the car, acceleration dynamics, fuel consumption, and traction force. The most “cargo” gearbox from 2102, pennies in a station wagon. Its maximum speed is low, about 145 km/h, but the car confidently drags quite serious loads and trailers without overloading the engine. The limit needs to be known, but the fact remains a fact. If you need a small tractor in the back of a Zhiguli, there is a 2102 gearbox with a gear ratio of 4.44 and a number of teeth of 40/9. This gearbox has become a rarity, but if you wish, you can find the main pair both new and used. The other extreme is the gearbox of the VAZ 2106. It will give the car a high maximum speed, but it will not take off from a standstill, because the traction force as a result is less than that of a two.
Typical gearbox failures and their causes
The rear gearbox of the VAZ 2107 is a reliable device that is very resistant to mechanical wear. However, over time, parts gradually wear out even in the gearbox. And then the driver begins to hear a characteristic crunch or howl heard in the area of the rear axle or in the area of one of the rear wheels. Here's why this happens:
- one of the wheels jammed because one of the rear axle shafts was deformed. This happens extremely rarely, usually after a strong blow to one of the wheels. In this case, the axle shaft is so deformed that the wheel cannot rotate normally. If the deformation is insignificant, the wheel will rotate, but when rotating, a characteristic howl will be heard coming from behind the damaged wheel. It is not possible to fix such a breakdown on your own . To straighten the axle shaft, the driver will have to contact specialists;
- crunching sound in the gearbox when the car is moving. This is a more common problem that every driver of an old “seven” will face sooner or later. The gearbox begins to crunch after several teeth and splines on the axle shafts wear out in the main gear. If the wear is very severe, the teeth may break. This happens both due to metal fatigue and due to poor lubrication of the gearbox (this is the most likely reason, since the lubricant in the “seven” gearbox often escapes through the breather and through the shank flange, which have never been leak-tight). In any case, such a breakdown cannot be repaired, and gears with broken teeth will have to be replaced;
- bearing wear on the axle shaft. This is another reason for the characteristic grinding noise behind the wheel. If the bearing has collapsed, then you cannot drive such a car, since the wheel may simply fall off while driving. The only solution is to call a tow truck and then replace the worn bearing. You can do this either on your own or at a service center.
Malfunctions of the rear axle of the VAZ 2101 and their symptoms
The complexity of the rear axle design does not in any way affect its performance or service life. If all the parts are selected accurately, the unit systematically undergoes appropriate maintenance, and the car has not been involved in traffic accidents, it may not declare itself at all. But it also happens the other way around. If you do not pay due attention to the bridge and ignore possible signs of its malfunction, problems will definitely appear.
Signs of failure of the “penny” rear axle
The most likely symptoms that your vehicle's axle is faulty are:
- oil leak from the gearbox or axle shafts;
- lack of transmission of torque from the “cardan” to the wheels;
- increased noise level in the lower rear part of the car;
- noticeable vibration when moving;
- uncharacteristic noise (hum, crackling) when accelerating the car, as well as when braking the engine;
- knocking, crackling from the side of the bridge when entering a turn;
- crunch at the beginning of movement.
Failure of the rear axle of VAZ 2101
Let's consider the listed symptoms in the context of possible malfunctions.
Oil leak
Let's start with the simplest thing - lubricant leaks. This is probably the most common problem that owners of “kopecks” face. A timely detected leak does not pose any threat to the unit, however, if the oil level reaches a critical minimum, rapid wear of the main gears, axle shafts and stellites is inevitable.
When oil leaks, gear wear accelerates.
Lubricant from the rear axle of the “penny” may leak from under:
- a breather, which serves as a kind of pressure valve;
- oil filler plugs;
- drain plug;
- shank oil seal;
- gearbox flange gaskets;
- axle seals.
Lack of transmission of torque from the driveshaft to the wheels
Unfortunately, such a malfunction is also not uncommon. Most often it occurs due to low quality parts or manufacturing defects. The breakdown is characterized by the lack of reaction of one or both rear wheels when the “universal shaft” rotates normally. If you have to face such a situation, you can safely prepare to replace the axle shaft. Most likely, it simply burst.
Increased noise level in the bridge area
Strong noise from the bridge while driving may indicate such malfunctions as:
- loosening of the fastening of the wheel rims to the axle shafts;
- wear of axle shaft splines;
- failure of semi-axial bearings.
Vibration
Vibration in the rear of the vehicle while driving can be caused by deformation of the shaft of one or both axle shafts. Similar symptoms also occur due to deformation of the beam.
Noise when accelerating or braking
A hum or crackling sound that occurs when accelerating a car, as well as during engine braking, is usually a sign of:
- insufficient amount of lubrication in the gearbox;
- wear of the mechanism bearings or improper tightening;
- failure of semi-axial bearings;
- exhaustion or incorrect adjustment of the distance between the main gear gears.
Knocking or rattling noise when turning
Extraneous sounds in the area of the rear axle during cornering may occur due to:
- occurrence of chips and scuffs on the surface of the satellite axis;
- wear or damage to satellites;
- increasing the distance between gears due to their wear.
Crunching sound at the start of movement
A crunching sound when starting the car may indicate:
- wear of the satellite axis mounting sockets;
- shank play;
- change in the gap in the connection between the drive gear and the flange.
About gearbox adjustment
If the driver finds out that the main pair of gears in the rear axle is completely worn out, he will have to change this pair. But you won’t be able to simply change the gears, since there are gaps between the gear teeth that will have to be adjusted. Here's how it's done:
- a special adjusting washer is installed under the drive gear (they are sold in sets, and the thickness of such washers varies from 2.5 to 3.7 mm);
- an adjusting sleeve is installed in the gearbox shank (these sleeves are also sold in sets; you can find them in any spare parts store);
- the washer and bushing must be selected so that the shaft on which the drive gear of the gearbox is mounted rotates without play when turned by hand. After the desired bushing has been selected, the nut on the shank is tightened;
How to remove the rear axle gearbox of a VAZ 2107
The car owner can disassemble the gearbox and replace everything necessary in it (or change the entire gearbox) independently, thus saving about 1,500 rubles (about the cost of this service at a car service center). Here's what you'll need to get started:
- a set of socket heads and a long wrench;
- set of open-end wrenches;
- set of spanners;
- puller for rear axle shafts;
- flat blade screwdriver.
Sequence of work
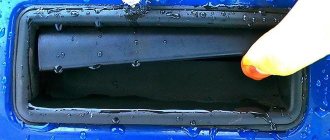
Before starting work, the oil must be drained from the rear gearbox. To do this, just unscrew the plug on the rear axle housing, after placing some container under it.
- The car is installed on the pit. The rear wheels are lifted using jacks and removed. The front wheels must be securely fixed.
- After removing the wheels, unscrew all the nuts on the brake drums and remove their covers. Access to the brake pads is provided.
Video: disassembling the rear axle on a “classic”
“Quiet, the operation is underway!” or Replacing the rear axle gearbox seal on a VAZ 2107
The sequence of work when replacing the gearbox seal is as follows:
- We measure and record the moment of resistance to rotation of the flange (the axle shafts must be removed!).
- Unscrew the flange nut.
- Remove the flange from the shaft splines.
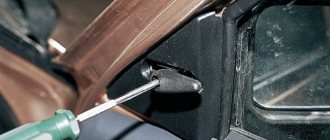
- Using expansion pliers, remove the oil seal. If you don't have pliers, you can pry it off with a screwdriver. Be careful not to damage the surface of the socket.
- We inspect the flange. If its surface has a pronounced groove in the place where the working edge of the oil seal rubbed, then before installing the new oil seal, insert a washer 1 mm thick into the socket. If the flange is damaged on the working surface, replace it with a new one.
- Lubricate the outer surface of the oil seal with lithol and carefully drive it into the crankcase socket using a mandrel of suitable diameter. If there is no mandrel, press in the oil seal by evenly tapping the end along the circumference of the outer diameter. Make sure that there are no distortions - the working edge should be strictly perpendicular to the shaft axis.
- We inspect the lead-in chamfer on the flange. It should not have defects that could damage the working edge. We install the flange, avoiding sudden movements and impacts, so as not to knock the spring off the oil seal. Before installation, you can lubricate the flange chamfer with transmission oil to make the process easier.
- We tighten the nut, periodically checking the moment of resistance to rotation of the flange. Remember that at the end of the tightening the resistance in the bearings increases much more intensely than at the beginning. The moment of resistance to rotation should be 1–2 kgf.cm greater than what we recorded before unscrewing the nut. In any case, if the moment exceeded 9 kgf.cm, and the bearings in the bridge were still old, remove the flange again, take out the inner ring of the bearing and change the spacer sleeve. If the bearings are new (new means they have not traveled a single kilometer, because after a hundred kilometers they can be considered old for adjustment purposes), then the normal moment of resistance to rotation after tightening the nut for them should be in the range of 16–20 kgf. cm. Replacement of the rear bearing affects gear alignment, so please refer to the appropriate instructions for this procedure.
To prevent self-loosening, the flange nut has a special plastic insert, which, when crushed against the thread, creates additional resistance both when screwing and unscrewing. As a rule, such nuts can withstand up to ten unscrewings without losing their locking properties. If in doubt, get a new nut.
We reinstall the axle shafts and brake drums, screw on the driveshaft, and fill in the oil. We make a test drive and if everything is in order, we enjoy life, until we suddenly find a treacherous spot under the bridge again...
Read, it may come in handy: Replacing the elastic coupling, suspension bearing. Features of replacing the joints of the cardan shaft crosspieces
Video: How to carry out work on a VAZ 2107
Disassembling the gearbox and replacing satellites
The satellites are additional gears installed in the differential gearbox. Their purpose is to transmit torque to the axle shafts of the rear wheels. Like any other part, pinion gears are subject to wear. After this, they will have to be changed, since this part cannot be repaired. To restore worn teeth, the car owner has neither the necessary skills nor the necessary equipment. In addition, any gear in a car undergoes a special heat treatment - carburization, which is carried out in a nitrogen atmosphere and strengthens the surface of the teeth to a certain depth, saturating this surface with carbon. An ordinary car enthusiast cannot do anything like this in his garage. Therefore, there is only one solution: purchase a repair kit for the rear axle gearbox. It costs about 1500 rubles. Here's what it includes:
- a pair of gears for axle shafts;
- a pair of satellites for the differential;
- satellite axis;
- support washer.
In addition to the repair kit for gearboxes, you will also need a set of regular open-end wrenches, a screwdriver and a hammer.
Sequence of operations
To disassemble the gearbox, it is best to use a regular bench vice. Then the work will go much faster.
- The gearbox removed from the machine is clamped in a vice in a vertical position.
- A pair of adjusting locking bolts are unscrewed from it, under which the locking plates are located.
So, an ordinary car owner is quite capable of removing the gearbox from the rear axle of the “Seven”, disassembling it and replacing its worn parts. There is nothing complicated about this. Certain difficulties may arise only at the stage of adjusting the new gearbox. But you can also deal with them by carefully reading the above recommendations.
Signs of a malfunction of the rear axle gearbox of the VAZ 2107
The gearbox is a fairly expensive part, and its repair is a labor-intensive and complex process. Therefore, you should first make sure that the cause of the noise is a gearbox malfunction. You can do this as follows:
- Choose a flat section of the road and gradually accelerate on it from 20 to 90 km/h. While driving, you should listen carefully and note the appearance and disappearance of extraneous noise from the rear axle gearbox.
- Release the gas and start braking with the engine. While the speed is decreasing, you should also note the moments when noises appear and disappear.
- Accelerate the car to approximately 100 km/h and, switching to neutral, turn off the engine. While the car is coasting, note the presence and disappearance of noise.
To verify the presence or absence of a mono problem like this:
- Park the car, securing it with wheel chocks.
- Raise it with a jack, hanging the rear axle.
- Start the engine, turn on the speed and add gas so that the wheels rotate without load, and the speedometer shows the same speed as during tests on the move.
If the noise remains the same when operating without load as under load, the problem is not in the gearbox. Other rear-wheel drive components should be checked.
If the gearbox does not make noise without load, you will have to start restoring it. Worn gears begin to make noise only under load.
Removing the rear axle gearbox of VAZ 2107
Before removing the gearbox, it is necessary to drain the transmission oil that is poured into the rear axle of the VAZ 2107. To do this, place an oil container under the drain hole of the axle and unscrew the drain plug.
Important: after repair, new transmission oil should be poured into the gearbox.
The next procedure is as follows:
- Unscrew the bolts securing the cardan to the gearbox flange;
- Uncouple the rear part of the cardan and lower it down;
- jack up the car (if it is not on a lift) and remove the rear wheels;
- Unscrew the guide screws of the brake drums;
- remove the brake drums;
- unscrew the 4 bolts securing the axle shafts;
- pull out the axle shafts, freeing the gearbox;
- unscrew the 8 gearbox mounting bolts;
- remove the gearbox.
Rear axle VAZ 2106
The front suspension and rear axle assembly are called the main elements on which the so-called “wheel drive” of the vehicle rests. If these units are in working order, the machine will function well.
- Rear axle VAZ 2106. Device. Gear ratio
- Replacing the rear axle of a VAZ 2106
- Replacing the beam (stocking) of the VAZ rear axle gearbox. Video
- Adjusting the rear axle VAZ 2106
- Adjusting the VAZ 2106 gearbox. Video
- Changing the oil in the rear axle of a VAZ 2106
- How to change the oil in the rear gearbox of a VAZ. Video
Rear axle VAZ 2106. Device. Gear ratio
The standard structure of the rear axle, which is equipped with the VAZ 2106, consists of a traverse and a gearbox. It is to the first that the latter is attached. It contains the main gear, which has a drive pair of gears, as well as a differential.
Rear axle VAZ 2106. Diagram
Explanation of the VAZ 2106 rear axle diagram:
- Wheel brake drum mounting bolt;
- Guide pin;
- Axle bearing oil deflector;
- Brake drum;
- Cast iron brake drum ring;
- Rear axle wheel cylinder;
- Fitting for bleeding the brake drive;
- Axle bearing;
- Bearing lock ring;
- Rear axle beam flange;
- Axle shaft seal;
- Suspension spring support cup;
- Rear axle beam;
- Upper suspension rod mounting bracket;
- axle guide;
- Differential bearing nut;
- Differential box bearing;
- Differential box bearing cover;
- Breather;
- Differential satellite;
- Main drive driven gear;
- Left axle shaft;
- Axle gear;
- Rear axle gear housing;
- Drive gear adjusting ring;
- Bearing spacer;
- Drive gear bearing;
- Drive gear oil seal;
- Oil seal deflector;
- Flange-fork universal joint;
- Screw;
- Oil deflector;
- Main gear drive gear;
- Axle of satellites;
- Axle gear support washer;
- Differential box;
- Right axle shaft;
- Brackets for fastening suspension parts;
- Axle bearing thrust plate;
- Rear brake shield;
- Rear brake pad;
- Friction lining;
- Axle shaft flange.
Malfunctions of the rear axle gearbox:
- during its operation, loud noises are heard;
- the external temperature regime of the housing increases;
- This part is constantly jamming.
In these cases, it is recommended to completely replace the components and checking the oil fluid level is indispensable. That is, you will need to buy an oil seal, bearings, and an axle shaft. However, you can immediately purchase a used rear axle.
At the same time, despite the strength characteristics of the fastening, it, due to its design features, does not have a complex structure. Therefore, even a driver who has minimal knowledge of locksmithing can handle it.
Video review on how to determine what is buzzing:
In some cases, repair work is carried out. Here, experienced mechanics must take into account one nuance - the gear ratio. Size is also of great importance. The key factor is the cost of repairs.
The gear ratio is the ratio of the number of teeth of the driven gear and the drive gear, one of the main parameters of any transmission.
The gear ratios of the VAZ classics vary and are equal:
- 3.9 — gear ratio in the “six” VAZ 2106;
- 4.1 - in the “troika” VAZ 2103;
- 4.3 - in the “kopeck” VAZ 2101.
Replacing the rear axle of a VAZ 2106
When it is necessary to replace the rear axle of a vehicle such as a VAZ 2106, you will need to acquire special tools for working with this unit. A standard driver kit is provided for this. In this case, you cannot do without a liquid intended for degreasing surfaces. So, experts recommend using white spirit and gasoline.
In order to dismantle the rear axle, you must:
- install the car using a pneumatic lift (repairs can also be performed on an overpass or by driving the vehicle into a deep pit intended for inspection);
- drain the engine fluid into a container and disconnect the universal joint with a part such as the flange mount of the shank;
- dismantle the axle shaft of the humming rear axle, unscrew the fastening element, align the rear axle gearbox with its beam;
- replace the unit, make adjustments if necessary, check the unit for operability;
- clean the structural elements of the unit, degrease the oil seal and bearings, fastening components;
- connect the gearbox to the rear beam of the vehicle and, using the cross technique, tighten the fasteners.
- pour motor fluid into the unit.
Replacing the beam (stocking) of the VAZ rear axle gearbox. Video
Adjusting the rear axle VAZ 2106
Adjustment of this bridge is required in order to eliminate the discrepancy in the clearance of the drive gear axis. To do this, it is necessary to perform partial disassembly of the bridge. As for measurements, it is impossible to do without indicating devices equipped with a scale. It is noteworthy that they provide a division price equivalent to only 0.01 mm.
The unit is tested at the moment when the cardan is removed. To do this, the flange moves along the axis. But the movable console, which is included in the indicator device, is directed to the end part of the flange.
Adjusting the VAZ 2106 gearbox
Installing shims helps eliminate small axle spaces. At the end of the assembly, the accuracy of fastening the rear axle gears is checked. In this case, a special dye is applied. This adjustment is made using a set of special shims.
Adjusting the VAZ 2106 gearbox. Video
Changing the oil in the rear axle of a VAZ 2106
Often, car enthusiasts who own a vehicle such as the VAZ 2106 ask the same question. They are interested in which oil fluid is best suited for the rear axle of their car. At the same time, they ask - what volume is needed and how to change the oil?
There are different opinions. But experts recommend filling the rear axle gearboxes of this machine with transmission oil, which is marked 80W90 . For example, this is Lukoil 80W90 GL. This group of oils also includes TAD-17 80W-90 or the so-called TNK.
When we've sorted out the oil, it's time to answer another question. Perhaps he is one of the most important. Namely, how much oil is required? So, the oil volume is as follows - 1.3 liters. At the same time, it is possible to change the oil in the gearbox. True, in this case you will need 1.4 liters.
As for the interval, it is necessary to change the oil fluid after every 30,000 kilometers of the vehicle. If you convert the mileage into a time frame, you get 3 years of operation.
The oil fluid is replaced in accordance with the established procedure:
- First of all, you need to use a lift or inspection hole. You will also need a key for “seventeen” and a hexagon for “twelve”.
- Next, unscrew the drain plug in the bridge and place a special container designed for draining the oil fluid. At the same time, the filler plug is also unscrewed. This is necessary so that the oil fluid flows out faster.
We unscrew the drain and filler bolts. When the oil fluid is drained from the bridge, the drain plug is screwed in and new oil is poured. Here you need to use the filler hole. You will also need a special syringe or other suitable tool.
Fill with a watering can
Repair and adjustment of the VAZ 2107 gearbox
Adjusting and repairing the gearbox requires some skills and careful adherence to technology. It is also necessary to have pullers, stands and special tools. If the above is not the case, you should entrust the work to professionals.
If your qualifications are insufficient, it is better not to start working with the gearbox. Assembly and adjustment work requires fairly high metalworking skills. It is not difficult to disassemble the VAZ 2107 axle, but this is one of the few components of the “Seven” that requires highly qualified maintenance. It is not worth saving on these works.
Disassembling the gearbox is performed in the following sequence:
- unscrew the shank nut;
- remove the flange and remove the drive gear and adjusting rings;
- remove the oil seal, oil deflector, inner ring of the bearing;
- press out the outer rings of the bearings with a puller;
- disassemble the drive gear with the differential (the spacer sleeve in this case must be replaced).
When disassembling the gearbox, it is necessary to put marks on the bearing caps in order to then install them in their original position. To do this, you can use a core (which is more reliable) or a pencil. Marks must be placed on the covers and on the body, so that later during assembly they can be aligned. You should also mark the left and right covers so as not to confuse them.
This can be done this way: on the covers, in addition to the marks opposite the marks on the body, apply numbers or letters with a pencil. The disadvantage of this method is that the marks will be erased when you clean the lid. Therefore, it is safer to simply make marks with a core. For example, one on the left cover and two on the right.
The inner rings with the separator are removed using a hammer and drift. You need to knock out the rings by lightly tapping them in different places. If you hit only one place, you won’t be able to pull out the ring.
Typically repairs consist of replacing bearings or the main pair. These parts most often fail.
The main pair is available in several variations and determines the gear ratio. The higher the gear ratio, the greater the traction; the lower, the higher the maximum speed of the machine. There are three standard versions of the main pair, used on different VAZ models.
Adjusting the VAZ 2106 gearbox
Rear axle gearbox VAZ 2106
The VAZ gearbox can be of various types depending on the components. The main gears have an unusual shape, and the teeth are at a variety of angles. This is explained by the fact that a hypoid type transmission is used. Its main advantage is low noise level, jerk-free operation and reduced load on each tooth. Thus, the entire mechanism can be operated for a long time and, as experience shows, quite reliably. The same gearbox is installed on many other models of domestic cars.
Replacement
After all the preparatory steps have been completed, you can proceed directly to removing the gearbox. To do this, disconnect the cardan from the shank by unscrewing the 4 fastening nuts:
And lightly hit the cardan with a hammer. The result is the following picture:
After that, using a spanner wrench, we tear off the bolts securing the gearbox to the rear axle housing of the VAZ 2106, and then you can use a socket and ratchet to unscrew all the bolts completely (there are 8 of them in total):
When the last bolt remains to be unscrewed, you need to hold the gearbox so that it does not fall:
And having unscrewed it, carefully remove the gearbox from the bridge housing, as shown in the photo below:
If necessary, the gearbox is repaired or completely replaced, after which everything is put back in place in the reverse order. It is worth noting that it is better to install a new gasket at the joint, since it is not intended for reuse.
Replacing the hand brake follow the link.
How to adjust
This operation is performed after each disassembly and repair of this part. But not always. You can determine whether the gearbox needs adjustment by the presence of axial play in the drive gears. This is done using an indicator with a division value of 0.01 millimeters. Checking for play is carried out with the propeller shaft disconnected by moving the flange in the axial direction.
The indicator leg is installed in the end part of the flange. By adjusting the tension, the axial play in the bearings is removed. A similar adjustment can be made by selecting the thickness of the adjusting rings. How can the rear axle (gearbox) be changed on a VAZ 2106?
Before final assembly of the gearbox, the meshing of the gears should also be checked. In order to do this, you need to paint the teeth of the device with some bright paint. It is not recommended to use something that is too liquid for this work, since its properties are not suitable (it will simply spread over the teeth). But you shouldn’t give preference to a thick one either - it won’t be squeezed out of the spaces between the elements (that is, there will be no result from it). After applying the paint, you need to rotate the drive gear in different directions. In this case, it is necessary to stop the revolutions when it hits the driven one. This must be done until there is a clear contact mark on the teeth. This is how we determine the correctness of the adjustment.
If during the work you need to move the driven gear, you can do this by changing the thickness of the shim set. The latter are installed between the end of the gear and the inner ring of the rear bearing.
Malfunctions of the rear axle of VAZ 2101, 2102, 2103, 2104, 2105, 2106, 2107 cars
Increased noise from the rear wheels
— The wheel mounting bolts are loose
The bolts need to be tightened.
— Wear or destruction of the axle bearing
The axle bearing needs to be replaced.
Constant increased noise from the rear axle
— The rear axle beam is deformed
Replace the rear axle stockings or the entire axle.
We replace bent axle shafts with new ones.
— Wear of splines on axle shafts
— The rear axle gearbox is incorrectly adjusted, its gears or bearings are damaged or worn
The gearbox needs to be repaired or replaced.
— Not enough oil in the rear axle
Bring the level to normal, eliminate leakage.
Noise when accelerating a car
— Shock absorbers are faulty
Check and replace shock absorbers.
— Incorrectly adjusted gearing of the main gears after gearbox repair
Adjust the engagement by selecting the drive gear adjusting ring.
— Damaged axle bearing
— Not enough oil in the rear axle
Bring the level up to normal.
Noise when the car engine brakes
— Incorrect lateral clearance in the mesh between the final drive gears
Disassemble the gearbox and set the gap to 0.08 - 0.13 mm.
— Increased clearance in the drive gear bearings due to loosening of the flange nut or wear of the bearings
It is necessary to check the technical condition and moment of resistance to rotation of the drive gear.
Noise when accelerating and braking the car engine
— Wear or destruction of drive gear bearings
They need to be replaced.
— There is no lateral clearance between the teeth of the main gear gears
Disassemble the gearbox and set the gap between the teeth to 0.08 - 0.13 mm.
Noise when cornering
— Tight rotation of the satellites on the axis
Disassemble the differential, replace damaged and deformed parts.
— Seizures on the working surface of the satellites
Small scuffs can be eliminated by sanding or replacing the satellite axis.
— Jamming of the axle gears in the differential box
It is necessary to check the condition of the gears and mating surfaces in the differential box. In case of minor damage, clean the surfaces with emery cloth or replace the damaged parts with new ones.
— Incorrect adjustment of differential gears
By selecting adjusting washers, set the axial clearance within 0 - 0.10 mm.
Knock when starting to move the car
— Increased clearance in the spline connection of the drive gear shaft with the flange
— Wear of the hole for the pinion axle in the differential box
Replace the differential box.
— The tightening of the rear suspension tie rod bolts is loose
The bolts need to be tightened.
Oil leak from rear axle
— Worn or damaged drive gear oil seal
— Wear of axle shaft seals
It is necessary to check the runout of the axle shafts, the deflection of the beam, and replace the oil seal.
— The gearbox housing bolts are loose, its sealing gaskets are damaged
Tighten the bolts and replace the gaskets.
Notes and additions
Rear axle gearbox parts for VAZ 2101, 2102, 2103, 2104, 2105, 2106, 2107 cars
1. Drive gear flange. 2. Flat washer. 3. Nut securing the drive gear flange. 4. Oil seal. 5. Oil deflector. 6. Front bearing. 7. Spacer sleeve. 8. Gear housing. 9. Bolt securing the gearbox to the rear axle beam. 10. Gasket. 11. Spring washer. 12. Cover fastening bolt. 13. Rear bearing. 14. Drive gear adjusting ring. 15. Axle gear support washer. 16. Axle gear. 17. Satellite. 18. Satellite axis. 19. Driven gear. 20. Differential box. 21. Drive gear. 22. Differential box bearing. 23. Adjusting nut. 24. Bolt securing the locking plate. 25. Locking plate. 26. Locking plate. 27. Bolt securing the driven gear to the differential box.
More articles on “classic” VAZ cars
Adjusting the VAZ 2106 gearbox
download photo to your mobile phone Contents: - Operation, maintenance and repair manual for the VAZ 2106 car
Possible malfunctions of the rear axle on a VAZ 2106 car, their causes and solutions
The axle shafts are deformed and have unacceptable runout
Wear of the spline connection with the semi-axial gears
Incorrect adjustment, damage or wear of gears or gearbox bearings
Straighten the axle shafts. If the axle shafts are significantly damaged, replace them with new ones.
Replace worn or damaged parts
Determine the malfunction and repair the gearbox
The meshing of the teeth of the main gear gears was incorrectly adjusted when repairing the gearbox
Damage to axle bearings
Seizures on the working surface of the satellite axis
Jamming of axle gears in the differential box
Incorrect clearance between differential gear teeth
Clean up minor roughness with fine sandpaper; if it is impossible to eliminate the defect, replace the satellite axis
If there is minor damage to the gears and mating surfaces in the differential box, clean them with emery cloth and replace the damaged parts with new ones
Increased clearance in the meshing of the final drive gears
Wear of the hole for the pinion axle in the differential box
Replace differential box
Wear of the axle shaft seal, determined by oiling of the brake shields, drums and pads
Check the runout of the axle shaft, the deflection of the beam, straighten or replace damaged parts. Replace the oil seal
About replacing the rear axle gearbox of a VAZ 2107
Extraneous noises that arise under the bottom while driving signal the occurrence of troubles with the gearbox “adjacent” to the rear axle. Even timely replacement of lubricant in the axle does not affect the failure of its parts, so replacing the rear axle gearbox of the VAZ 2107 is inevitable. In order to verify whether the “diagnosis” is correct, it is necessary to dismantle the gearbox, disassemble it, if necessary, carry out repair work, reassemble it, reinstall it and configure it. But here's the question...
Adjusting the gas reducer on a VAZ 2101
A gas reducer is a device that reduces the gas pressure at the outlet of the cylinder and keeps the operating pressure constant. Today we will tell you how to adjust the gas reducer on a VAZ 2101 car yourself.
The gearbox is also connected to the car’s cooling system: it prevents the membranes from freezing. In order for it to work without interruption, you need to wait until the engine warms up to 30-50 degrees and only then start the gearbox.
Components
The gas reducer on a car consists of 4 main parts:
— Separate chamber (there can be several chambers, from 1 to 3); — Idle channel; — Evaporator; — A system that regulates the supply of gas from a cylinder.
Varieties
There are 2 types of gearboxes:
— Vacuum (start-up occurs when the fuel type switch is set to “gas”, at the same time the car’s ignition is turned on and there are impulses from the ignition system); — And electronic (start-up occurs provided that the fuel type switch is in the “gas” position. Along with this, the ignition is on, pulses from the ignition system are sent and the gas vacuum inside the intake manifold is checked).
Adjustment
The gas reducer on a car needs adjustment, which you can do yourself. Let's take an example of adjusting the DISEL2101 gearbox:
— First you need to start the engine and warm it up to operating temperature (30-50C).
— Idle speed should be at 950-1000 rpm. — Turn off the supply, run out of gasoline. This should be the position of the adjustments:
- Maximum position of the dispenser of the first chamber, minimum - the second; — Middle position of the sensitivity screw; — The idle speed screw must be tightened all the way, then unscrewed 5 turns.
The following actions must be taken:
Set idle speed
— Using a choke, you need to set the speed at 1700-2000 rpm. — Gradually removing the choke and rotating the idle screw, find the maximum number of revolutions. — In several stages, achieve engine idling without choke. — Next, reduce the idle speed screw to 950-1000 rpm.
Adjust the sensitivity of the gas reducer
— Gradually unscrew the sensitivity screw until it affects the engine speed during idle. — Next, tighten the screw 0.75-1.25 turns back. — Try to press the gas pedal sharply, the car should respond well.
Set up dispenser
— When the engine is running, set the rpm speed to 3000-3500. - If it is difficult to do it yourself, use the help of an assistant, but under no circumstances use suction to achieve this speed. — Turn the metering screw to a position where it will affect the speed. — Unscrew the screw 0.5-0.75 turns from the found point, place the second one at 25-30% of the first.
Final adjustment
— Press sharply on the gas actuator. — After this, turn out the sensitivity screw 0.25 turns until you feel a dip in the speed gain. — Next, unscrew the sensitivity screw 0.5 turns.
It is better to check the last action not by ear, but by the movement of the car at idle. If the car starts well, then everything is correct.
We finish the setup by re-adjusting the dispenser. We advise you to read our previous article about replacing the instrument panel of a VAZ 2105 with a panel of a VAZ 2101 with your own hands.
Where is the gearbox located?
On the "sevens", as on all representatives of the rear-wheel drive family, the gearbox is located at the rear, under the bottom of the car. It connects the cardan to the VAZ 2107 axle and causes the wheels of the car to rotate. Rotation occurs thanks to axle shafts engaged in the gearbox, which, due to the technical features of the rear axle of the VAZ 2107, will have to be removed later. If the car is lifted, or when viewed from a garage pit, the gearbox is simply impossible not to notice.
Signs and malfunctions of the classic rear axle gearbox
Replacing a gearbox with your own hands is a labor-intensive process, which includes not only the purchase of a new unit (quite expensive), but also time costs. Therefore, before you start, you need to make sure that the gearbox is faulty. You can define the signs like this:
- gradually accelerating the car, listen carefully and remember at what moment the noise appears;
- while driving, start engine braking (remove your foot from the gas pedal at speed), at this time listen to the gearbox and note the moment the noise appears;
- accelerate the "seven" to hundreds, switch to neutral and turn off the engine - listen to how the gearbox behaves while coasting.
“If the bridge is noisy both in neutral and at speeds, the gearbox has nothing to do with it. If the hum occurs only at speed (regardless of the number), repairs, or, as a last resort, replacement of the gearbox are inevitable.”
When the signs are identified, it is necessary to carry out another check:
- park the car, secure the front wheels with shoes;
- jack up the rear so that the bridge hangs over (it is necessary that the wheels come off the surface);
- start the engine and accelerate the “seven” to the point at which noise occurs, while the wheels should spin without load.
If the noise has not changed, then the gearbox is clearly in good working order and it is not the cause of the trouble. Here other drive units are checked. Well, if there is no noise when driving without a load, then we are talking about worn gears of the gearbox, which make noise only when driving with a load.
The “seven” gearbox itself is a fairly reliable unit that can withstand a period of 100 to 300 thousand mileage, and there is no need to even look into it. Gears, gear spacer, differential adjustment - all these problems arise during improper operation:
- the use of oil with a low viscosity level, as well as failure to comply with the terms of its replacement;
- operating the “seven” with an amount of oil insufficient for this;
- During movement, the bridge is subject to extreme loads (frequent and unsuccessful slips).
Gearbox removal process
In order to repair or replace the rear axle gearbox of a VAZ 2107, you first need to remove it from the car:
- Drain the oil. This, by the way, may be a reason to replace it.
- Separate the flanges of the cardan and gearbox. To do this, you need to unscrew four bolts and nuts. At this time, it is necessary to fix and immobilize the cardan with a screwdriver or by holding the brake pedal. After unscrewing the nuts, you need to tie the cardan to the muffler. You can simply hang it, but this can also lead to negative consequences for the cardan.
- Remove the axle shafts, because without this the gearbox cannot be removed. At the same time, you can inspect the seals, and if they are worn out, replace them. This will save time and prevent possible malfunctions.
- Separate the beam and gearbox by unscrewing all eight bolts that secure it. When unscrewing the latter, it is necessary to hold the gearbox so that it does not fall. The bolts are unscrewed - carefully remove the gearbox.
Signs and malfunctions of the classic rear axle gearbox
Replacing a gearbox with your own hands is a labor-intensive process, which includes not only the purchase of a new unit (quite expensive), but also time costs. Therefore, before you start, you need to make sure that the gearbox is faulty. You can define the signs like this:
- gradually accelerating the car, listen carefully and remember at what moment the noise appears;
- while driving, start engine braking (remove your foot from the gas pedal at speed), at this time listen to the gearbox and note the moment the noise appears;
- accelerate the "seven" to hundreds, switch to neutral and turn off the engine - listen to how the gearbox behaves while coasting.
Rear axle gearbox design of a VAZ-2107
If the axle is noisy both in neutral and at speed, the gearbox has nothing to do with it. If the hum occurs only at speed (regardless of the number), repairs, or, as a last resort, replacement of the gearbox are inevitable.
When the signs are identified, it is necessary to carry out another check:
- park the car, secure the front wheels with shoes;
- jack up the rear so that the bridge hangs over (it is necessary that the wheels come off the surface);
- start the engine and accelerate the “seven” to the point at which noise occurs, while the wheels should spin without load.
If the noise has not changed, then the gearbox is clearly in good working order and it is not the cause of the trouble. Here other drive units are checked. Well, if there is no noise when driving without a load, then we are talking about worn gears of the gearbox, which make noise only when driving with a load.
The “seven” gearbox itself is a fairly reliable unit that can withstand a period of 100 to 300 thousand mileage, and there is no need to even look into it. Gears, gear spacer, differential adjustment - all these problems arise during improper operation:
- the use of oil with a low viscosity level, as well as failure to comply with the terms of its replacement;
- operating the “seven” with an amount of oil insufficient for this;
- During movement, the bridge is subject to extreme loads (frequent and unsuccessful slips).