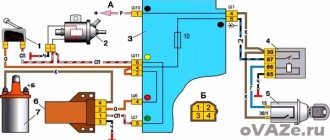
Composition of a seat heating kit and how to install heaters on Granta with your own hands
Preparation for installation of heating elements
Before connecting the heated seats on the Grant, you need to secure the heaters under the upholstery of the seats. Of course, it is more convenient to do this on dismantled “seats”, previously disassembled into two parts: the back and the support. Creating acceptable conditions for installing heating elements is the goal of the preparatory stage. By the way, when determining the reasons for the knocking of hydraulic compensators, there is a slightly different logic.
Preliminary activities are carried out according to the following scenario:
- Disconnect the power supply to the seat belt sensor located under the seat. In many trim levels, this option is available only to the driver.
- Using an E10 head mounted on the knob, unscrew the four bolts connecting the base of the seat frame to the body and remove the seat. For ease of access to fastening elements, move the seat to the farthest or closest position. Similarly, remove and pull out the second front “seat” from the passenger compartment.
- Remove the backrest angle adjustment knob by prying it off with two flat-head screwdrivers.
- At the junction of the backrest and seat, remove the plastic covers on the left and right sides by unscrewing one screw each.
- Unscrew 2 bolts on each side securing the backrest frame to the metal base.
- Detach the backrest from the seat.
- Repeat steps 3-6 for the second chair.
Factory covers are attached to the frame with four clips. On the reverse side, the fixing elements are clamped with wires. Having untwisted the latter, we tighten the fabric. Before removing the backrest cover, disconnect the plastic lock at the bottom of the structure. When assembling, it is advisable to replace the wire with plastic clamps.
Installation of heaters
The purpose of preliminary positioning is to achieve such an arrangement of the heaters that the wires exit into the joint of the backrest and seat. You won't be able to play with the longitudinal base - the standard kit is designed strictly according to the dimensions of the depressions. After removing the protective tape, glue the element to the frame. If necessary, the foam is trimmed to allow the wire to exit unnoticed.
Dismantling works
To install heating elements, you first need to carry out a dismantling procedure. It includes the following activities.
- Unscrew the plastic fasteners that connect the seats to the body of your car.
- Remove the skids. Two pieces are located in front, and two more are located in the back.
- Remove the chairs from the interior, otherwise it will be extremely uncomfortable to work.
- Separate the back from the chair. To do this, there are bolts on the sides, which can be removed with a 10 mm wrench.
- On the back there is a plug for the headrests, which can be removed.
- The upholstery is removed from the hooks below. To do this, the hooks are slightly unbent.
- Now you can completely remove all the trim.
- Carry out a similar procedure with the second seat if you plan to install heating on it too.
While you are installing the heating, throw the upholstery into the washing machine. This will not harm her, and the interior will look newer and nicer.
Power supply or how to connect the heated front seats on the Lada Granta correctly
The cost of installation work at an unofficial service station is at least 2,500 rubles. For this money, already purchased heating elements will be installed in the car seat and the circuit will be connected according to the manual. All that remains is to make an anti-freeze product according to a home recipe and hit the road. This is for the quick ones. Painful owners will probably not like the electrical part of the integration.
Disadvantages of the standard kit
The instructions indicate how to install heated seats on the Grant and connect it to the on-board network. According to what is written, the electrics connect and function like this:
- The permanent plus is taken from the hazard warning button.
- The ground is connected to the bracket for fastening the standard wires of the negative pole.
- The standard fuse is replaced with a more powerful one.
- The heating is turned on/off using the buttons directly.
Only one function is correctly implemented - turning off the heating when the ignition is turned off. Otherwise, the connection scheme is not entirely successful:
- The positive wire that goes to the emergency light is thin and will probably work at the limit.
- The contact group of buttons operates in a dangerous mode, since it is not intended for power loads.
For your information. The kit offers simplified buttons for installation - they do not have a power indicator in the form of a yellow lamp (as on the rear window heating control).
Competent connection diagram
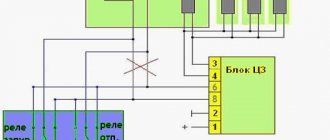
An unfortunate result of the standard connection algorithm is a melted fuse. Such a reaction indicates that the circuit is operating at its limit. An alternative scheme for connecting heated seats will help to avoid this. It involves the use of two four-pin relays and powering them from switch K4, which supplies the output “+” after turning on the ignition.
Additional items
It is advisable to carry out installation work after purchasing an additional mounting block of reduced size. You will also need regular contacts for connecting two relays and two Lyra contact elements linking a 10A fuse. We also add additional wires with a cross-section of 4 and 1.5 mm2 to the shopping list.
Search "+"
So, in order to connect the heated front seats on the Grant, you need to find out the number of the output plus of relay K4, which appears after turning on the ignition. This can be either the 87th or the 30th contact.
Usually this is contact element No. 30, but it doesn’t hurt to make sure once again. We remove the relay and diagnose. The test is carried out by connecting a 12V lamp to the 30th contact of the mounting block and ground. After activating the ignition, the lamp should light up.
Summary
The technology for installing heated front seats on the Lada Granta consists of two stages: installing heating elements under the factory seat covers and connecting them to the on-board electrical network. The proposed electrical circuit organization scheme raises doubts.
The manufacturer of the branded kit suggests connecting the heaters directly to the buttons, and powering them from the alarm control button. Since the circuit is quite loaded, it is better to organize the heating power through two relays with a separate fuse. It is also advisable to replace the buttons - they do not indicate the operating mode.
Connection diagram for heated seats Lada Granta
In the first part
In this article, I described the introduction of a set of heating elements from the Alamara into the Granta seats. In the second part I will try to describe how we can connect them to the car’s on-board network. Let's figure out the connection together. Many connect heating through one or two relays. I had a small diagram included with the wiring harness for connecting the heating. There were no relays marked on it, just as there were no relays in the wiring itself. And the power was taken from the alarm connector. It was also indicated there that it is necessary to replace the original 5 A fuse of this circuit with a more powerful one - 10 A. Let's check if such a connection is safe: After installing the heaters in the chairs, I connected them to a powerful 12 V power supply to check their functionality . At the same time, I decided to understand the connection in more detail and make sure that this circuit is reliable and correct. I connected an ammeter to the circuit and measured the amperage under load. You can see the results in the photo:
Installation of heated seats on Lada Granta. 3 hours for everything about everything
The price of the issue is “0” rubles or installing heated seats on the Lada Granta.
The topic that was brought up for consideration is quite relevant, since such a function is very useful for human health. As a rule, it is installed on cars of intermediate level and above. Budget versions only dream of this, the domestic auto industry doesn’t even install this, but what to do if you want it and it’s cold in winter? 12-volt battery charge.
. Absolutely harmless to the human body and environmentally friendly. If not a manufacturing defect, then the service life is very long. It is possible, even recommended, to install it yourself. But how to do this, read below.
Installation algorithm
- Installing heated seats on a Lada Granta may take you at least 3 hours
, so calculate your schedule. Especially when the weather is frosty outside. - We drive the car into the garage, if in the summer, then it can be on any flat and clean surface;
- We turn off the engine, squeeze the handbrake, put it in gear or wedge the wheels with shoes;
- We are interested in the central part of the dashboard, called the beard, and the front driver's seat. By analogy, you can install it on all the others or leave it on one;
We took it off, and in front of us is a picture of a tunnel niche. On the sides at the front it is secured with two screws on each side and one at the back. Unscrew them using a screwdriver. Please note right away that the rear screws cannot be unscrewed without lifting the handbrake handle and removing the pressure sensor and casing. Otherwise, you won't be able to access it with a screwdriver.
Let's move on to the seat
. Place it on a clean and flat surface. Use pliers to remove the fasteners from the bottom. We do this carefully, as everything is fragile and delicate. Remove the top part of the casing.
We unpack our heater and check its integrity. On the bottom of the seat you will see a pre-installation in the form of a through hole, and stretch the wires from the pad there. And secure the heater itself to the foam rubber using double-sided tape, which is installed there by default, so that it does not fidget.
After checking the tightness of the fit and the exit of the wires from the hole, we cover the foam rubber with sheathing and fasten the brackets back
. If their further installation is not possible, you can use ordinary wire as a replacement, if it is not important to you.
We're done with the seat, let's return to the interior of our car. We run wiring under the rugs. We connect the ground to the handbrake sensor on the body, and plus the developers clearly indicate the “emergency light”. I don’t know why I went there, they probably know better.
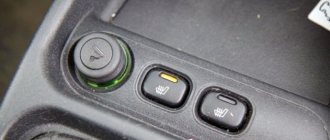
The keys themselves (depending on the configuration) are located in the backstage area and have a greenish LED backlight. If the circuit is correct they will light up.
After the electric hoses are laid, we install the seat itself and connect the chips. We test the heating; it should be felt in four squares at once, evenly over the entire area.
We put everything back together in reverse order.
This completes the installation of heated seats on the Lada Granta. Enjoy the warmth while the thermometer outside the window shows minus. Good luck to you.
Instructions for installing heated seats on a grant.
For installation, we purchase heated seats from Viburnum or grants. For ease of operation and reliable fastening of the heating elements, we recommend removing the seats from the car, although it is possible to install heating on the seats without removing the seats themselves.
| Unscrew the plastic covers on the left. | |
| and right side of the seat | |
| Unscrew the bolts securing the backrest to the seat | |
| Separating the back from the seat | |
| At the bottom of the seat back we separate the upholstery material. | |
| . fold back the covering material for good access | |
| We install the heating on the back of the seat. | |
| . and on the seat itself | |
We cover the covering material back, carefully so that there are no folds anywhere.
We connect the black connectors of the backrest and seat heating together.
. and heated seats turned on (orange indicator for heating on).
We use and enjoy the warm seat in the winter season!
In the first part
In this article, I described the introduction of a set of heating elements from the Alamara into the Granta seats. In the second part I will try to describe how we can connect them to the car’s on-board network. Let's figure out the connection together. Many connect heating through one or two relays. I had a small diagram included with the wiring harness for connecting the heating. There were no relays marked on it, just as there were no relays in the wiring itself. And the power was taken from the alarm connector. It was also indicated there that it is necessary to replace the original 5 A fuse of this circuit with a more powerful one - 10 A. Let's check if such a connection is safe: After installing the heaters in the chairs, I connected them to a powerful 12 V power supply to check their functionality . At the same time, I decided to understand the connection in more detail and make sure that this circuit is reliable and correct. I connected an ammeter to the circuit and measured the amperage under load. You can see the results in the photo:
As you can see above, with a heating power supply load for one seat, the current consumption is in the range of 2.4-2.5 A. We look at the maximum load current of our heating button - it is equal to 5A (Stamped on the button itself). That is, the current reserve for our button is quite large. The conclusion that follows is that the buttons can be freely used without a relay.
Next, you need to find out the total amperage of heating consumption on two chairs. Turn it on and measure it.
We see that the amperage did not go beyond 5 A. It follows that the recommendation in the wiring diagram is correct. That is, you can take the plus (with the ignition on) from the alarm connector and increase the fuse rating of this circuit by 5A. But I decided not to pull the wires so far, and took the plus from the connector for adjusting the heater blowing speed. There is a wire with a thicker cross-section than on the emergency gang, and there is no need to pull it through the entire panel.
Now after the theoretical part, let's get down to business:
It is most convenient to connect the wiring with the seats removed. First of all, we need to remove the plastic floor tunnel. It is secured with five self-tapping screws. To begin, unscrew two screws on the right and left of the tunnel. Their location can be seen from the photographs:
How to save money or install heated seats on Grant yourself. This topic can be considered very relevant, because it is directly related to human health. Installation of heating is usually carried out on vehicles of medium and higher classes. As for budget versions, their owners can only dream about this. But what to do when it’s very cold outside? Is there really no way out? Eat!
Installation of heated seats on the Grant is carried out directly under the seat trim. It is powered by a battery. It does not cause any harm to human health, which is undoubtedly encouraging. If no defects were made during the assembly of the device at the factory, then the service life will be very impressive. It is recommended to carry out installation yourself. But how to do this? Everything will be described below.
The installation sequence will be as follows:
- You will only need a few hours of free time, maybe more. In any case, it is better to do this on a weekend so as not to rush.
- The vehicle is driven into the garage. If the weather outside is favorable, you can do everything on smooth asphalt, in the open air.
- The power unit is turned off, the handbrake is released, first gear is engaged, and stops are placed under the wheels.
- The center of attention is the part of the torpedo located in the middle. It is called “beard”. And of course, work will be carried out directly on the driver’s seat.
Using a “ten” wrench, the six bolts holding the seat are unscrewed.
Carefully remove it and put it aside so that it does not interfere during the work process. Next, you need to dismantle the above-mentioned “beard”. First, remove the caps from the heating and air switches. Proceed with extreme caution, because the plastic may burst if it receives too much load. Now the tunnel niches will appear before your eyes. They are attached using self-tapping screws located on each side. You can unscrew them using a screwdriver. You should immediately keep in mind that it is impossible to unscrew the rear screws unless you first lift the handbrake and remove the pressure sensor. Otherwise, it will not be possible to crawl up with a screwdriver. Remove the tunnel with extreme caution, then remove the boot from the wings, which is secured from the inside using simple clamps. Using a knife, cut the clamp made of plastic with which the wires are connected. This will make it possible to move the tunnel. It is noteworthy that there is no need to put the wires back into a bundle right away; you can leave them in this state for a while. Now you can proceed directly to work related to the seat. In fact, this is a continuation of what was written earlier. But above, more attention was paid to the “beard”.
- The seat is placed on a flat, and most importantly, clean surface. There are locking devices on the bottom. They need to be removed. Do this carefully. Next, the upper part of the casing is removed.
- The heater is removed from the packaging. Check it for external damage. There will be a noticeable through hole at the bottom of the seat. The wires coming from the cover should be pulled into it. To prevent the heater from dangling, it should be fixed on foam rubber. For this you can use the most ordinary tape.
- After making sure that the structure is securely fastened, pull out the wires from the other side of the hole. The foam rubber is covered with sheathing. The staples are put in place. It will probably not be possible to install them in place. In this case, you should use a simple wire or purchase new clamps.
- Actually, this completes all the work on the seat. It needs to be installed in the car interior. Wiring is laid under the mat. The ground is connected to the handbrake sensor, to the housing, and the positive terminal is usually connected to the emergency light.
As for the control buttons, as a rule, they are located in close proximity to the scenes. Most often they have a green backlight. If the circuit is assembled correctly, it should light up.
After the wiring work has come to its logical conclusion, the seat is placed in its original place and the chips are connected. Heating should be tested immediately. It should be felt at four points in the seat at once. It is easy to guess that the assembly work must be performed in reverse order.
That's all! The main thing is to make sure in advance that the device is working. The installation of heated seats on the Grant has come to an end. The driver can only enjoy the warmth at the moment when the street gets really cold.
Article rating:
Lada Granta seat heating buttonLink to main publication
Related publications
- VAZ injection time correction factor
Heated seats, two connection options
Not all Granta trim levels have heated seats. In Russia, this element is extremely necessary, because getting into a cold car is quite unpleasant and is fraught with health problems. When buying, you don’t always worry about the little things and want to buy a car at a lower price. But then people like to add the missing functions themselves. Now we’ll look at how you can make seat heating without the help of specialists, with your own hands.
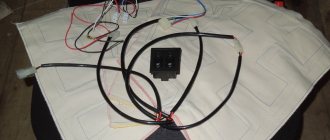
First, we will need to buy a heating pad, a Kalinovskaya one or one from Granta will do. The price for the original heating is 1100 rubles. In the kit you will find:
- wires, fuses, buttons
- warmers themselves for two chairs
- connection diagram
All this stuff looks like this:
If you wish, you can first remove the chairs. This will be more convenient, but leaving them in place will allow you to install the structural elements.
The installation process begins with unscrewing the plastic covers on both sides.
They need to be removed to gain access to the bolts connecting the chair and the backrest.
We unscrew these bolts and separate the seat.
Next, remove the seat covering material and fold it up. We do the same with the back.
We take our heating pads from the kit and slip them under the material.
Carefully place the casing in place, making sure there are no folds. After assembling the seat, you need to connect the black wires from the two heaters, and connect the white one to the power supply.
The power supply is located under the shift lever housing. Having unfastened it, we pass our wires from the right and left seats through the central channel. Don't forget to install the fuse, it is included in the kit.
Having completed all the steps, all that remains is to display the on and off buttons on the panel with cup holders.
The process of installing heating on Granta Liftback can be significantly simplified by using universal heating capes. In this case, there is no need to disassemble the floor of the car. You just need to throw them on the seat and plug them into the cigarette lighter socket.
What is needed for this?
The first thing you need to figure out is what elements, materials and tools will be useful to you during the heating installation process.
| Element | Explanation |
| Heating elements | They are required for backs and seats. Experts recommend choosing the standard ones provided for the VAZ 2110. They are sold in sets for two seats. Their cost ranges from 1000 to 1400 rubles. The kit also includes wiring and buttons to turn the heating on and off. |
| Buttons | They are not always included. They are used to turn the seat heating system on and off. |
| Wiring | It serves to connect the heating to the vehicle’s on-board network |
| Foam rubber | If the seats are already quite worn, it would not hurt to replace the foam rubber, which is short-lived |
Choose only high-quality materials, purchase kits from trusted retail outlets. Heating is carried out by electricity, which is always dangerous to human life and health.
On/off buttons
