From the factory, Lada NIva Travel (formerly ChevyNiva), Niva Legend (formerly 4×4, 2121, 2131) are equipped with a hydraulic timing chain tensioner. One of the popular and simple modifications is the replacement of the hydraulic chain tensioner with a mechanical (automatic) one. Let's figure out why this is needed and how to replace it yourself.
Purpose of the chain tensioner shoe
Early models of VAZ engines (2101 and 2103, installed on all VAZ Classic models, as well as 21213 and 21214, installed on Niva cars) use a chain drive of the gas distribution mechanism, which has a number of undeniable advantages over a belt-based drive. In particular, the chain reduces the likelihood of slipping and incorrect engine phases, it is more reliable and durable, allowing for less frequent timing maintenance. However, such a drive works normally only if the chain has constant tension with a certain force. This problem is solved using a system of two main parts - a chain tensioner and a tensioner shoe.
The tensioner and tensioner shoe solve several problems:
– Provide optimal timing chain tension throughout the entire range of crankshaft rotation speeds; – Compensate for weakening of chain tension when it is stretched (in automatic mode or during manual adjustment); – Uniform distribution of the load from the pusher over the chain section, reducing the degree of wear.
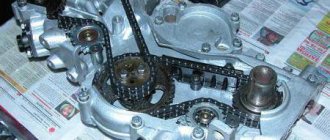
The tensioner is installed on the ascending side of the chain between the crankshaft gear and the camshaft gear. Between the tensioner and the chain there is a movable shoe (it has one fulcrum and can swing), which receives the force from the tensioner and distributes it along the chain. The chain tensioner shoe plays an important role in the operation of the timing belt, so let’s look at this part in more detail.
Mechanical chain tensioner. Main manufacturers.
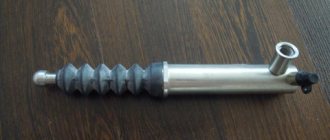
The photo shows three main options common in Russia. The first product is made by the people and on the forums of the ANC “auto pilot”. The second product is manufactured by Rusmash, usually called the pilot. The third tensioner belongs to the designer Isaev, colloquially Isay. My team and I personally have installed several dozen of each type of tensioner on cars, so I have the right to talk about statistics and operating features. Something from behind the scenes. The first two tensioners belong to the pen of one person. Designer Igor Medvedev. On motor forums under the nickname Rhodes-M. As far as I know, patents for these inventions or utility models are registered in his personal name. I work together with this person on other projects, so the information about the designs and manufacturing features is first-hand.
Autopilot. Principle of operation. Rack. Of the three, this is the undisputed leader. I have not noticed any shortcomings in operation. Cars with mileage of more than 150 thousand have already arrived where I installed autopilots from the very first batches. It is very convenient to work when replacing the camshaft; it does not need to be removed from the cylinder head. Flaw. It is difficult to find an “original” that has passed quality control. Medvedev left and the quality of input immediately dropped greatly. The cost of production has become cheaper.
Pilot. The operating principle is a toothed rack. Good quality tensioner. The big brother of "autopilot". Stable quality. It is also possible to work without removing it from the cylinder head. The main disadvantage is the huge percentage of fakes on the market. This tensioner was the first successful design, and the Chinese grabbed it. If Autopilot is completely impossible to find, then Pilot is very difficult to find “original”. Based on the St. Petersburg market, I estimate the prevalence of counterfeits for this tensioner at 70%. I work with Rusmash directly, so this as a “minus” is insignificant.
Isaiah. The operating principle is a clock spring. To avoid questions and insinuations, I contacted the designer directly and in 2015, we installed several dozen of them. The main disadvantage of the product, which the designer passes off as its advantage, is that there are no precision parts. When the rod doesn't move out too much, everything is fine. When the chain is worn out and the rod goes beyond half, it “walks” quite a lot. If we are talking about a production engine without “pretensions” for tuning, this may be acceptable. If the engine is “more serious” this is unacceptable. The tolerance for axial “walking” of the chain and sprockets in the timing tract is only 0.3 mm.
Types and design of tensioner shoes
On VAZ-2101, 2103, 21213/21214 engines of all modifications, sliding tensioner shoes are used - the chain slides along their surface, which has an anti-friction coating. Today you can find two types of shoes, differing in materials of manufacture:
– Old-style shoes are metal with anti-friction coating; – The shoes are a new type - solid plastic.
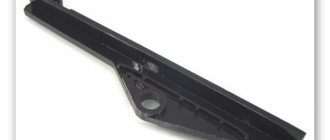
The old style tensioner shoes have an extremely simple design. The basis of the part is a bent steel plate, at one end of which there is a loop for mounting on the engine. On the outer (convex) side, a layer of plastic is applied to the plate, with which the shoe slides along the chain. On the inside, closer to the end of the shoe, a bracket is attached with the help of two rivets - a stop for the tensioner.
The new style shoe is a one-piece plastic part that has an arched shape with a molded bracket for the tensioner stop and a loop for mounting on the engine. To increase strength and reliability, stiffening ribs are made in the body of the shoe.
According to their applicability, tensioner shoes are divided into several groups:
– Shoe type 2101-1006090 - used on VAZ 1200 and 1300 engines. A distinctive detail of this shoe is a semicircular recess in the upper part of the bracket (pusher stop); – Shoe type 2103-1006090 - used on VAZ 1500 and 1600 engines. A distinctive detail of this type of shoe is a semicircular recess in the lower part of the bracket (from the hinge side); – Shoe type 21213-1006090 - used on the VAZ-21213 (1700) engine. It has no marks and is larger in size; – Shoe type 21214-1006090 is a modern plastic shoe used on VAZ-21214 and some other 1700 engines.
There was also a universal tensioner shoe available in the 1970s, but it is impossible to find today.
The tensioner shoe is installed under the timing cover; it is mounted on the engine using one complexly shaped bolt, which also acts as an axle. Such a bolt ensures reliable installation of the shoe, but at the same time prevents excessive tightening and jamming of the part during operation.
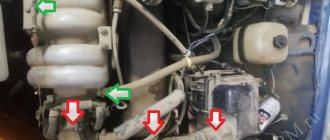
Where is the device located in the Chevrolet Niva and what does it look like?
The device is located on the passenger side under the hood of the car. Having opened the hood, you need to find the cooling pipes in the area of the front of the cylinder head, under them the hydraulic tensioner itself is located. A photo of the device that is installed on the Chevrolet Niva is located below.
Issues of maintenance and replacement of tensioner shoes for VAZ cars
The tensioner shoe does not require maintenance during operation. However, over time, the shoe lining (or the working surface of the plastic shoe) wears out and loses its characteristics; such a shoe can no longer provide chain tension with the required force and requires replacement. The need to replace the shoe is indicated by the characteristic noise of the chain; in advanced situations, the chain may even skip. The shoe should also be replaced if it is deformed or mechanically damaged (this is only discovered during engine repair or maintenance, when the timing cover is removed).
Replacing the tensioner shoe is not the easiest operation, so it should be approached responsibly. In general, the work is performed in the following order:
- Remove the mudguard from the power unit;
- Remove the generator drive belt;
- Remove the fan assembly with casing and electric motor;
- Remove the crankshaft pulley mounting nut and remove the pulley;
- Loosen the sump fastening on the timing drive side;
- Unscrew the bolts securing the timing drive cover, carefully remove the cover (in this case, use a screwdriver to pry the cover so that its lower edge comes out from under the pan);
- Unscrew the bolt securing the tensioner shoe, remove the shoe;
- Install a new shoe;
- Install all removed parts in reverse order.
After installing a new shoe, adjust the chain tension, which is done using a tensioner.
If the tensioner shoe is replaced in a timely manner, the timing drive of cars of the “classic” VAZ family will work confidently and reliably, ensuring high-quality engine operation in any conditions.
Installation of shafts according to Niva Chevrolet marks
You will need: a screwdriver, keys “8”, “10”, “13”, a special key for turning the crankshaft.
Setting the piston of the fourth cylinder to the TDC position of the compression stroke
The piston of the 4th cylinder is set to the TDC (top dead center) position of the compression stroke so that when carrying out work related to removing the camshaft drive chain, the valve timing is not disrupted. If the valve timing is incorrect, the engine will not operate normally.
Set TDC according to the mark on the camshaft sprocket (when installing according to the marks on the crankshaft pulley and on the front cover of the camshaft drive chain, the piston of either the 1st or 4th cylinder may be in this position).
After this, make sure that the marks on the crankshaft pulley and the cover match. If the shaft marks do not coincide, it means that the valve timing is incorrect (the piston of the 4th cylinder is not installed at TDC). In this case, it is necessary to remove the camshaft drive chain from the camshaft sprocket and rotate the crankshaft until the marks align.
You can rotate the crankshaft in the following ways.
1. Purchase a special wrench for turning the crankshaft by the pulley nut. This wrench can also turn the crankshaft from above the engine compartment.
2. Engage 4th gear and slowly roll the car in the desired direction until the mark on the camshaft sprocket matches the mark on the camshaft bearing housing.
3. Engage 4th gear and lift one of the rear wheels.
Then turn the hanging wheel in the desired direction until the mark on the camshaft sprocket matches the mark on the camshaft bearing housing.
Location of TDC marks
The marks are located on the camshaft sprocket (hole “a”) and on the camshaft bearing housing (protrusion “b”).
In addition, marks are applied in the casting on the camshaft drive chain cover (protrusion “a”) and on the ring gear of the crankshaft pulley (hole “b” on the edge of the ring).
1. Remove the cylinder head cover (see “Replacing the cylinder head cover gasket”).
Rotate the crankshaft, align the marks on the camshaft sprocket and its bearing housing.
If the chain is installed correctly, the mark on the crankshaft pulley should align with the long mark on the camshaft chain cover.
3. If the marks do not match, straighten the tabs of the lock washer of the camshaft sprocket bolt.
4. Engage first gear to secure the crankshaft from turning, unscrew the bolt and.
5. . remove it along with the lock and thrust washers. The lock and thrust washers are not fixed to the bolt in any way and can be easily removed from it. Be careful not to drop them into the engine pan.
6. Remove the chain tensioner (see “Replacing the camshaft drive chain tensioner”). If you have the necessary skills, the hydraulic tensioner does not need to be removed. It is enough to press out the hydraulic tensioner plunger with a large screwdriver or mounting spatula.
7. Remove the sprocket along with the chain, remove the chain from the sprocket and then reinstall it on the sprocket, changing the position of the chain on the sprocket teeth in the desired direction. It is recommended to move the chain one tooth at a time.
8. Place the sprocket and chain on the camshaft flange, tensioning the drive chain. Since when the position of the chain on the sprocket changes, the hole in the sprocket no longer coincides with the alignment pin in the flange, turn the crankshaft slightly in the desired direction until the hole and pin coincide.
9. Install the sprocket mounting bolt along with the thrust and lock washers and tighten it until it stops, without completely tightening it.
10. After turning the crankshaft two turns, repeat checking the position of the marks as you did before.
11. If the marks match, tighten the bolt and bend the tab of the lock washer onto the edge of its head. If the marks do not match, repeat setting the valve timing.
12. Install all previously removed parts in reverse order. To prevent oil leakage, replace the cylinder head cover gasket.
Product description
Branded developments:
- Innovative USPK technology was used in the production of oil and petrol resistant rubber:
BNKS-28AMN (synthetic butadiene-nitrile rubber) is used in the recipe.
Benefits for the car enthusiast:
- Warranty 2 years unlimited mileage
- Availability: In stock
- Length: 16 cm x Width: 6 cm x Height: 3 cm
- Weight: 0.45 kg
- Product code: 4877
- Cash upon receipt (cash on delivery)
- Online payment by bank cards without commission
- Electronic wallets
- According to the organization's account (excluding VAT)
- Post office
- SDEK | DPD | PEC
- Business Line
- Energy | GTD (KIT)
- Baikal Service
- ZhelDorExpedition
- Dispatch from 1 day
- Delivery from 2 days
- Product didn't fit? Easily return it within 14 days
- Read about other store guarantees
General principles for replacing the timing chain on a Volkswagen
This type of work requires accuracy and special skills. If you have experience in repairing cars yourself, perhaps replacing the timing chain on a Volkswagen will not cause any particular difficulties. For this procedure, you need to prepare a certain set of tools, the configuration of which may vary depending on the modification of the machine. Here is an example for replacing the timing chain on a Volkswagen Passat:
For this work you will need:
- 10mm combination spanner wrench;
- socket heads 10, 13, 16, 17, 18, 24, 27;
- TORX bits t25, t30;
- hex bits 5 mm, 6 mm;
- multifaceted bits M10, M12;
- special key VAG t10355 for removing the crankshaft pulley;
- special key VAG t10352 for removing the camshaft valve;
- pliers;
- jack or lift.
Only if you have all the above tools can you begin to replace the timing chain on a Volkswagen Passat.
In some modifications of Volkswagen engines, to replace the timing chain, you need to remove the front engine cover.
Instructions for disassembling the timing belt on a Volkswagen:
- At the first stage of the work, you need to disconnect the wires from the ignition coils and unscrew the coils themselves. To avoid confusion during assembly, we recommend numbering all dismantled components.
- The air hoses must be disconnected from the valve cover. After this, unscrew all the bolts securing this part. Removing the valve covers is necessary to provide access to the timing chain.
- The right engine mount prevents further disassembly of the unit, so it should be disconnected.
- Then you need to prepare a container for the oil, place it under the pan, unscrew the drain plug and drain the oil from the engine. After it has completely drained, unscrew the oil filter.
- Now we need another container to drain the coolant from the radiator. To completely drain the antifreeze, you must open the cap on the radiator.
- Now you can remove the cooling radiator, the drive belt from the generator and the inlet pipe clamp.
- Let's move on to dismantling the cylinder head. To do this, you need to unscrew the four mounting screws. In addition to the cover, you need to remove the fan and related parts.
- Now you need to remove the engine pan, having first disconnected the muffler mounting bolts and dismantled the muffler itself.
- Loosen the water pump mounting screws. This is necessary to remove the air conditioning and power steering servo belts.
- You need to install a wooden block between the crankshaft and the side of the crankcase and remove the crankshaft pulley (to do this, you need to unscrew the fastening bolt).
- Disassembly is completed by removing the water pump pulley. There is a gasket underneath that should also be removed. In addition, the oil pump must be removed.
After completing the disassembly, we proceed to removing the timing chain for the Volkswagen. First you need to unscrew the screws that secure the camshaft gears. An adjustable wrench is used to secure the camshaft.
The sequence for dismantling the timing chain on a Volkswagen:
- First you need to remove the chain guide (top bar).
- After this, you need to dismantle the tensioner and the bar that provides tension on the damper. Carefully inspect the tensioner for defects; this part may need to be replaced.
- The bottom strap is put on a stiletto heel.
- We remove the chain.
- The lower gear is removed using a flathead screwdriver.
The removed timing chain can be compared with a new part. The difference, as a rule, is noticeable: the old chain will be longer.
The new chain should be lubricated with engine oil before installation.
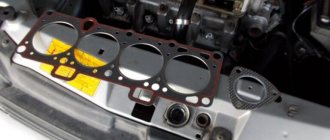
Installing the timing chain on a Volkswagen is performed in the reverse order. All installed parts must be cleaned first. The side surface of the motor is cleaned using degreasers and clean rags.
In order to correctly replace the timing chain on a Volkswagen, it is necessary to ensure that its mark matches the required points on the pulleys. The cylinder head cover is installed on sealants and pressed with mounting bolts. After this, you need to wait until the sealant dries. Further assembly of the unit is carried out in the reverse order of disassembly.
After completing work on replacing the timing chain on a Volkswagen, you need to ensure its tension. Before starting this operation, make sure that all timing parts have no visible mechanical damage (to do this you will have to remove the valve cover). Parts that are defective should be replaced.
How to replace the hydraulic chain tensioner on a Chevrolet Niva
The timing hydraulic tensioner is a part whose main purpose is to tension the chain of a Chevrolet Niva car to ensure the normal functioning of the gas distribution mechanism. The timing system in cars plays an important role in ensuring smooth engine operation. It is very important to monitor the condition of this unit, since over time, drive parts can weaken and wear out. The timing chain in a Niva Chevrolet stretches over time. This is a completely normal phenomenon, but it is necessary to identify it in time in order to eliminate it before serious problems arise. To compensate for chain stretching, the system is equipped with a hydraulic tensioner. But over time it wears out and requires replacement when the chain weakens to half the sprocket tooth.
How is the replacement made?
If chain stretching is detected and the decision is made to replace only the hydraulic tensioner, then this is an incorrect assumption. It is necessary to replace all parts: chain, hydraulic tensioner, seals, gaskets. Replacement is done in the following sequence, using all the necessary tools:
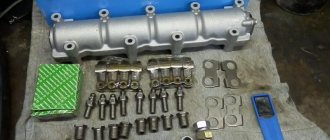
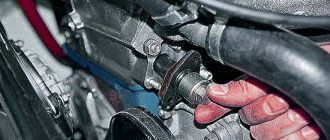
Use a spanner wrench to unscrew the tube fitting, which has a “10” head. The tube is designed to supply oil to the hydraulic tensioner.
Having loosened the fitting, the tube is removed and moved upward so that it does not interfere with further work. The two nuts securing the device itself are also unscrewed using a “10” wrench.
The device is ready to be removed from its mounting location. We grab the protruding part with our hands and pull out the device. There is a gasket on it, which also needs to be removed to replace it with a new one.
A used device cannot be repaired and requires the installation of a new one. Before installation, it is necessary to coat the gasket with a layer of sealant to prevent oil leakage.
Replacing an old device does not require serious mental and especially physical effort. Installation of a new one is carried out in the following steps:
- The device is inserted into the new seat, having first checked that the structure is identical to the old tensioner.
- Screwed in with two fastening nuts.
- The tube is inserted and secured.
It is simply impossible to make a wrong replacement. After installation, the operation of the motor and the tension of the new chain are checked. An important point is to replace the timing chain in order to 100% protect the car and your health from unexpected breakdowns on the road. This article will tell you how to replace the chain.
Now the owners of the Chevrolet Niva can, without doubt and without errors, correct the existing problem with weakening the chain tension. Remember that if your car has traveled more than 100 thousand km, and there are no characteristic sounds from under the hood, then do not neglect the situation, but disassemble and check the looseness of the chain and the functionality of the tensioner. Happy renovation work!

