Replacing the light bulbs in the dashboard of a VAZ 2110 yourself
Installation of the dashboard on a VAZ 2110
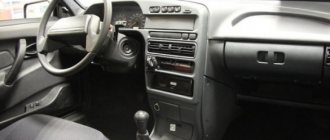
The dashboard of the VAZ 2110 car is designed to reflect information about the current condition of the car. Made from ordinary plastic.
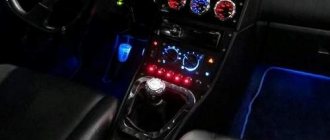
The presence of a huge number of light bulbs leads to the need to replace them from time to time. Many drivers want to replace the unsightly factory panel of the VAZ 2110 with a more modern one.
The article suggests finding out how to replace the dashboard bulbs of a VAZ 2110 and how to make it more aesthetically pleasing.
Features of the dashboard of the VAZ 2110 car
Dashboard VAZ 2110
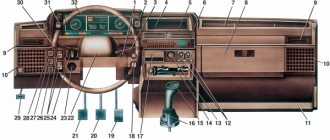
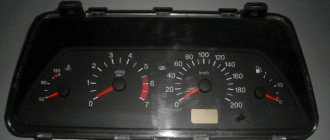
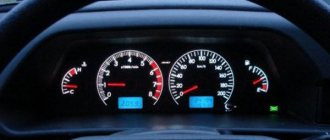
The composition on the dashboard of a VAZ 2110 car dashboard includes:
- 1 – indicates the temperature of the cooling water. If the arrow of this indicator moves into the reddish zone of the scale, this indicates overheating of the motor.
You need to pay attention to the operation of the electric fan and thermostat of the cooling system.
Tip: Do not operate the motor in overheating mode. Water temperature is more than 110 °C.
- 2 – tachometer. Shows the approximate frequency at which the engine crankshaft rotates.
To get the real value of the unit’s rotation speed, you need to multiply the device’s arrow reading by 100. The arrow reading in the reddish zone means that the engine is operating at an increased frequency, which is unsafe for the vehicle to continue moving.
- 3 – speedometer. The position of the arrow indicates the approximate speed of the car in km/h.
- 4 – indicates the fuel level.
- 5 – reset button on the daily mileage counter.
- 6 – screen for the trip odometer and odometer.
- 7 – screen for indicating the time.
- Positions 1 – used to illuminate device hands and scales.
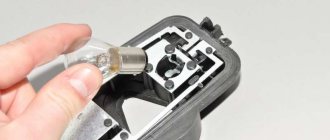
- Positions 2 – the smallest in size are used in yellowish indicators and burgundy signal indicators. Such light bulbs are installed without rubber caps. Light filters of suitable colors are already integrated into the device.
- Position 3 – has a medium size, used to indicate a low gasoline level, just when the needle is at zero. It burns out very rarely.
The photo shows the installation of light bulbs on the panel:
Installing light bulbs on the panel
The entire arrangement of devices is fixed with 2 screws in the corresponding slot on the dashboard. Its connections are made using printed circuit board mounting using foil getinax. The board is perfectly attached to the back of the case.
The speedometer is equipped with 2 counters showing the distance traveled: one is total, the other is “daily”. Using the corresponding button, the readings of the latter are simply reset.
Tip: Readings can only be reset when the car is stationary.
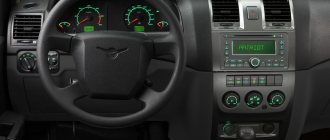
The latest VAZ 2110 models are equipped with an electric dashboard. It contains all components and control indicators, icons and lamps.
Indicator lamps located on the additional panel of the VAZ-2112
An additional panel is installed in the VAZ-2112 dashboard, on which the designers also placed several indicators. In particular, in the middle there is a silhouette of a car with its doors open. If one of the doors is illuminated, it means that it is not closed tightly enough.
On the left side of the vehicle indicator (one above the other) there are three indicators:
- low engine oil warning (optional);
- warning about low fluid level in the windshield washer reservoir;
- additional warning about high coolant temperature.
To the right of the car silhouette, again one above the other, there are three more indicators:
- indicator of malfunction of brake lights or side lights;
- warning of high brake pad wear;
- seat belt warning.
If you respond in a timely manner to the warnings displayed on the panel by one or another indicator, then everything will cost you only with work to eliminate the malfunction that has arisen, while ignoring the warning signals, as you might guess, can result in more serious consequences. And you shouldn’t forget about the red zones on dial gauges - you don’t need to rev the engine to maximum speed, wait until the coolant temperature rises to 130 degrees or until the tank runs out of gasoline.
Replacing the backlight on the dashboard
Dashboard sign for VAZ 2110
To do this, you need to use the following algorithm:
- The panel should be removed.
- The illumination designation is determined by special LED bulbs. To replace the backlight, these bulbs must be removed.
Note: this must be done very carefully, because they are quite small. In addition, there is a possibility of damaging the panel itself.
- But before that you need to disassemble it. This is not a difficult task, as to disassemble it you just need to press the latches, thanks to which you can remove the bulbs.
- Everyone has seen that on top of the dashboard there is a “sticker” and symbols (speed, amount of gasoline). It is held on by glue, so to remove it you will have to dig around a little.
Remaining glue must be removed.
- You can start replacing the backlight.
Note: it is advisable to choose colors that are not very bright and strain the eyes. White or blue colors are ideal.
- To remove the light filter located on the back of the “sticker”, you need to take a utility knife. The light filter is located under the protective layer. First you need to remove it. Do not press too hard with the knife, as necessary parts may be damaged.
Description of dashboard tuning
Note: it is easier to remove it if you rub it with a knife in one direction, then in the other.
- To insert LED bulbs, you must remove the board located in the plastic case. There will be special holes for them.
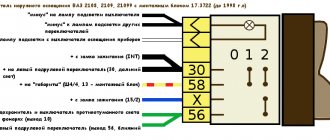
Panel instrument pinout
Note: but that's not all, you will need to solder the wiring of the light bulbs to the board for them to work.
- Now we need to put everything back together and install it correctly.
Separately illuminated arrows
LEDS IN THE INSTRUMENT PANEL FOR VAZ 2110 2111 2112
Video guide for replacement
DIY
instrument panel for
VAZ 2110 An example of replacing
...
How to remove the instrument panel on a VAZ 2110, 2111, 2112 and replacing light bulbs
Video review - Backlight styling
interior of a
VAZ 2110 car, replacing
all incandescent light bulbs with diodes on
the panel
...
LED instrument panel VAZ 2110
If you want the arrows to glow a different color, you can do the following:
Note: in this case, the arrows will light up in a different color only when ignited.
Instrument panel lighting for VAZ 2109
The backlighting of the VAZ 2109 instrument panel is often not satisfactory for drivers. You can change the color and its brightness yourself, without turning to the salon for help.
To improve the lighting, you need to install LEDs instead of conventional incandescent light bulbs. Their glow is much brighter, in addition, you can choose the color of the backlight at your discretion: blue, green, red or white. These are the main colors, but if you look, you can also find purple LEDs.
READ Replacing the clutch cable Priora 2
Replacement
The inspection of light bulbs or sockets must be carried out carefully and carefully. If the car owner decides to use LEDs to illuminate the buttons, then you need to purchase a light bulb with a regular base. Soldering and a special cartridge are needed if there is a desire to replace the backlight of the instrument cluster. Among the many LEDs, there are also those that have a diffuse or, conversely, point glow.
These effects are achieved using a focusing lens configuration. A more uniform backlight is suitable for illuminating the scale on the instrument panel, and a brighter light is suitable for the button icon. Every driver should take into account the features of design changes when improving his car.
How to change the backlight using color film
Old dashboard of VAZ 2110
In order to change the color of the dashboard lighting, it is not necessary to change the LED bulbs.
To do this you can simply:
- Take 12 LEDs and an LED strip.
- Remove the light bulbs from the base and insert one LED at a time in their place.
- You need to take the required amount of LED strip.
Instrument panel diagram
Note: its length is measured according to the size of the panel.
- The base and LEDs must be returned to their original location.
- The tape should be glued to the plastic of the panel (the appropriate temperature must be maintained).
- Tighten the block well.
How to assemble and disassemble the panel
To reset the speedometer or fix the problem that the turn signal light on the dashboard is not blinking, it must be removed.
To this end, you should perform the following actions:
- You can remove the cover, but the board will still be locked.
- You need to take a Phillips screwdriver and use it to remove a few more bolts.
- Now you need to unlatch the latches on the panel. You should start from the bottom. If they were disconnected from the bottom side, then you can push them up. This way the fee will be removed quickly.
- The arrows will have to be removed anyway.
Note: some arrows are easy to remove, but the arrows for the gasoline quantity indicator are much more difficult to remove. To remove the arrows, you need to gently pull them.
- The panel is disassembled, now we need to try to solve the problem.
Note: There are very small LEDs on the board that can also burn out. Because of them, the turn signal light may not blink, so they need to be replaced.
This requires working with a soldering iron.
But if the panel was disassembled in order to reset the speedometer readings, then:
Now it is advisable to somehow put the panel back together.
This is made even easier:
- Place the board in a plastic case.
Note: It is advisable to have a clean cloth underneath to prevent the surface from being scratched.
- Now you need to screw in the bolts on the panel itself. They do not need to be completely screwed in yet, as the arrows must be put in place first.
- Before putting the hands back in place, they need to be wiped thoroughly, as fingerprints, dirt, etc. will be visible when exposed to light.
Note: the arrows should be set approximately 3-4 mm below zero. It is also important that there is a small gap between the needles and the speedometer, otherwise they will stick.
It is much easier to install, as well as remove, long arrows. To install short arrows, you need to act very carefully, as they are more delicate compared to long ones.
- Before installing the glass, it also needs to be wiped. Now snap onto the latches.
- Secure the board with bolts.
- Lastly, screw in the screws on the cover, and then put all the light bulbs in place.
Working with a panel in a car is probably the simplest thing it can be. Therefore, there is no point in going to a car service center, where the price even for such trivial work will be high.
It’s better to look through a bunch of photos and videos before you decide to do repairs and tuning of the car’s interior with your own hands, so as not to harm the car. Any instructions will help you get the job done quickly and efficiently.
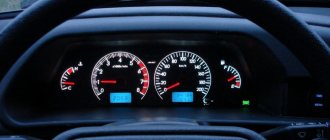
The instrument panel of the VAZ 2110 is boring and unsightly, but everything changes when they arrive - white LEDs.
About 8 years ago I myself assembled LED lighting for my six from what I had. Now the choice of LEDs is simply huge and without any problems I simply replaced the dashboard backlight bulbs with LED ones. The transformations pleased me.
Diagnosis and troubleshooting
If the instrument panel of the VAZ 2110 does not work, then to fix the problems you need to:
- check the lamps and replace faulty elements;
- check the integrity of the wiring using a multimeter or test indicator;
- inspect the condition of the contacts and clean their surface from traces of oxidation;
- check the condition of the fuses;
- test the operation of the devices.
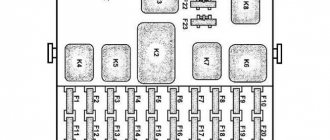
The diagram shows fuses in blue that need to be checked if problems arise with the devices on the VAZ 2110.
Instrument cluster circuit fuses
To check the temperature or fuel level gauge you must:
- Connect the ignition.
- Connect the positive power output of the device (attached to pin 5 in the white plug) to ground with a wire. If the arrow deviates, you need to check the condition of the wiring connecting the sensor and indicator.
- If the temperature indicator constantly indicates overheating, it must be disconnected from the sensor. If the needle drops to zero, the sensor needs to be replaced. Otherwise, there is a short circuit in the wiring to ground or failure of the indicator device itself.
- To test the device, you need to remove the white plug from the panel and apply power to pin 10 directly from the positive terminal of the battery. At the same time, a negative voltage is applied to pin 1. A working indicator shows a value equal to zero; if the arrow deviates, the device requires replacement.
Other possible repair options:
- Testing the tachometer is only possible on a stand that simulates engine operation. The speedometer is also checked using special equipment, which compares the measurement results with a reference device.
- After this, a visual inspection of the tracks on the printed circuit board located inside the combination is carried out. If cracks, ruptures and delaminations are detected, contact must be restored with solder. If repairs do not help, the instrument cluster will need to be replaced.
A video from the channel “In Sandro’s Garage” demonstrates how to replace backlight bulbs.
Precautionary measures
When repairing the instrument cluster, a number of recommendations must be followed:
- fuses are replaced with the ignition off;
- when testing devices, be careful to avoid short circuits;
- soldering is done with a low-power soldering iron with a thin tip;
- Removal and installation of the combination is carried out with little force so as not to damage the attachment points.
